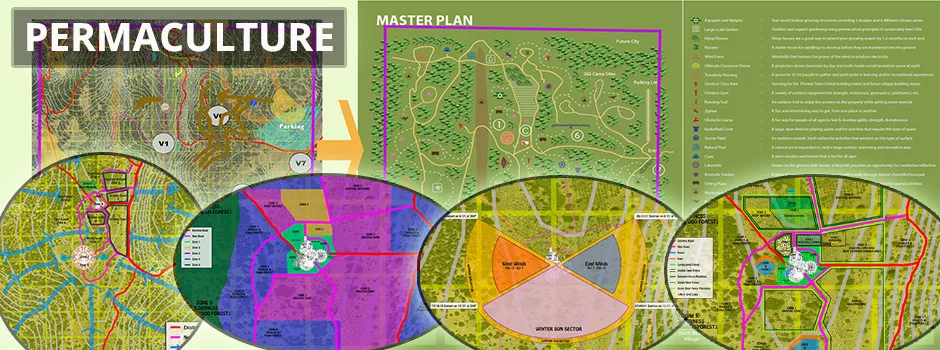
Open Source and DIY Permaculture Design
This is an open source and do-it-yourself permaculture design resource and tutorial. It is on the Geoff Lawton Permaculture Design Certification, Bill Mollison’s “Permaculture: A Designers’ Manual”, “Sepp Holzer’s Permaculture” by Sepp Holzer, and review of all of the content from Paul Wheaton’s Permaculture Design and Appropriate Technology Course Videos. All of these resources are highly recommended and links to each of them are in the resources section along with any others we’ve found useful. We discuss here the complete open source and DIY permaculture design process with the following sections:
- What is Permaculture
- Acknowledging Permaculture’s Founders
- Why Open Source Permaculture
- Ways to Contribute and Consultants
- Permaculture Design Details
- Permaculture Ethics, Principles, and Domains
- 3 Key Permaculture Ethics
- Permaculture Principles
- The Seven Domains of Permaculture Action
- Permaculture Design Process
- Step 0: Familiarize Yourself with the Process
- Step 1: Identify Needs and Assess Resources
- Step 2: Assess Site Through Observation and Research
- Step 3: Develop a Conceptual Design
- Step 4: Develop a Detailed Design
- Step 5: Implementation and Evaluation
- Open Source Final Detailed Permaculture Design (case study)
- Case Study Step 0: Familiarize Yourself with the Roots of the Permaculture Process
- Case Study Step 1: Identify Needs and Assess Resources
- Case Study Step 2: Assess Site Through Observation and Research
- Case Study Step 3: Develop a Conceptual Design
- Case Study Step 4: Develop a Detailed Design
- Resources
- Summary
- FAQ
RELATED PAGES (Click icons for complete pages)
WHAT IS PERMACULTURE
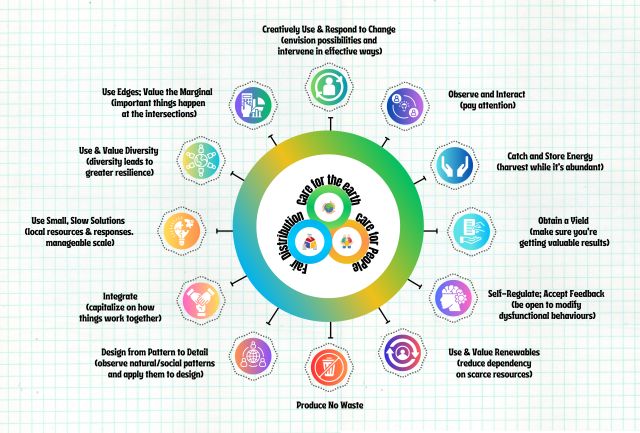
 Permaculture is a design system that utilizes a set of principles and ethics that guides us to create holistic systems aiming to replicate nature. Observing nature within permaculture can be a path towards a paradigm shift of interconnected, regenerative closed-loop systems. Permaculture’s way of living and connected way of thinking focuses on the opportunities rather than obstacles. This moves us from a consumption mindset to a responsible and sustainable production alternative. At the core of this conceptual framework for sustainable development are 3 foundational ethics and 12 guiding principles that apply to all aspects of our existence and the decision making process – see Holmgren’s flower below.
By using this as a ‘permaculture lens,’ we become earth protectors, people protectors, and fair-share/future care mediators. Using these 12 principles, we illuminate different perspectives and whole-systems thinking for design. This can address many of the most challenging issues of our generation while producing new opportunities.
In short, permaculture is about designing efficient and sustainable human settlements and preserving and extending natural systems. It models and integrates the successful strategies of nature and covers all aspects of settlement design from climatic factors, soils, housing, food, and energy to social, legal, economic design, and more. Ultimately, it is about ethical and intelligent stewardship as conscious and conscientious members of the natural systems that surround and support all life. When implemented properly, permaculture enriches all aspects of these systems sustainably and for the benefit of all people and life that interact with them. One Community calls this living and creating for The Highest Good of All.
ACKNOWLEDGING PERMACULTURE’S FOUNDERS
The term ‘permaculture’ was first coined by Bill Mollison and Mollison and David Holmgren in the mid-1970s. Permaculture was originally a contraction of ‘permanent agriculture’ and more currently has been expanded to ‘permanent culture.’ The concept of permaculture was born through questioning the mainstream trajectory of the way we live our lives, which had its rise in the environmental movement of the 1970s. David Holmgren planted the seed of permaculture through the exploration of the nexus between the design practices of landscape architecture, the holistic principles of science ecology, and the primary way we provide for human needs (agriculture). Bill Mollison has been the catalyst for spreading permaculture concepts to the world. Several books have been written on the topic, with the original being authored by Bill Mollison and David Holmgren entitled Permaculture One. Bill Mollison then went on to write Permaculture: A Designer’s Manual, which is commonly used to teach courses. Several years later, David Holmgren wrote Permaculture: Principles and Pathways Beyond Sustainability, also textbook-like presentation.
WHY OPEN SOURCE PERMACULTURE
 Open sourcing One Community’s permaculture designs and processes supports and is part of our four primary goals. Our first and foremost goal is to demonstrate comprehensive sustainability covering food, energy, housing, and more. Second, to operate as an open source eco-tourism and teacher/demonstration hub that can be replicated as a sustainable living model. Third to provide and demonstrate food and lifestyle abundance beyond self-sufficiency and fourth to function as an educational example of comprehensive stewardship. This page will continue to develop with any additional resources we find helpful, input from consultants that choose to join our team and contribute, and the actual permaculture design implementation as part of the One Community Highest Good food, Highest Good society, Highest Good energy, Highest Good housing, etc. components. This will include the addition of pictures and our ongoing (indefinitely) experience with what worked, changes we made, evolutions in thought process, etc.
“We cannot possibly imagine how abundant the world can be… it is way more abundant than we presently imagine.”
~ Geoff Lawton ~
WAYS TO CONTRIBUTE TO EVOLVING THIS SUSTAINABILITY COMPONENT WITH US
SUGGESTIONS | CONSULTING | MEMBERSHIP | OTHER OPTIONS
CLICK THESE ICONS TO JOIN US THROUGH SOCIAL MEDIA
CONTRIBUTORS TO THIS COMPONENT:
Christopher Blair: GIS Technician/Horticulturist
Faisal Rasheed: Graphic Designer
Hakan Sabol: Certified Permaculture Designer, Wed Designer, Graphic Designer, and Video Editor
Jae Sabol: Certified Permaculture Designer, Project Manager, and Holistic Health Professional
Jennifer Lee: Graphic Designer (web design for this page)
Julia Meaney: Web and Content Reviewer and Editor
Maya Callahan: Sustainability Researcher
Pallavi Deshmukh: Software Engineer
Sangam Stanczak: Environmental Engineer (Ph.D., P.E.)
PERMACULTURE DESIGN DETAILS
 Permaculture is a path to demonstrating what truly ethical and carefully planned land stewardship is capable of. When applied comprehensively, this approach can holistically integrate food, energy, housing, society, and economics as a complete stewardship model. It is regenerative and symbiotic with existing natural systems and provides living models that are healthier, happier, and long-term sustainable. We discuss this and more with the following sections:
- Permaculture Ethics, Principles, and Domains
- 3 Key Permaculture Ethics
- Permaculture Principles
- 1. Observe and Interact
- 2. Catch and Store Energy
- 3. Obtain a Yield
- 4. Apply Self-Regulation and Accept Feedback
- 5. Use and Value Renewable Resources and Services
- 6. Produce No Waste
- 7. Design From Patterns to Details
- 8. Integrate Rather Than Segregate
- 9. Use Small and Slow Solutions
- 10. Use and Value Diversity
- 11. Use Edges and Value the Marginal
- 12. Creatively Use and Respond to Change
- The Seven Domains of Permaculture Action
- Permaculture Design Process
- Step 0: Familiarize Yourself with the Process
- Step 1: Identify Needs and Assess Resources
- Step 2: Assess Site Through Observation and Research
- Step 3: Develop a Conceptual Design
- Step 4: Develop a Detailed Design
- Step 5: Implementation and Evaluation
- Open Source Final Detailed Permaculture Design (case study)
- Case Study Step 0: Familiarize Yourself with the Roots of the Permaculture Process
- Case Study Step 1: Identify Needs and Assess Resources
- Case Study Step 2: Assess Site Through Observation and Research
- Observation and Research by Component
- Case Study Step 3: Develop a Conceptual Design
- Site Design Considerations
- Applying Permaculture Design
- Case Study Step 4: Develop a Detailed Design
- Final Design Plan
- Permaculture Implementation Process
- Before and After Photos
- What Worked and what We’d Recommend
- What We’d do Differently
- Costs and Yields
- Resources
- Summary
- FAQ
PERMACULTURE ETHICS, PRINCIPLES, AND DOMAINS
Permaculture is about designing efficient and sustainable human settlements and preserving and extending natural systems.
Permaculture design contains 3 ethics and 12 principles. We discuss here what each of these are, where and how they can be applied, and the design process itself. For easy reference, we’ve divided this information into the following sections:
- 3 Key Permaculture Ethics
- 12 Permaculture Principles
- The Seven Domains of Permaculture Action
- Initial Design Considerations (People Analysis and Assessment)
- Site Design Considerations (Site Analysis and Assessment)
- Applying Permaculture Design
- Design Concept Development Using Energy Flow
- Implementation & Evaluation
3 KEY PERMACULTURE ETHICS
The Ethics of Permaculture are compiled from the common thread among cultures that coexist with nature in a balanced manner, while applying lessons from modern times. There are three of them: Earth Care, People Care and Fair Share.
EARTH CARE
Earth Care is the key ingredient to sustaining life on Earth. This ethic places emphasis on supporting all life forms and in particular rebuilding soil, a natural capital that represents the overall long-term well-being of society. Soil is a living ecosystem. The soil is where all life begins and ends and it supports all life. The soil ecosystem is vital in sustaining plants, animals, and humans.
Earth Care means taking responsibility for, protecting and staying connected to the physical elements that are life giving – the things we could not survive without, for example soil, water, air, plants and pollinators such as bees. Humans are uniquely positioned to either continue damaging the earth (our home) or preserving it. Human action tends to be shortsighted – we are changing the world faster than we can see resulting consequences. The situation has become so adverse that geologists have named this era of heavy human influence the Anthropocene, which follows the Holocene, a geological epoch that lasted nearly 12,000 years. The problems of today are complex, yet the solutions remain simple.
PEOPLE CARE
People Care is the key ingredient to bringing about change that will ultimately secure a more fulfilling existence. This ethic calls for self-love, out of which grows intimate care for families, neighbors, and our wider communities. It also includes a recognition that greater wisdom results from collaboration. People Care at its core is about comradery, collaboration and peace. When there is a sense of belonging and community, it relieves the burden placed on meeting our needs through the fleeting satisfaction experienced through material goods. People Care naturally complements Earth Care because greater satisfaction and happiness is possible through connection, which puts less stress on the earth.
FAIR SHARE / FUTURE CARE
This third ethic supports the first two ethics. Future Care is derived from the Seven Generation Stewardship concept from Indigenous American teachings. This philosophy is based upon the idea that the decisions we make today should result in a sustainable world for seven generations into the future. This ethic calls for redefining what is enough and applying self-regulation towards our own consumption, and the consumption of the earth’s resources. Fair Share requires people to have an intuitive understanding of how much to give and how much to take. This is also often referred to as creating systems that return surplus, which can come in the form of time, fruits, healthy soil, wildlife, water, etc. This ethic requires us to apply common sense and to keep our desire to accumulate and overindulge in check.
PERMACULTURE PRINCIPLES
Permaculture principles are design principles that promote systems thinking, a holistic way to perceive all interactions with the world and our existence. These principles within permaculture have evolved since its inception. Bill Mollison left the principles up for interpretation and sprinkled them throughout his writings.
Holmgren clearly presents 12 Design Principles which appear to be inclusive, in some form, of the various lists available online and his principles apply to any kind of design, not just gardening or homesteading. Here is a fun song about the 3 permaculture ethics and Holmgren’s 12 principles.
Holmgren’s Design Principles are designed to be applied simultaneously and for all decisions. They are based on the modern science of ecology, specifically systems ecology. The principles, under the umbrella of the ethics, can be used as simple thinking tools to identify, plan, and evolve design solutions. The first six are from the perspective of elements and living beings, whereas the second six are from the perspective of the patterns and relationships that tend to emerge by system self-organization and co-evolution.
1. OBSERVE AND INTERACT
By taking time to engage with nature we can design solutions that suit our particular situation.
The principle of Observe and Interact reminds us to slow down, be aware, and truly engage with our surroundings, through reciprocal interactions for consciously and continuously evolving systems. This is also about introspection – looking within, as well as outward.
Here’s a fun song that explains “Observe and Interact”
2. CATCH AND STORE ENERGY
By developing systems that collect resources at peak abundance, we can use them in times of need.
The principle of Catch and Store Energy is about collecting resources when they are abundant and storing them for later use. This especially focuses on nearly infinite resources like the sun, rain and wind. It also applies to personal and communal progress – when motivation and energy are high, take action and make progress.
Here’s a fun song that explains “Catch and Store Energy”
3. OBTAIN A YIELD
Ensure that you are getting truly useful rewards as part of the work that you are doing.
The principle of Obtain a Yield is about making creative and wise decisions that result in responsible surplus. It is important to make choices that are expansive and long-term, choices that bring returns that are undying. This also extends to having energy to pursue what you love – having enough energy at the end of the day to pursue your passions and pleasures. This results in a positive feedback loop that amplifies the permaculture lifestyle.
Here’s a fun song that explains “Obtain a Yield”
4. APPLY SELF-REGULATION AND ACCEPT FEEDBACK
We need to discourage inappropriate activity to ensure that systems can continue to function well.
The principle of Apply Self-Regulation and Accept Feedback applies at both the individual and global scale. It is our responsibility to take only what we need (keeping greed in check) and to be flexible and cognizant of our behavior, always striving to be better. At the global scale, it is important to be attentive of feedback and to adjust accordingly, prime example being Global Warming.
Here’s a fun song that explains “Apply Self-Regulation and Accept Feedback”
5. USE AND VALUE RENEWABLE RESOURCES AND SERVICES
Make the best use of nature’s abundance to reduce our consumptive behavior and dependence on non-renewable resources.
The principle of Use and Value Renewable Resources and Services reminds us to take action that maximizes long-term returns, while minimizing consumables and single-use types of operations.
Here’s a fun song that explains “Use and Value Renewable Resources and Services”
6. PRODUCE NO WASTE
By valuing and making use of all the resources that are available to us, nothing goes to waste.
The principle of Produce No Waste calls to see everything as a resource. Putting value on everything and finding creative ways to refuse, reduce, reuse, repair, repurpose or upcycle, recycle, and finally rethink. Bill Mollison’s definition of a pollutant is “an output of any system component that is not being used productively by any other component of the system.”
Here’s a fun song that explains “Produce No Waste”
7. DESIGN FROM PATTERNS TO DETAILS
By stepping back, we can observe patterns in nature and society. These can form the backbone of our designs, with the details filled in as we go.
The principle of Design From Patterns to Details is a natural outcome of the application of the principle of Observe and Interact – pattern recognition. This principle reminds us to always keep the big picture in mind and to be cognizant of the long-term overall impacts of our actions, our choices, and designs. When designing, it is important to step back and observe the patterns in nature and society, where society represents human evolution – how well we have adapted to our surroundings. This icon used for this principle, spider on its web, directly represents zone and sector site planning – most widely used concept of permaculture design.
Here’s a fun song that explains “Design from Patterns to Details”
8. INTEGRATE RATHER THAN SEGREGATE
By putting the right things in the right place, relationships develop between those things and they work together to support each other.
The principle of Integrate Rather Than Segregate highlights the importance of working together as a society because we can go further together. This also applies to all aspects of our existence – looking at all aspects of our lives in an integrated, interconnected manner. All elements are designed to be interconnected (have a relationship), both serving and supporting multiple functions within the whole system.
Here’s a fun song that explains “Integrate Rather than Segregate”
9. USE SMALL AND SLOW SOLUTIONS
Small and slow systems are easier to maintain than big ones, making better use of local resources and producing more sustainable outcomes.
The principle of Use Small and Slow Solutions helps to prevent permanent damage, or time wasted in cleaning up an unforeseen mess due to haste and lack of foresight. Smaller and slower systems are more manageable in terms of maintenance, while simultaneously creating space for creative, more sustainable decisions along the way.
Here’s a fun song that explains “Use Small and Slow Solutions”
10. USE AND VALUE DIVERSITY
Diversity reduces vulnerability to a variety of threats and takes advantage of the unique nature of the environment in which it resides.
The principle of Use and Value Diversity is key to security. Diversity offers insurance against unpredictable variations in the natural environment. Diversity is valuable in reducing vulnerability within the natural fluctuations that we live in. Also, a diverse society is more stable and a more effective think tank.
Here’s a fun song that explains “Use and Value Diversity”
11. USE EDGES AND VALUE THE MARGINAL
The interface between things is where the most interesting events take place. These are often the most valuable, diverse and productive elements in the system.
The principle of Use Edges and Value the Marginal reminds us to be creative in our thinking and to question the norm for the possibility of something extraordinary. This also reminds us that everything has value, even the things that appear initially as marginal or unconventional. If we stopped cutting the forests down now and left it to perform its essential functions for the larger biosphere, the earth could recover. The permaculture lifestyle calls for us to transform the land that is marginal and make it productive.
Here’s a fun song that explains “Use Edges and Value the Marginal”
12. CREATIVELY USE AND RESPOND TO CHANGE
We can have a positive impact on inevitable change by carefully observing, and then intervening at the right time.
The principle of Creatively Use and Respond to Change is directly linked to our very survival. Charles Darwin said, “It is not the strongest of the species that survives, not the most intelligent, but the one most responsive to change.” Humans are unique in the evolutionary process because we have more input in our survival through creative adaptation than other living beings. Other living beings are reliant on random opportune events that give them an advantage, but humans, for the most part, can be deliberate in our survival. The only constant in life is change – nothing is for certain. So instead of resisting the inevitable, it is important to embrace, accept, foresee, and be prepared for change. Change brings lots of positives, often little pockets of blessings in disguise. This principle calls on being flexible, going with the flow, and improvising along your journey. This also links us back to Principle 1: Observe and Interact, because we must be able to see things not only as they currently are, but also as they will be in the future.
Here’s a fun song that explains “Creatively Use and Respond to Change”
THE SEVEN DOMAINS OF PERMACULTURE ACTION
The Seven Domains of Permaculture Action are where we apply the ethics and principles of permaculture. These seven domains are radical in a sense, calling for substantial revisions to how we currently exist and are central to a more sustainable and just society. They call upon us to transform from being passive recipients to participants. This process starts with ourselves, and spirals outward to include families, communities, and eventually all life. Weaving the seven domains together with a backdrop of the foundational ethics and principles has the potential to create a holistic, all-inclusive, and completely sustainable civilization.
Here is a 2.5-minute audio of David Holmgren talking about the seven domains | source
The icons below each domain also link to what we consider as One Community’s most relevant open source contributions to each one.
LAND AND NATURAL STEWARDSHIP
The domain of Land and Nature Stewardship is what most people think of when they hear ‘permaculture.’ It includes all elements having to do with working nature to obtain long-term, responsible yields. Some real-world examples include regenerative agriculture, agroforestry, biointensive gardening, forest gardening, organic agriculture, holistic rangeland management, integrated aquaculture, and wild harvesting and hunting. One Community’s most relevant open source contributions to the domain of Land and Nature Stewardship include the following:


BUILDING
The domain referred to as ‘Building’ covers all infrastructure and emphasizes constructed elements built to last, while honoring land and nature stewardship and enhanced living. Some real-world examples include solar design, natural construction materials, water harvesting, waste reuse, biotecture, earth sheltered construction, and natural disaster resistant construction. One Community’s most relevant open source contributions to the domain of Building include the following:

TOOLS & TECHNOLOGY
The domain of Tools and Technology covers human ingenuity and how it can be used in a creative and resourceful way – a way that preserves foresighted survival and current comforts. Some real-world examples include recycling, fuels from organic wastes, and renewable energy. One Community’s most relevant open source contributions to the domain of Tools and Technology include the following:


EDUCATION AND CULTURE
The domain of Education and Culture covers the way we teach and the way we function and define culture – striving towards a more flexible, active and creative way of learning and existing among one another. Some real-world examples include social ecology, home schooling, Waldorf education, participatory arts and music, action learning, and transition culture. One Community’s most relevant open source contributions to the domain of Education and Culture include the following:


HEALTH AND SPIRITUAL WELL-BEING
The domain of Health and Spiritual Well-Being encompasses taking more responsibility for personal well-being through preventative care methods and extends to dying with dignity and mental well-being. Some real-world examples include alternative medicine, home birth and breastfeeding, dying with dignity, and body/mind/spirit disciplines. One Community’s most relevant open source contributions to the domain of Health and Spiritual Well-Being include the following:





FINANCE AND ECONOMICS
The domain of Finance and Economics strives to encourage the development of a more robust, stable, and sustainable economy. Some real-world examples include ethical investment and fair trade, farmers markets and community supported agriculture, tradable energy quotas, and ecological living. One Community’s most relevant open source contributions to the domain of Finance and Economics include the following:





LAND TENURE AND COMMUNITY GOVERNANCE
The domain of Land Tenure and Community Governance encourages a more communal existence, honoring our social nature as humans and the ingrained desire to co-exist. Some real-world examples include: native title and traditional use rights, cooperatives and body corporates, and co-housing and ecovillages. One Community’s most relevant open source contributions to the domain of Land Tenure and Community Governance include the following:





PERMACULTURE DESIGN PROCESS
Several permaculture design processes can be used when implementing a permaculture-based design. Each step is informed by the previously mentioned ethics and design principles that lead to sustainable, designed-to-last, and regenerative solutions. Interestingly, the end product of the design process is all but a starting point. The true design happens when the design is put into action and you engage in an evolutionary process that calls for adjustments along the way. The design process described here is a good starting place to kickstart the long-term progression and transformation that naturally occurs through feedback and a desire to steer towards efficiency and common sense. Approach the process with confidence. The aim is not perfection, but rather a deliberate and conscious engagement in a journey with the sole goal to make things better and better over time.
The Design process is comprised of the following overarching steps:
- STEP 0: Familiarize Yourself with the Process (optional)
- STEP 1: Assess Resources and Identify Needs
- STEP 2: Assess Site Through Observation and Research
- STEP 3: Develop a Conceptual Design
- STEP 4: Develop a Detailed Design
Note: William Horvath eloquently brings together the details from many known contributors of Permaculture and we recommend his resource that can be found here and this flow diagram that distills the overall process. Our information in this section draws most heavily from this information and Geoff Lawton’s Permaculture Design Course. A broad diversity of other resources were then used to confirm and support this information, but to a much lesser extent. We’ve included the most significant of them within the content and in the resources section.
STEP 0 – FAMILIARIZE YOURSELF WITH THE PROCESS
The design process is best initiated by familiarizing yourself with the permaculture concepts with the intent to keep these in the forefront while going through the design, implementation, and adaptive experience. The 3 foundational ethics and 12 guiding principles can be written on index cards so this information remains at your fingertips – as pictured below:
In this way, the ethics and principles become the backbone of all decisions, big and small:
- EARTH CARE: I pledge to preserve and protect the water, air, soil, plants and pollinators – all baseline life-giving elements.
- PEOPLE CARE: I pledge to care for self, family, neighbors, and the wider community. I recognize the potential for greater wisdom through collaboration, peace, and a secure sense of belonging.
- FAIR SHARE: I pledge to redefine what is enough, keeping my desire to accumulate and overindulge in check.
- OBSERVE AND INTERACT: I am reminded to slow down and genuinely engage with, learn, explore, document, and improve my internal and external landscapes.
- CATCH AND STORE ENERGY: I am reminded to hold ‘boundless’ and retainable energy within the system I live in for as long as possible, slowing down the entropic process.
- OBTAIN A YIELD: I am reminded to produce only long-term, efficient, and responsible surplus, both monetary and non-monetary.
- APPLY SELF-REGULATION AND ACCEPT FEEDBACK: I am reminded to take only what I need and consciously keep that in check. I create self-regulating systems and make adjustments from the feedback.
- USE AND VALUE RENEWABLE RESOURCES AND SERVICES: I am reminded to have each element within the system I live contribute to other elements, as well as receive from other elements to thrive.
- PRODUCE NO WASTE: I am reminded that everything is a resource and to rethink the concept of waste through reduce, reuse, repair, repurpose or upcycle, and recycle.
- DESIGN FROM PATTERNS AND DETAILS: I am reminded to apply natural ecosystem mimicry.
- INTEGRATE RATHER THAN SEGREGATE: I am reminded to think with diversity and multifunctionality in mind.
- USE SMALL AND SLOW SOLUTIONS: I am reminded to work at a pace that allows me to see my impact to prevent permanent damage.
- USE AND VALUE DIVERSITY: I am reminded to use diversity to reduce vulnerability against unpredictable variations in the natural environment.
- USE EDGES AND VALUE THE MARGINAL: I am reminded to look for often invisible advantages and functions and improve unproductive areas.
- CREATIVELY USE AND RESPOND TO CHANGE: I am reminded of what Charles Darwin said, “It is not the strongest of the species that survives, not the most intelligent, but the one most responsive to change.”
STEP 1 – IDENTIFY NEEDS AND ASSESS RESOURCES
Identifying your needs and assessing your resources is an important step prior to beginning the permaculture-based design process (or any large design or construction project for that matter). It is helpful to gather key information and assess your resources and commitment to the process by identifying your needs (or design criteria) and objectively assessing the resources available to you. Step 1 is to organize your talents and engage in a cooperative process that is centered around being ethically responsible and accountable. People with a desire to make a difference and are willing to invest the necessary energy are the only true resources needed to bring about harmony and restore the very forces that keep us alive – air, water, and land.
IDENTIFY YOUR NEEDS
Identifying your needs or design criteria helps get clear on the intent of your design. This is called the “Design Brief” and should include the intended use and priorities of the property, the level of food self-sufficiency desired, who and how many people will live there, and an overview of anything else relevant to the design. Having a clear vision and goals speeds up both the design and implementation process. Toby Hemenmay says the following regarding envisioning your future, “The visioning phase begins with a no-holds-barred brainstorm, limited to some degree by finances and really only by ecological and ethical constraints.” During this step clearly articulate your goals – this is a foundational step of the design process.
ASSESS YOUR RESOURCES
Objectively assessing the resources at hand is essential to your success. The design process requires research, time, and problem-solving skills. Implementation requires deeper research, considerably more time, patience, observation skills, flexibility, and complex problem-solving and adaptation skills. The larger the project, the more people will be involved. This means the addition of quality management and people skills. Larger sized projects may require greater financial investment as well.
A resources and limitations analysis is useful to accomplish this step and entails listing your personal resources and limitations to identify areas of abundance and scarcity. During this step, assess your time, budget, skills and other aspects that may be limiting factors to execute your endeavor. Knowing yourself is key, because you can only build on your strengths. As said by Aristotle, “knowing yourself is the beginning of all wisdom.”
It is extremely important to consider your ability and dedication to the entire process before you start. What is your track record of success with similar-sized projects and commitments? What are your strengths and weaknesses and what are you able and willing to lose if it fails? What new skills will you need to learn and what skills will you need help with? Are you the person to lead the project implementation or would someone else be better suited for that?
If you haven’t already, conducting a SWOT analysis would be a good thing to do before starting. If you need help, this Wikipedia page that teaches the process. The image below shows an overview of what the process is and clicking on the image allows you to download an editable version of the table that you can complete for your project. This is a view-only file, so please create your own copy of this template to edit by clicking File > Make a copy…
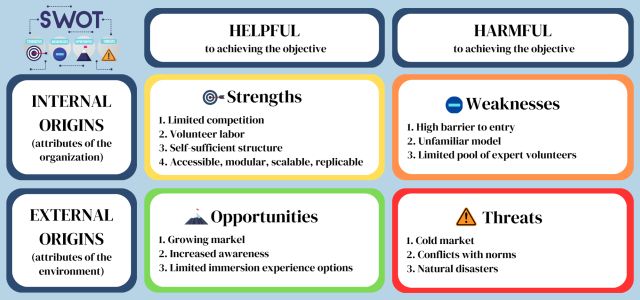
Once completing this table, which entails listing the team and project strengths, weaknesses, opportunities and threats, the next step is to come up with the following strategies:
- OPPORTUNITY – STRENGTH: Strategies to use strengths to take advantage of opportunities
- OPPORTUNITY – WEAKNESS: Strategies to overcome weaknesses by taking advantage of opportunities
- THREAT – STRENGTH: Strategies to use strengths to avoid threats
- THREAT – WEAKNESS: Strategies to minimize weaknesses and avoid threats
STEP 2 – ASSESS SITE THROUGH OBSERVATION
Step 2 is to assess your site through observation and research. During this step, the goal is to collect information that is potentially relevant to the design process. This step has two components. The first is observation – ideally making direct observations in the field for an entire year – learning where the sun shines, shadows cast, wind blows, water flows, water collects, pollution drifts, and the such. The second is research – gathering characteristics that were not observed directly. Research uses off-site resources, such as books, local experts, and the internet. These two components ultimately inform our choices to create an effective permaculture design.
OBSERVE AND DEVELOP A BASE MAP
Before you go to your site for the observation phase, make a basemap. The basemap provides a framework for your design. The basemap should at a minimum have your property boundaries, along with a scale and compass rose. You can consult your local municipality or use an online mapping tool to define the property line. Online mapping tools include: Google Earth, Google Maps, Bing Maps Bird’s Eye View, Topographic Maps on Google Earth, Area Calculator, Topographic National Map Download, GPS Visualizer: Assign elevation data to coordinates, Creating Contours using ASTER DEM and Global Mapper | MacOdrum Library and MyTracker App.
Google Earth is a powerful, free program that can be used to learn about the property and get an overall picture of your property and the surrounding area. Take time to look at the many features offered to familiarize yourself with the property: historical maps, distance to the ocean, altitudes, compass aspect, terrain, contours.
If possible, get contours on your basemap to help with understanding the terrain. Contour lines give essential information, such as how the land slopes, which impacts sun energy exposure and water travel. Darren Doherty provides this tutorial we think is pretty good for how to create a boundary in GoogleEarth:
Click here to view Darren Doherty’s tutorial
He also has an article on Making Contour Maps on the Cheap, which suggests having elevation data about every 1 foot. A visual terrain of your property may also be available using Google Maps’ terrain view. If using Google Earth,”World_Topo_Map (MapServer)” may be of assistance. Topographical data is also available in online viewers, such as through ArcGIS, National Map Viewer, ESRI’s World Topographic Map Viewer, Mapping Support, My Topo, and Contour Map Creator.
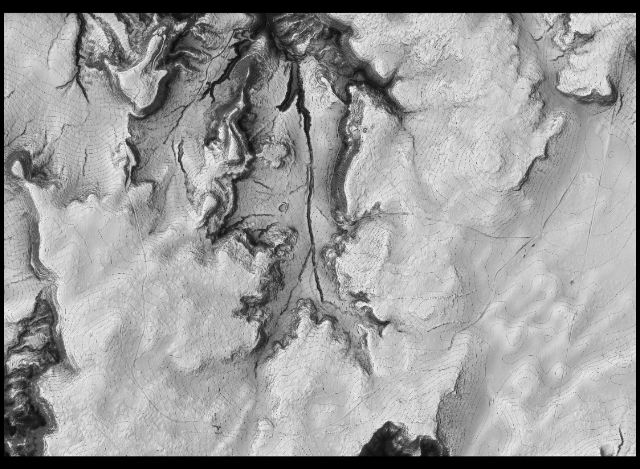
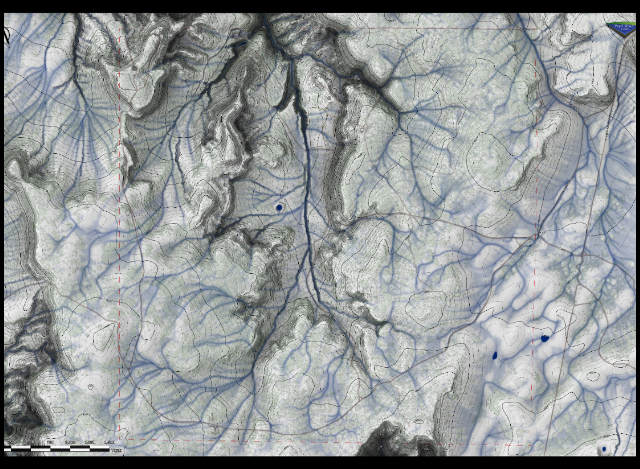
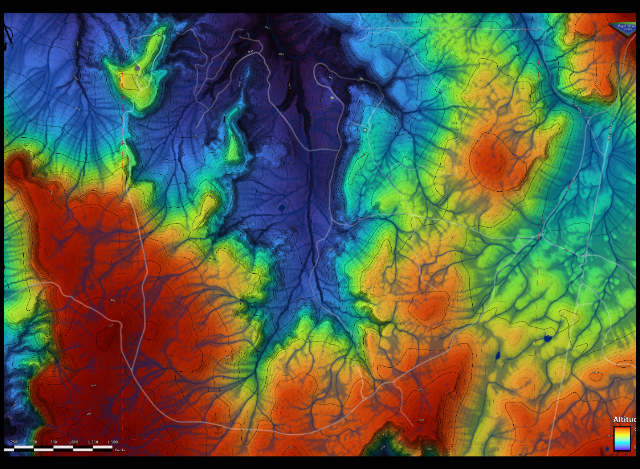
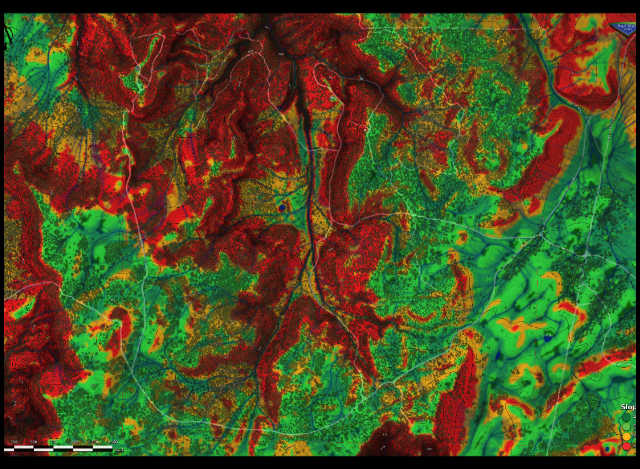
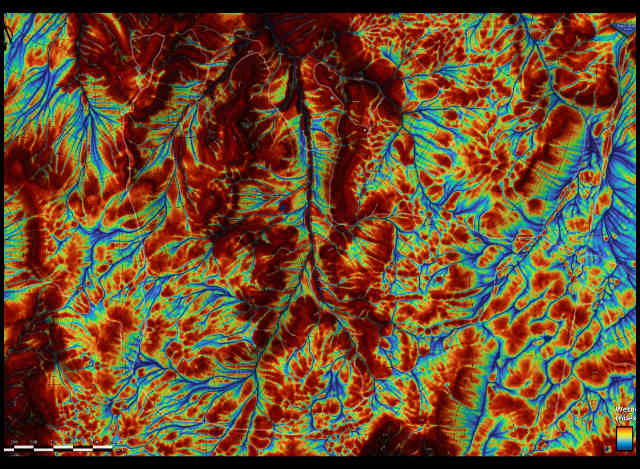
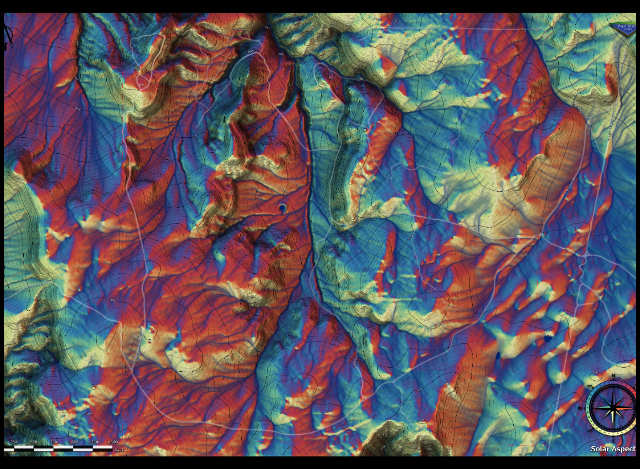
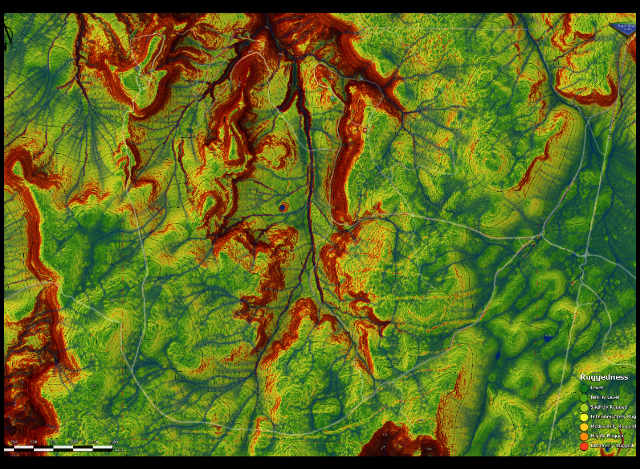
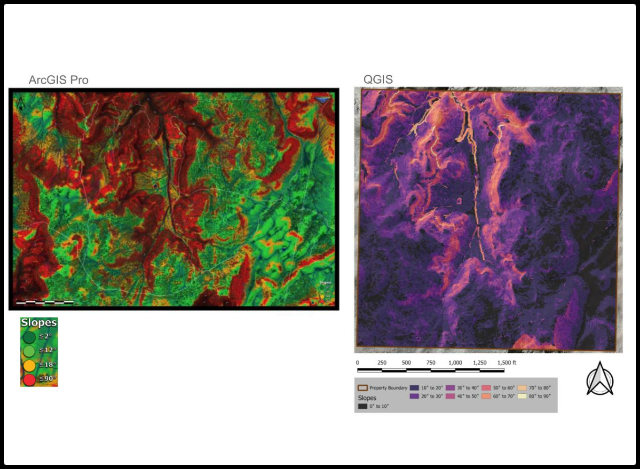
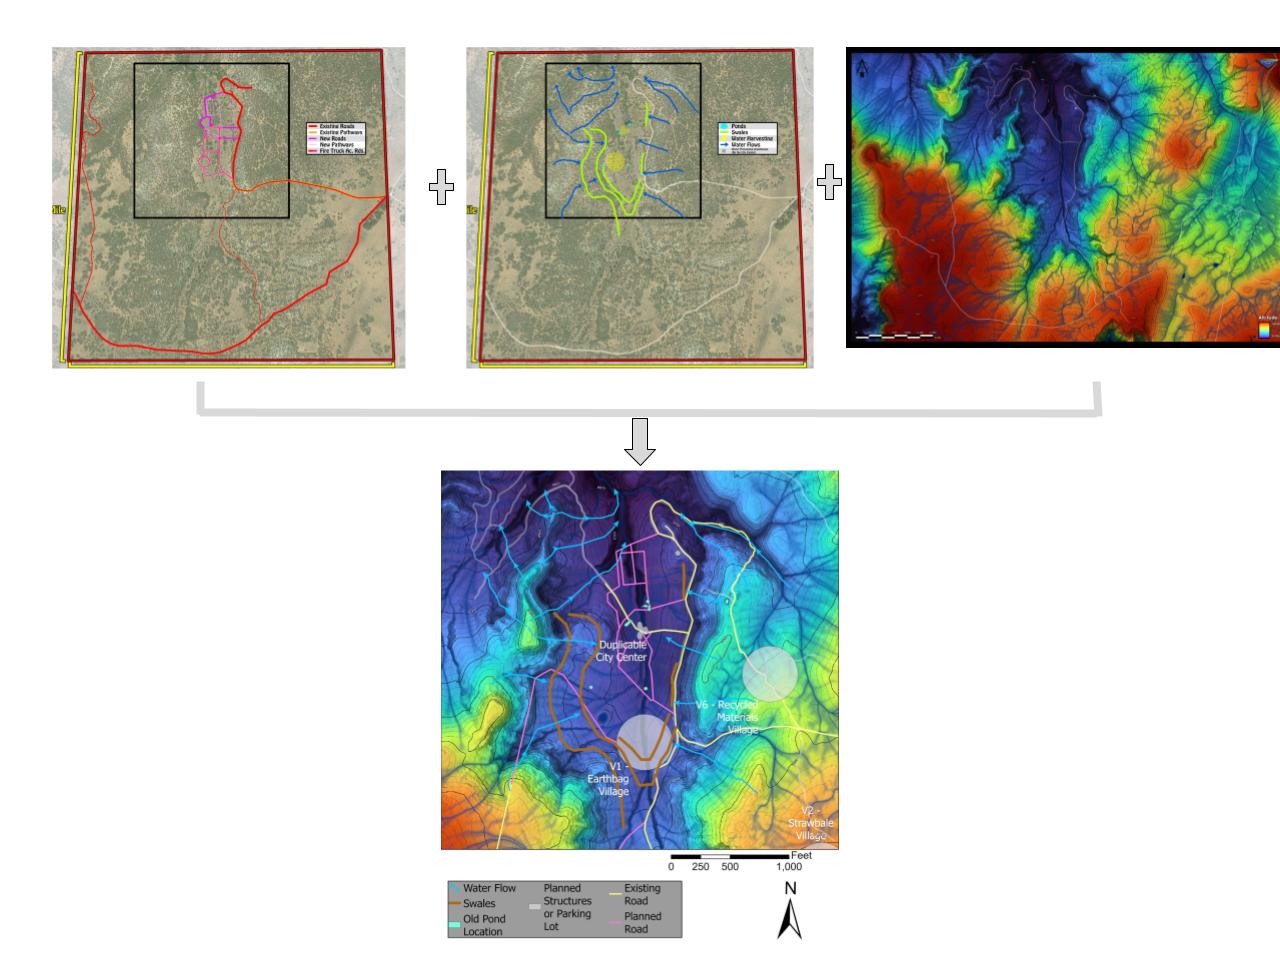
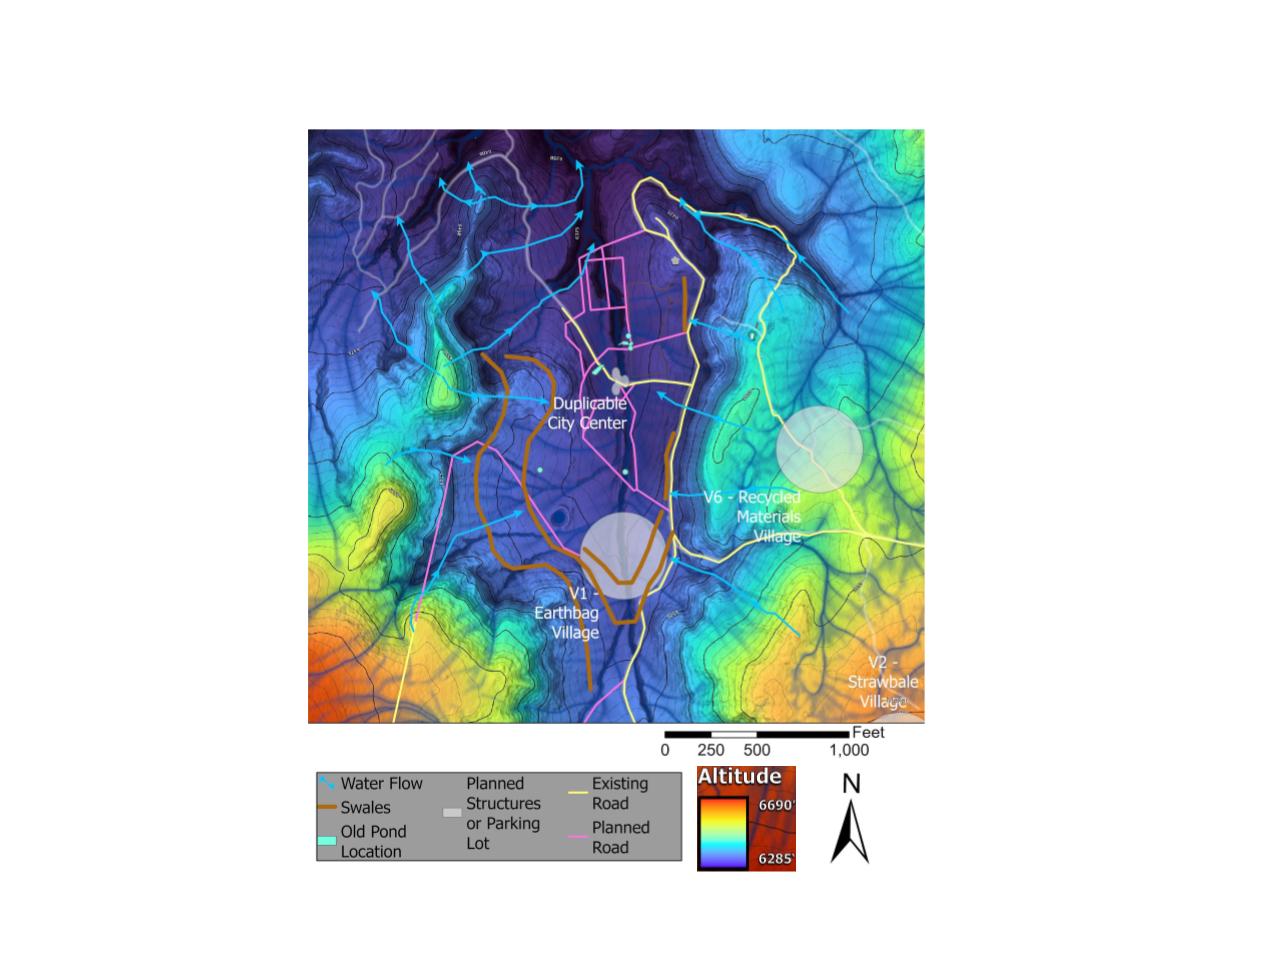
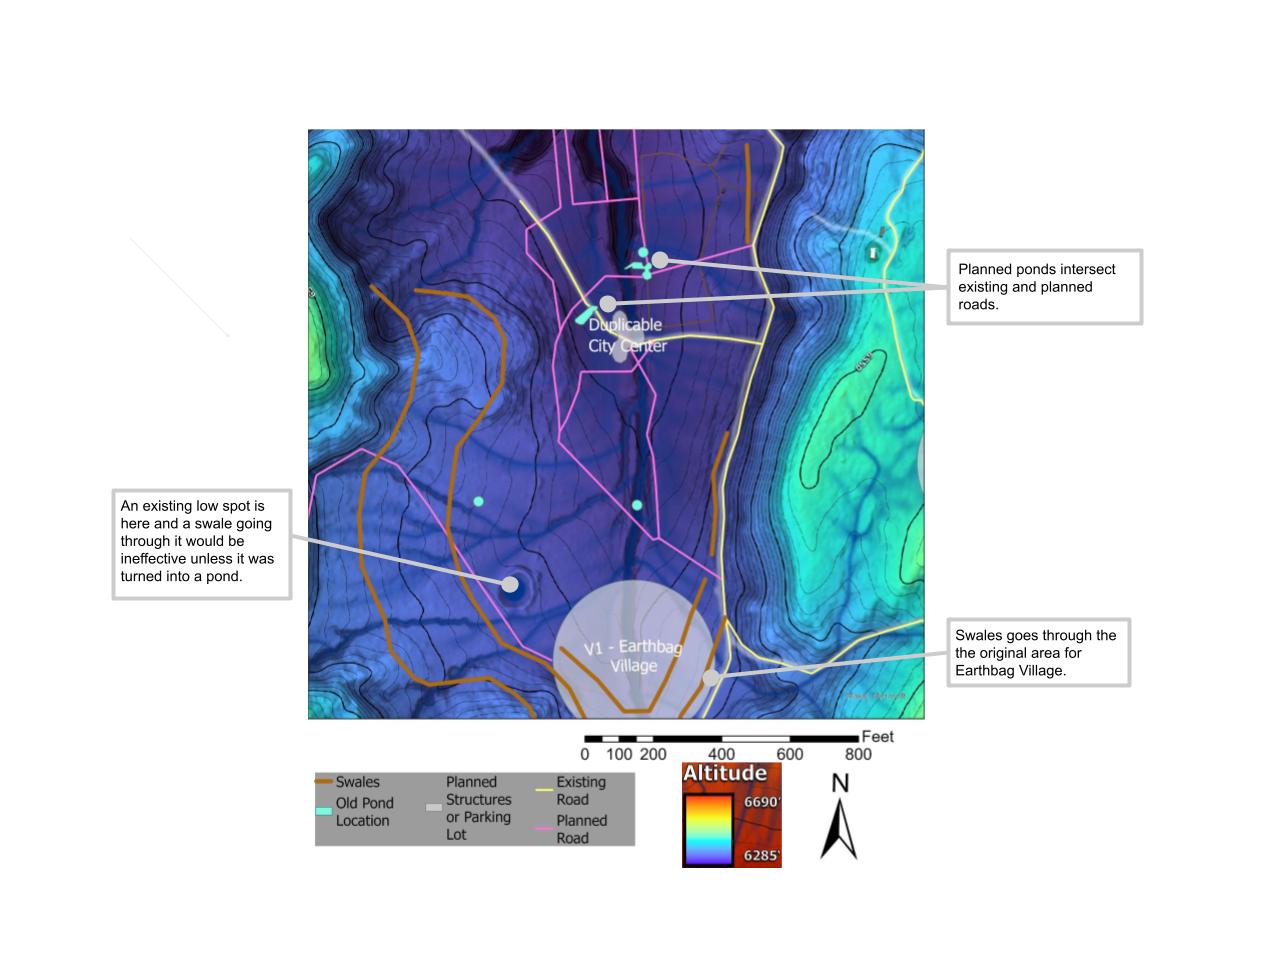
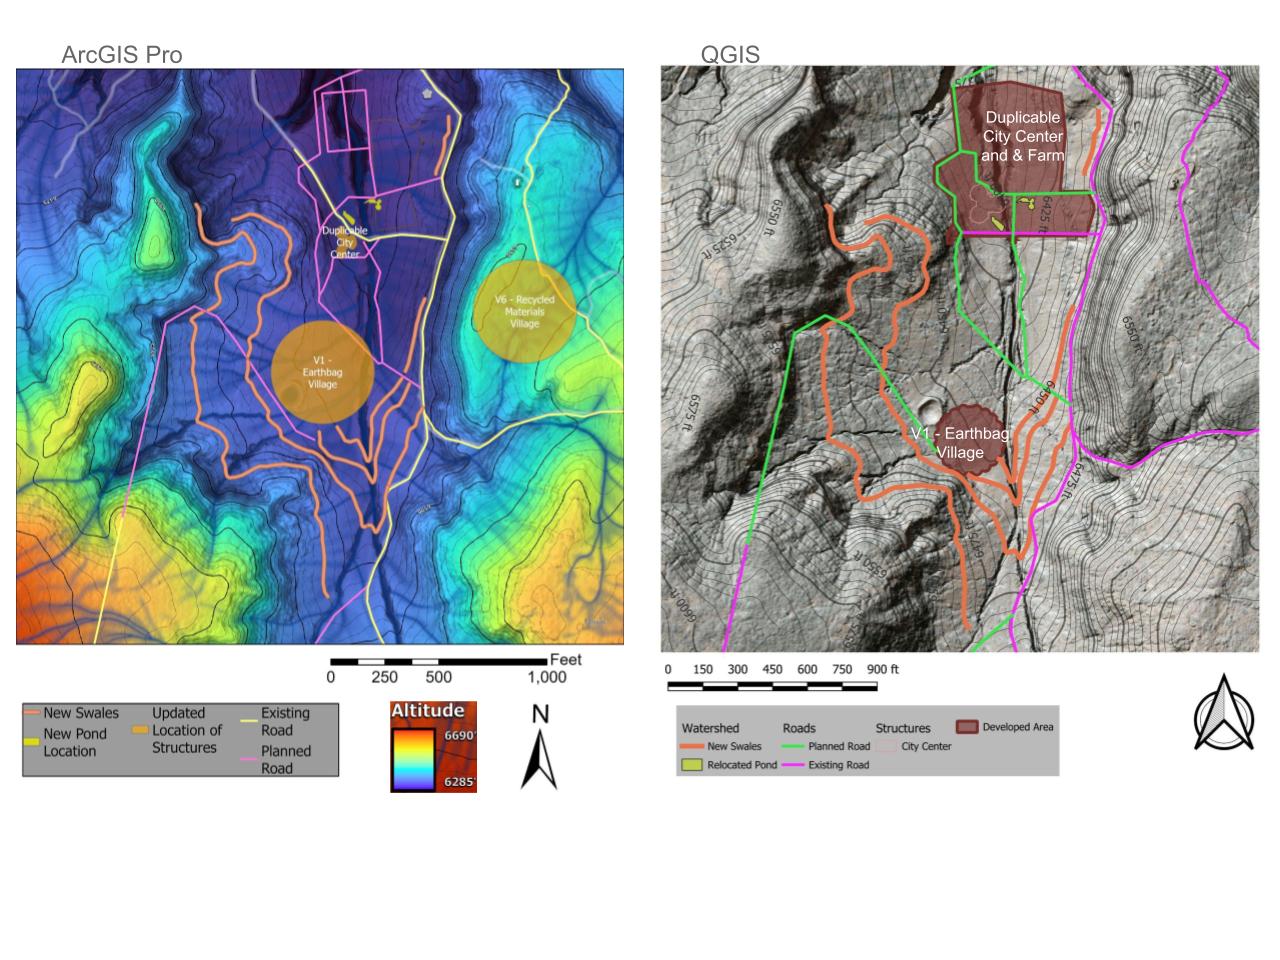
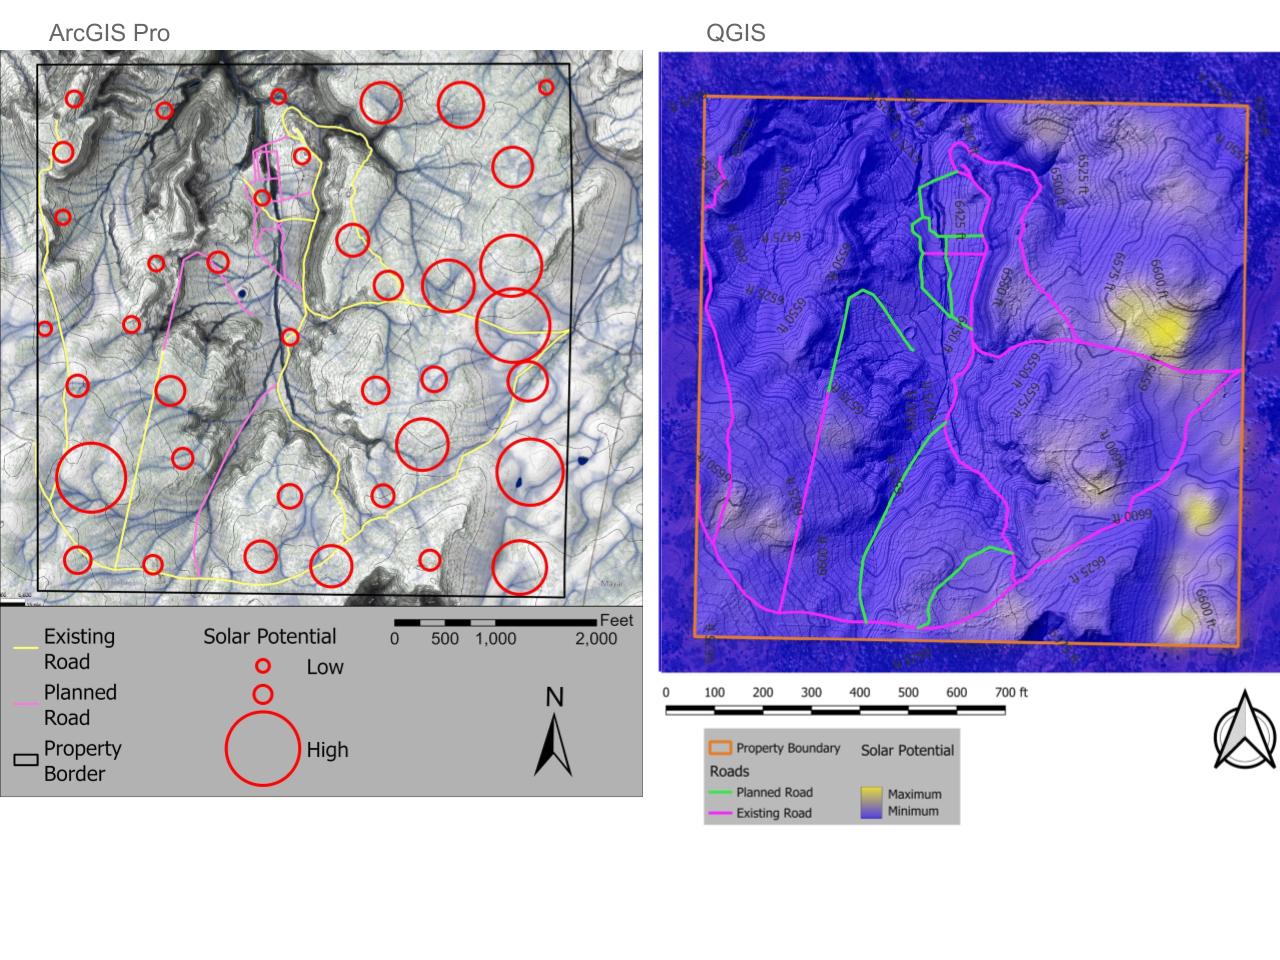
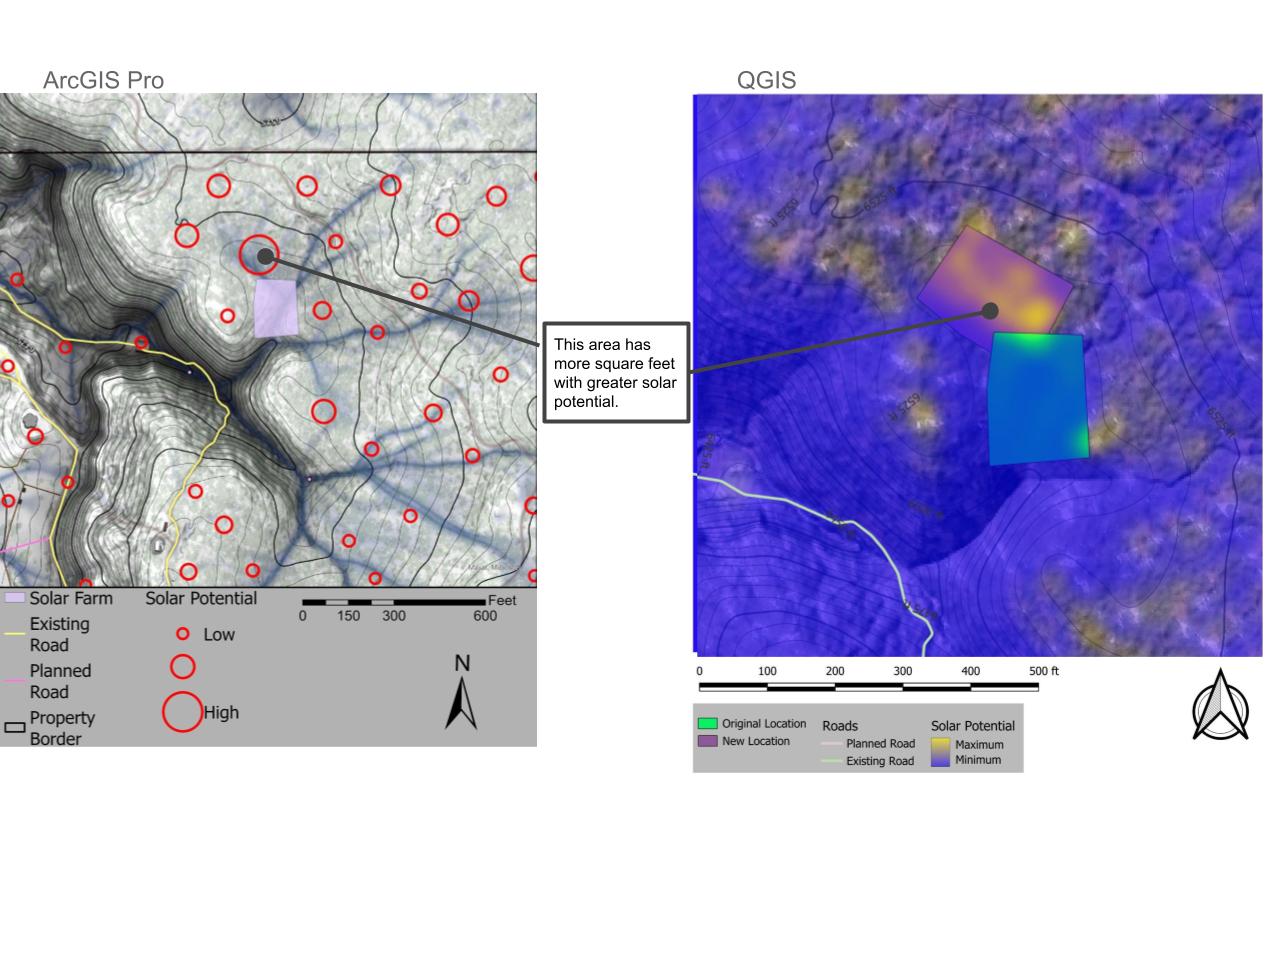
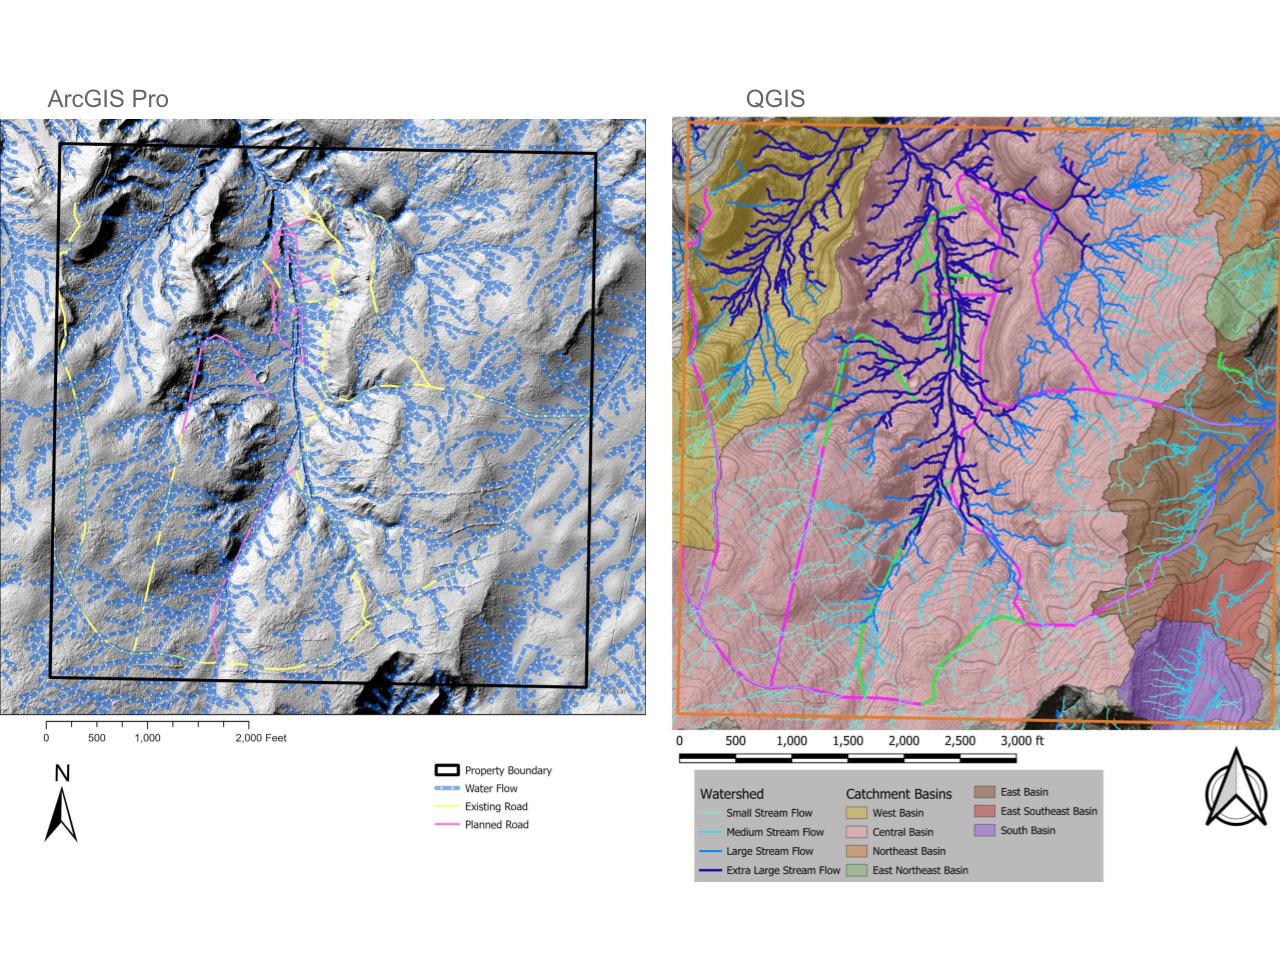
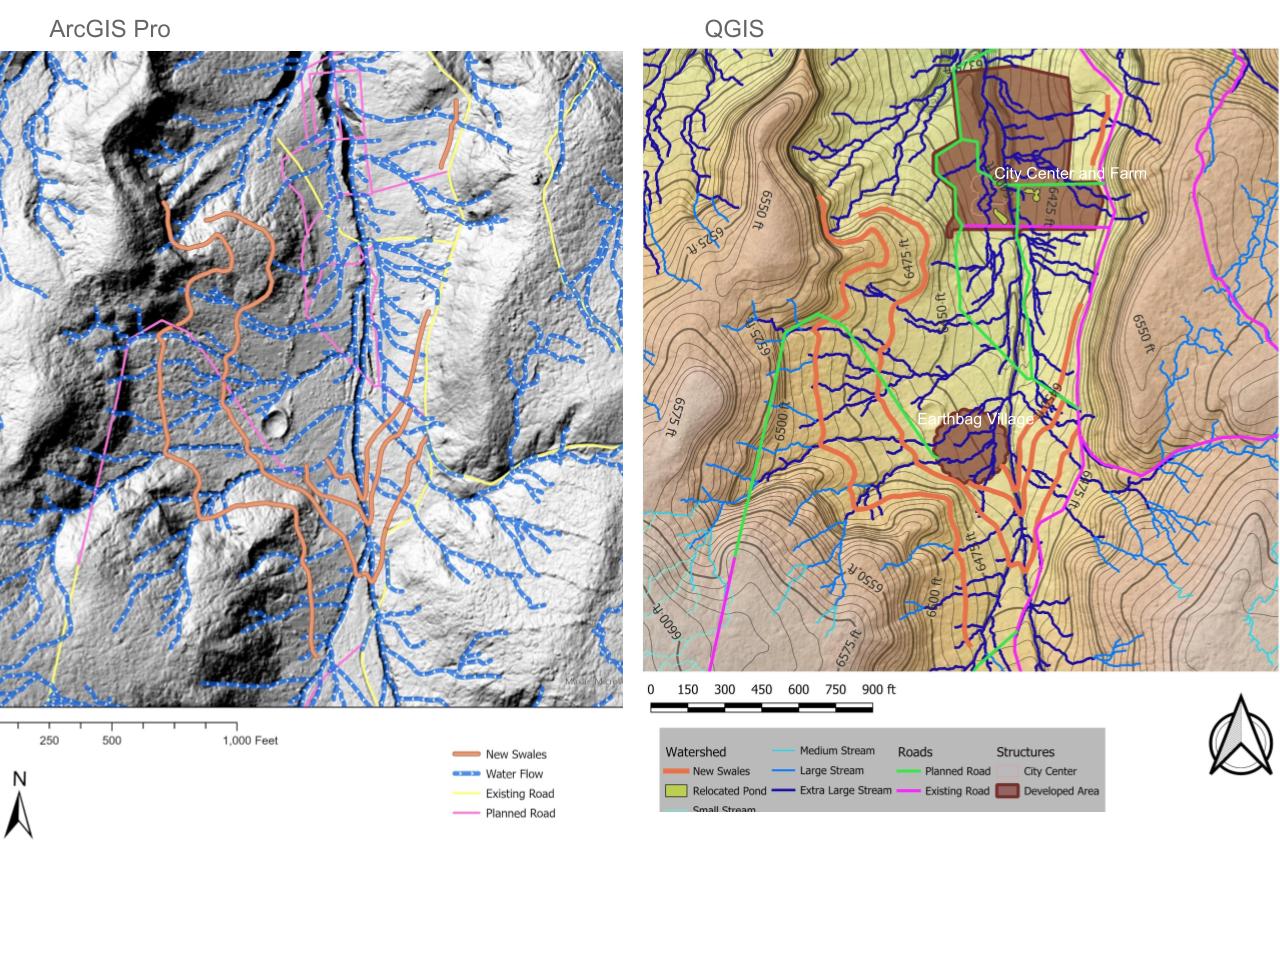
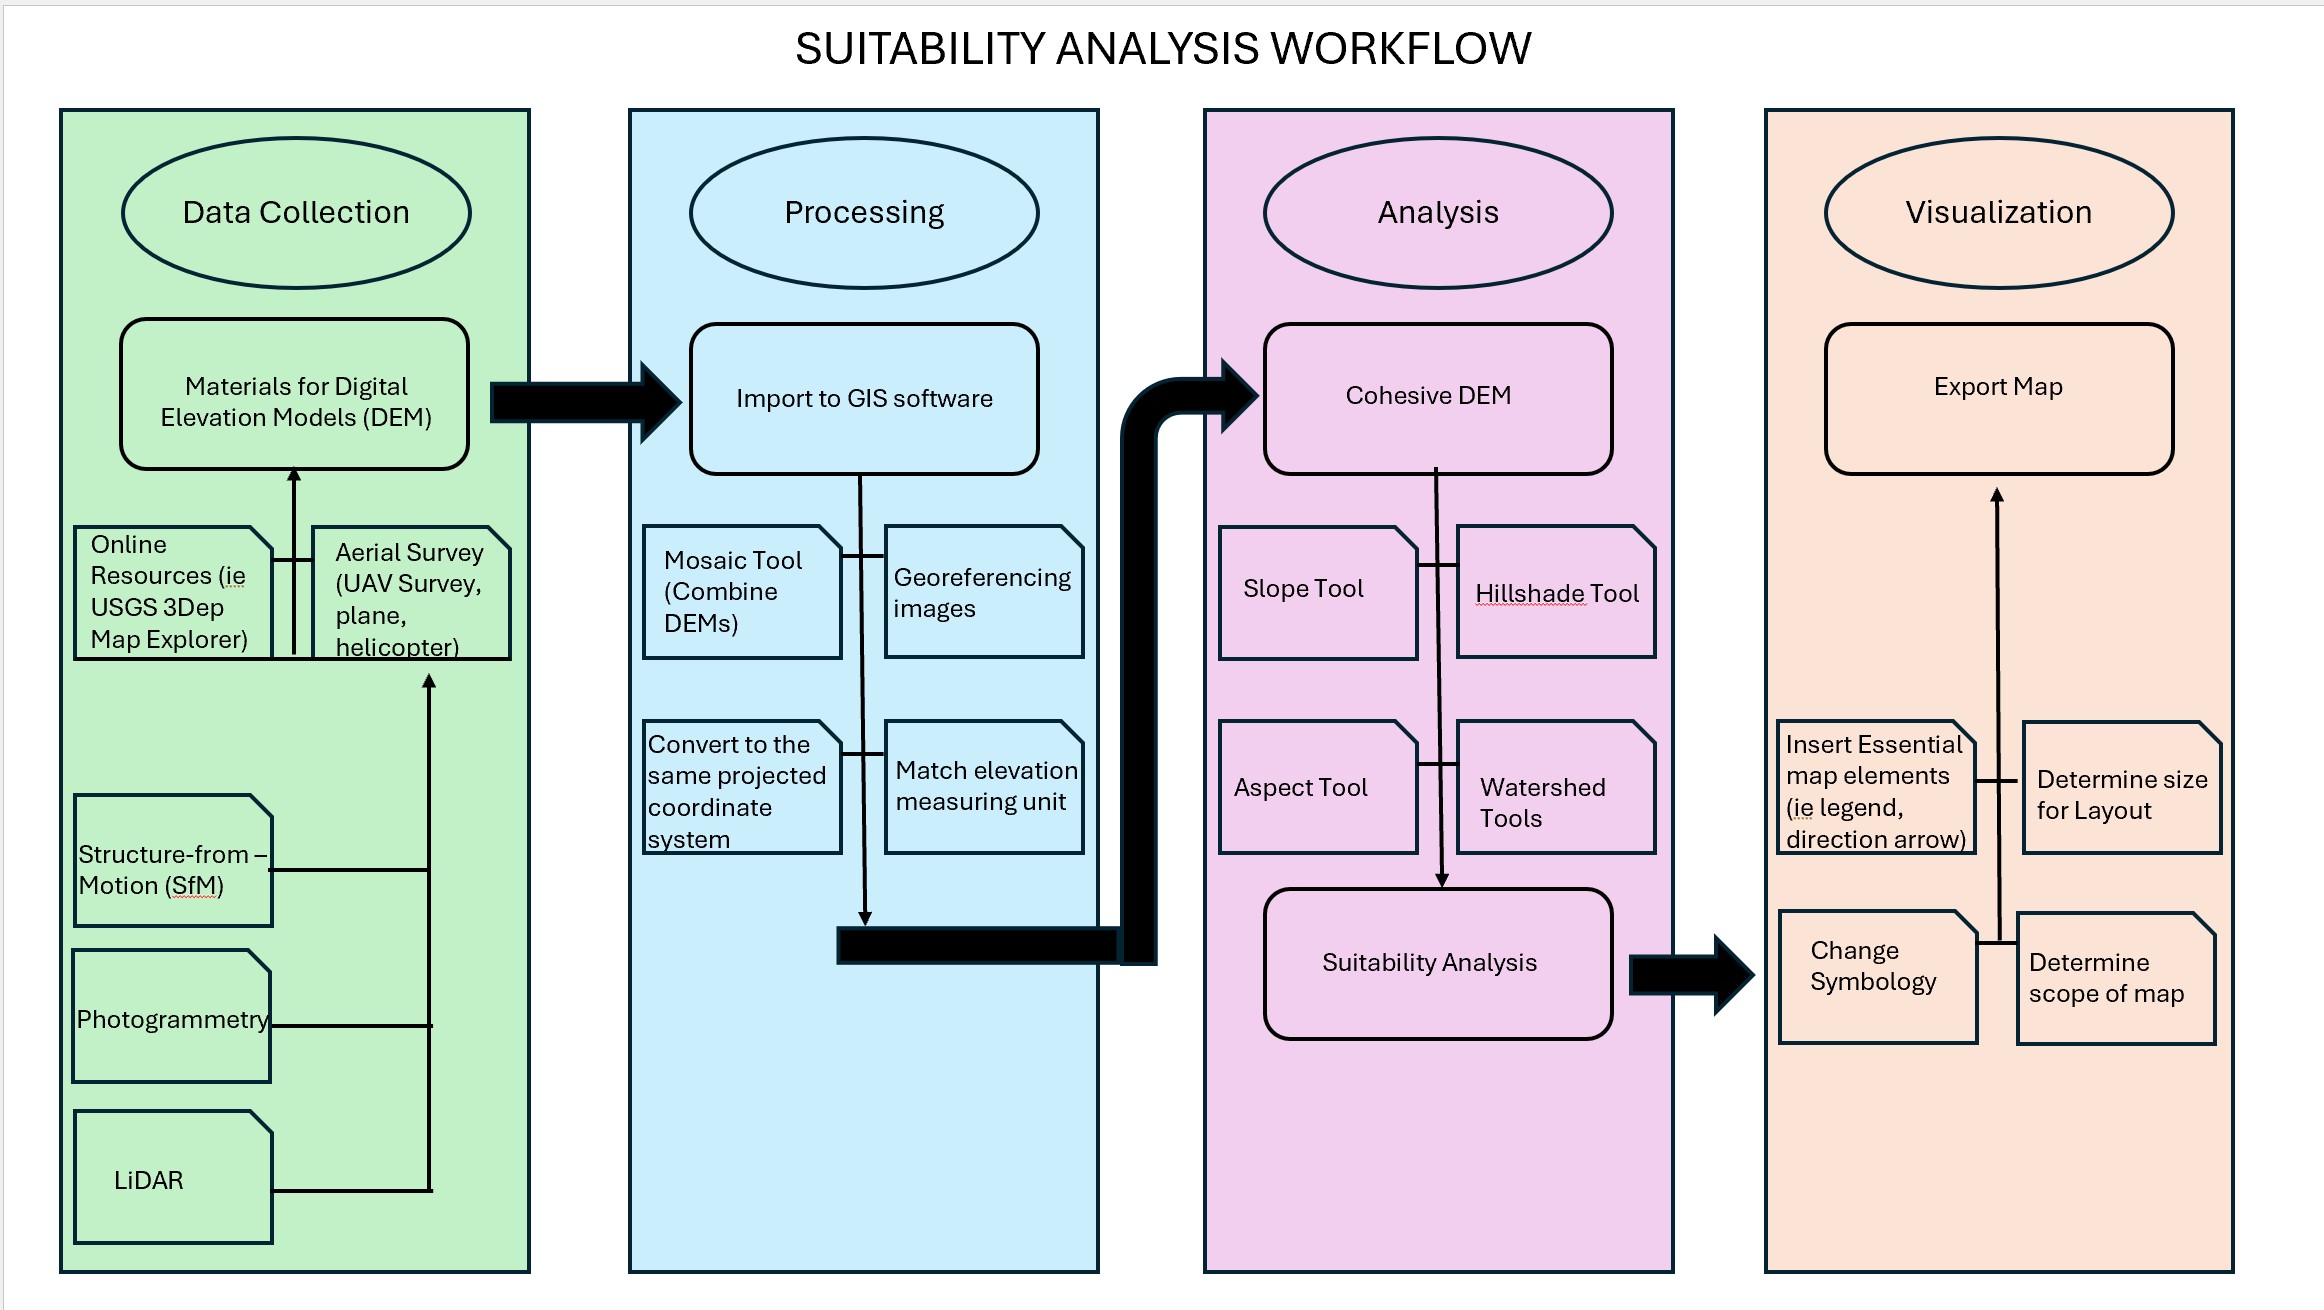
A more detailed approach to viewing the landscape and producing a more accurate basemap is to use Geographic Information Systems (GIS) software. With GIS software, contour lines can be generated at any interval, and it can display the landscape’s slope degrees, the cardinal direction it faces (aspect), and the shadows cast by the topography (hillshade) at different times of the day. This is all based on data from aerial surveys that produce Digital Elevation Models (DEMs), which can often be acquired online for free. Much of the United States has been surveyed, and DEMs – some as detailed as 1 square meter or even finer – can be found on the USGS Lidar Explorer Map (nationalmap.gov).
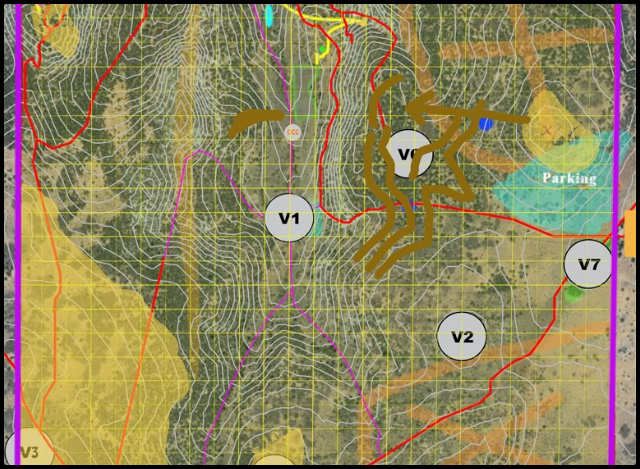
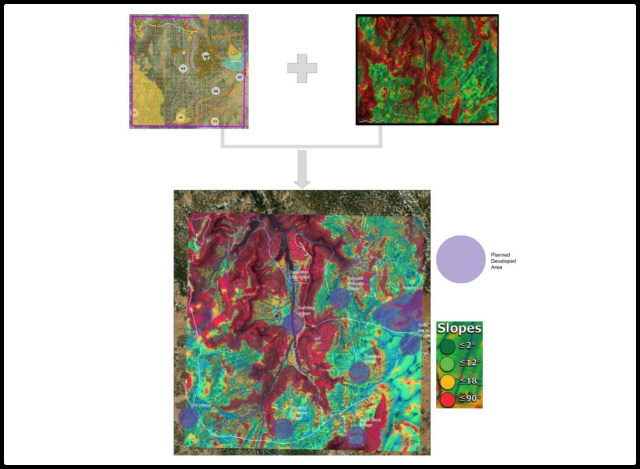
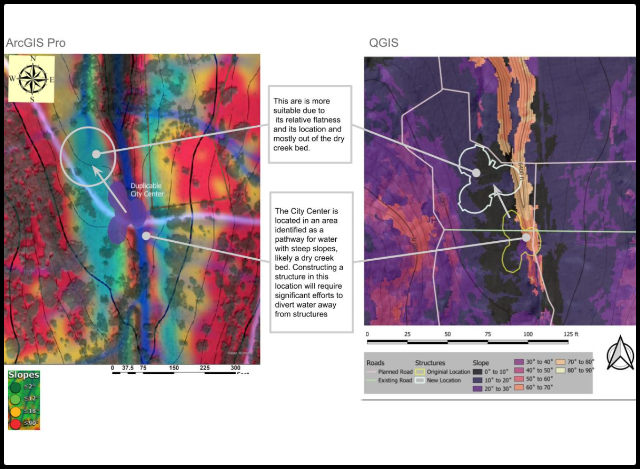
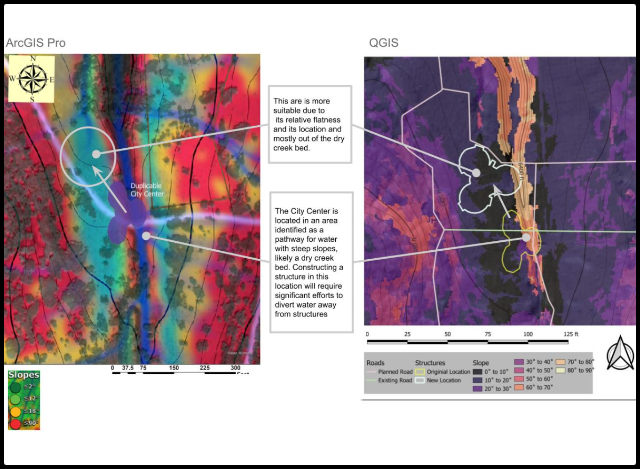
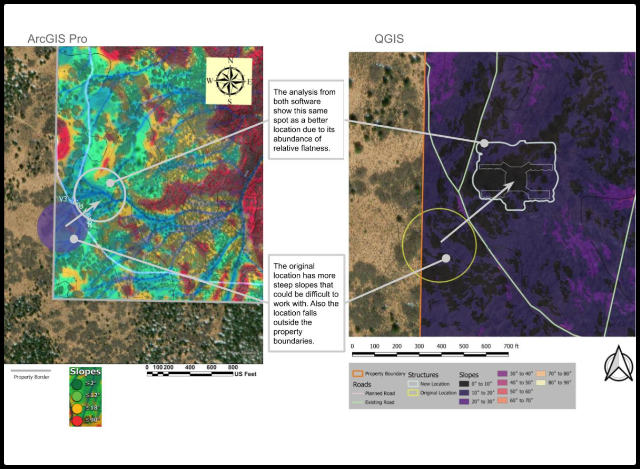
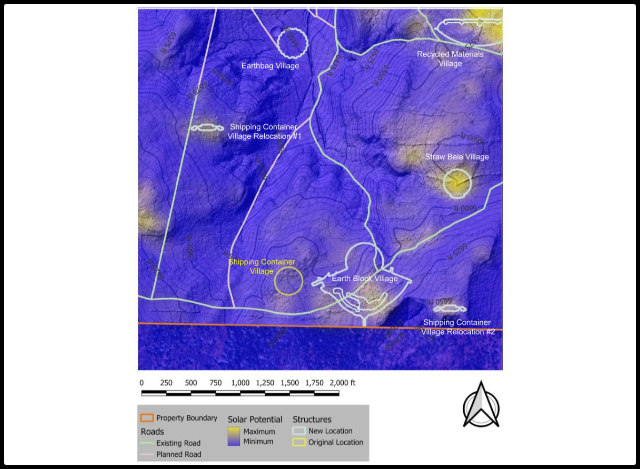
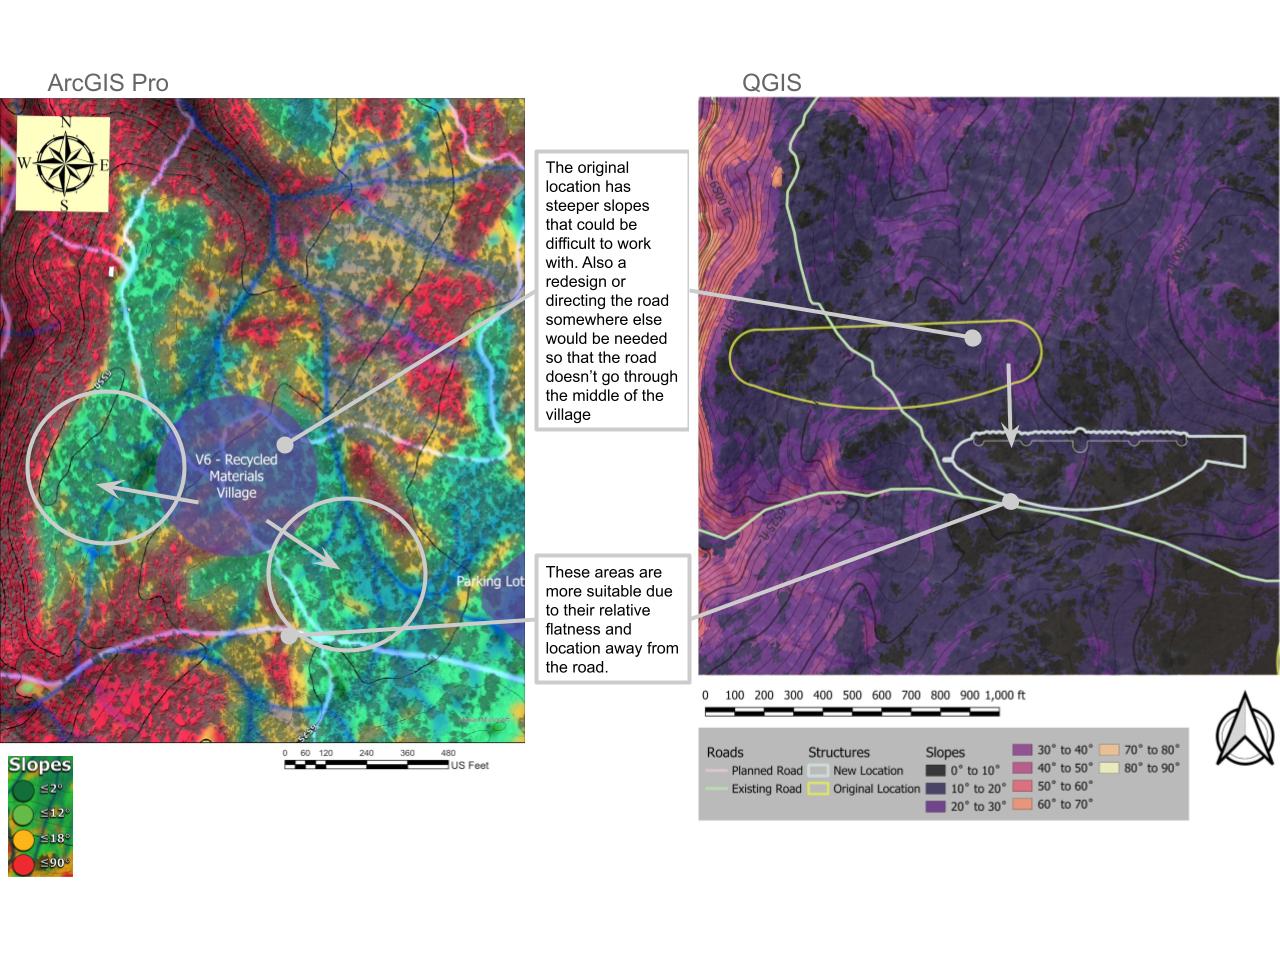
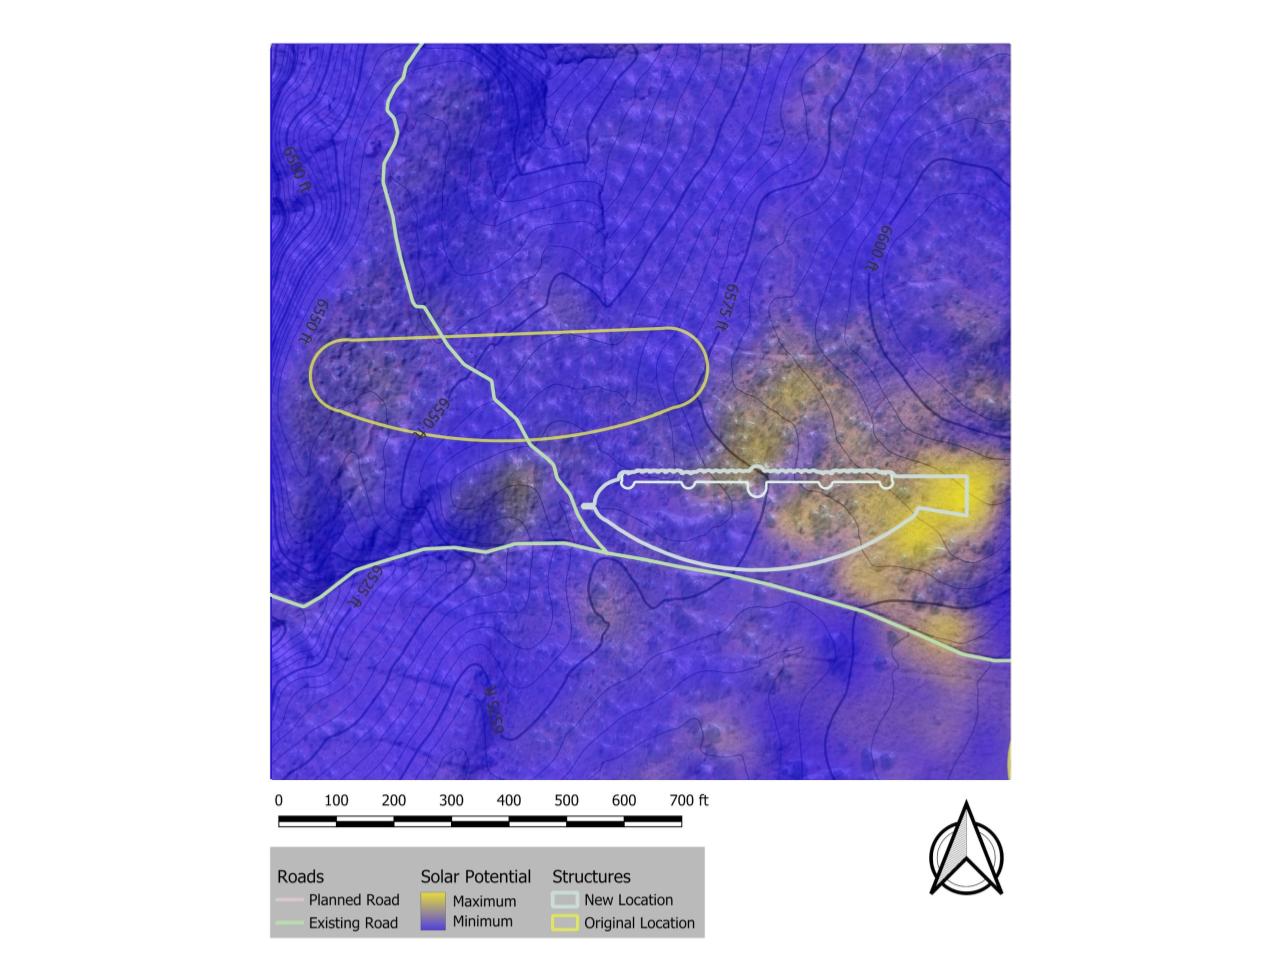
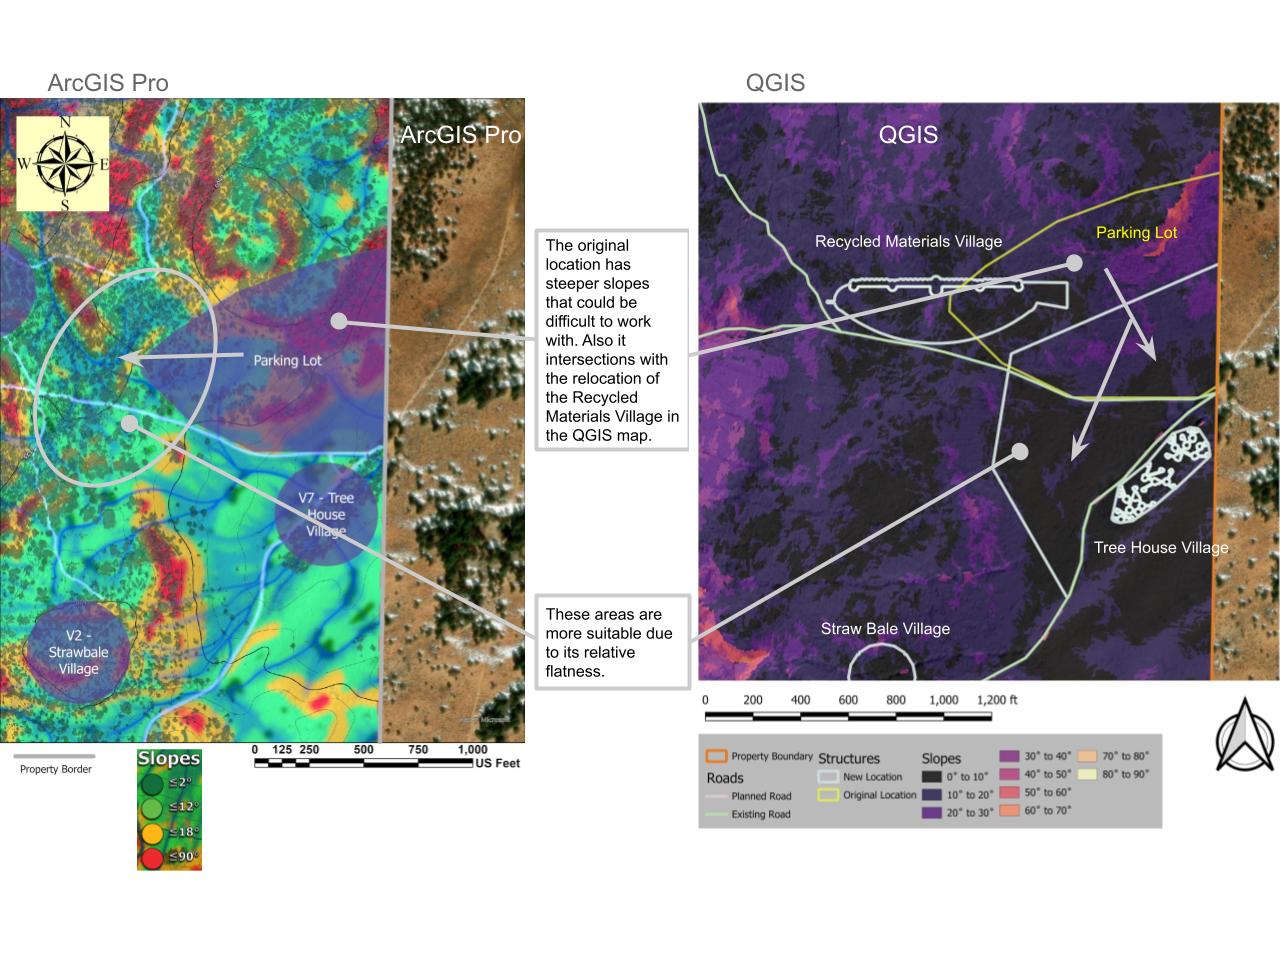
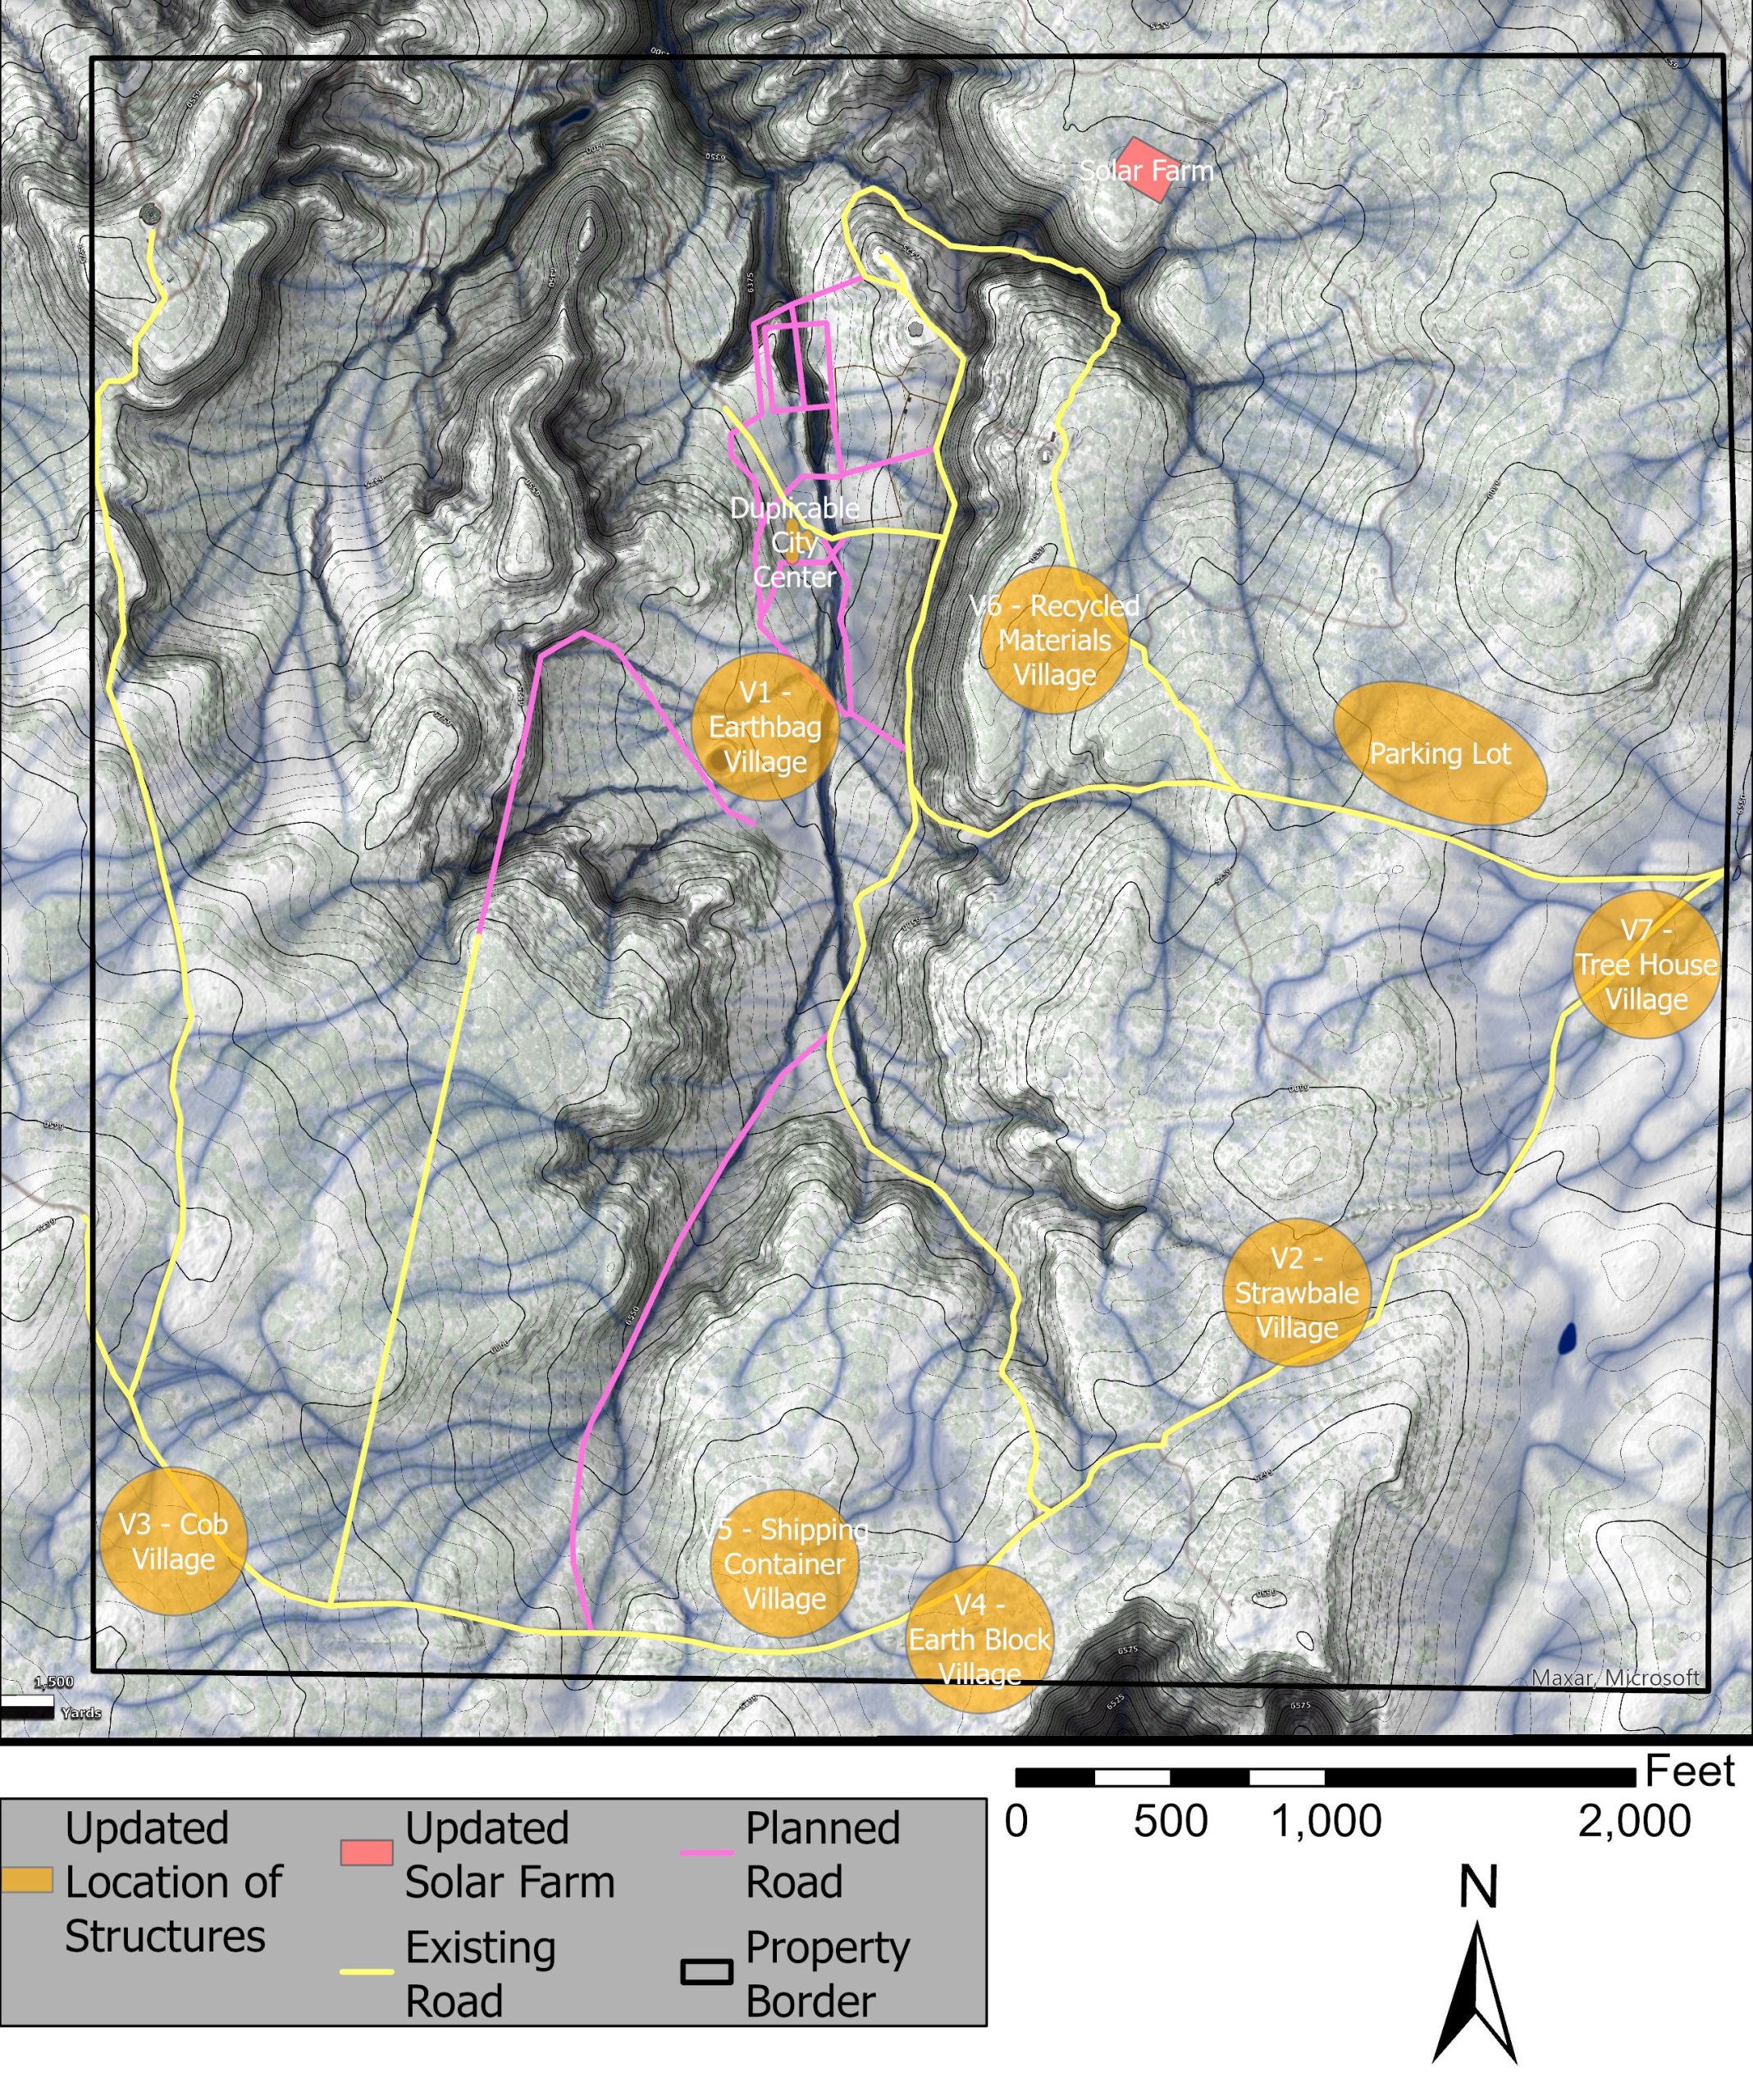
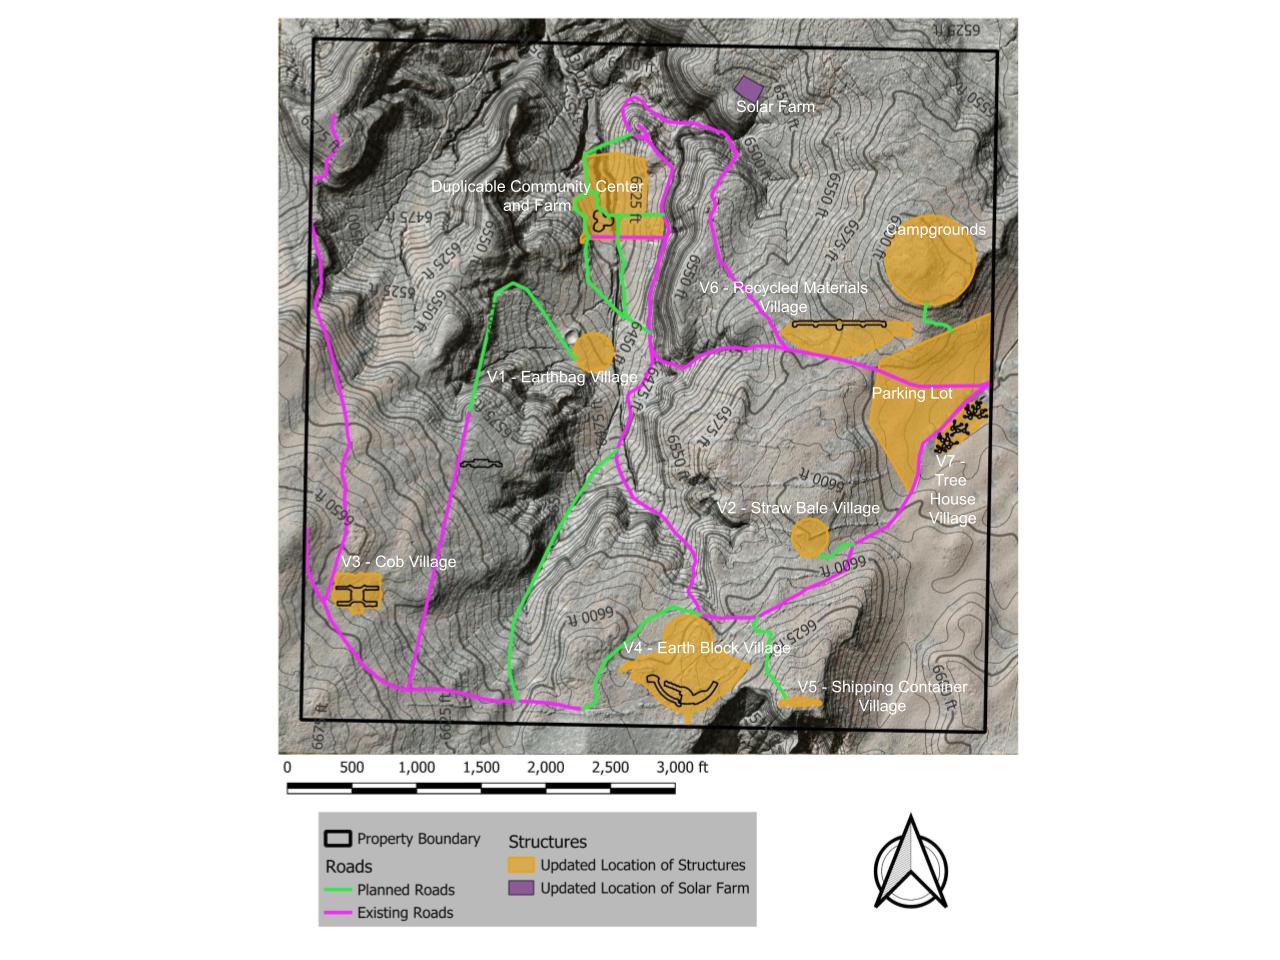
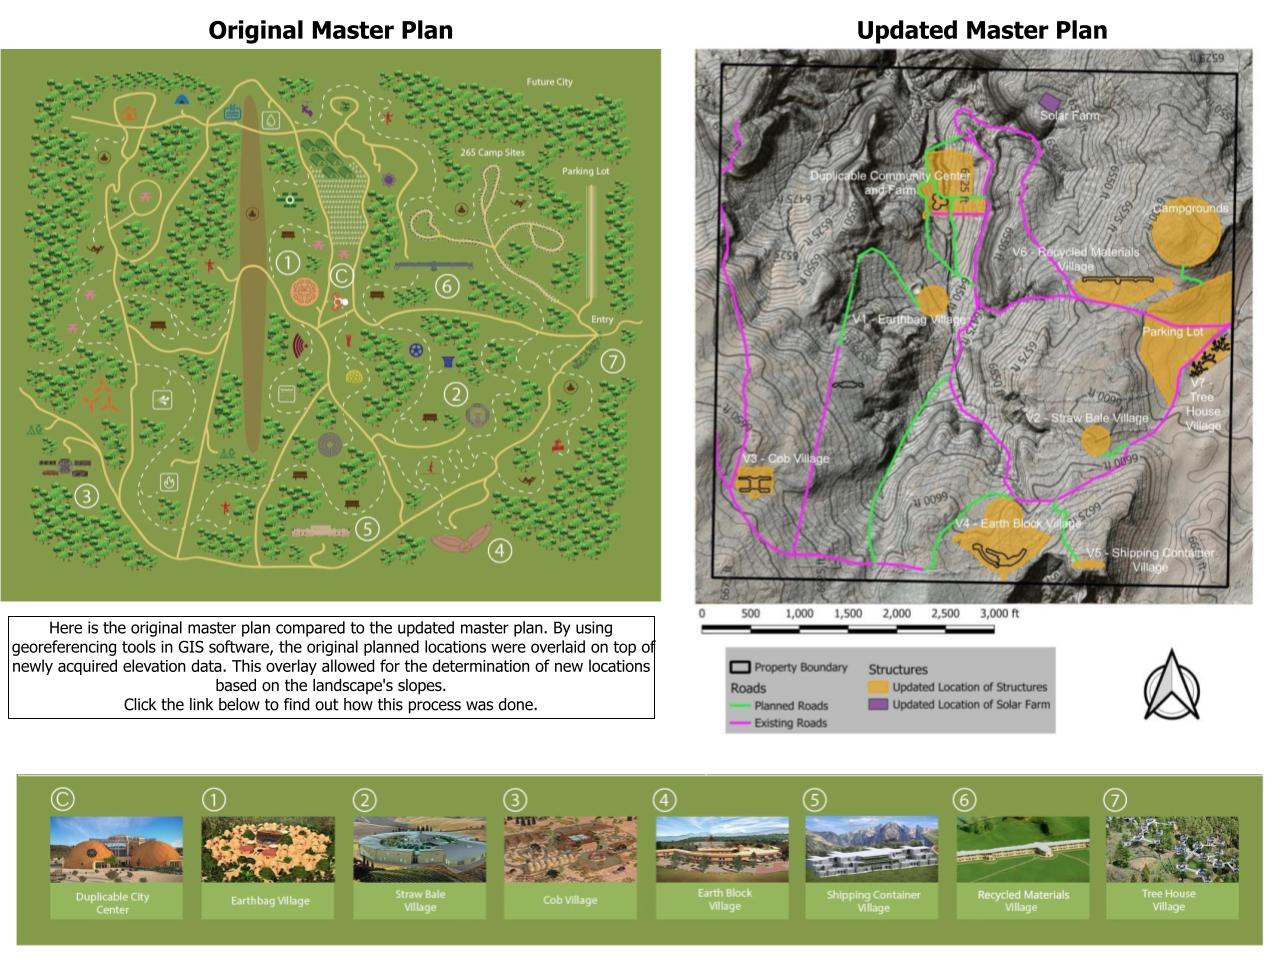
This level of detail showed mistakes and new opportunities in One Community’s masterplan layout of its structures and infrastructure that was based solely on contour maps. Further information on how GIS can be used in permaculture design can be found here: (link to the webpage with GIS content).
Ideally, spend one year observing before implementing your permaculture design. Become intimately familiar with the land that you are working with. Watch and experience the seasons. Walk the property as it rains so you can observe where and how the water flows and collects. During a rainfall is the perfect time to be outside to observe where the water is accumulating. Observe what plants thrive to learn about the soil conditions and microclimates. Walk the area taking notes, making drawings, and mapping. Note the topography, such as the high, low, and flat areas. Get to know the lay of your land in the context of the whole process. As you walk the property, mark up the basemap freely. Record any relevant information on the following topics:
- CLIMATIC FACTORS: Climate includes precipitation, temperature, wind, first/last frosts, and plant hardiness. Climate also includes other forces that move through the site, such as the sun’s rays, floods, fires, pollution, and wildlife.
- GEOGRAPHY: Landform or geography includes catchment area, topography, streams and other water features, it is the lay of the physical lands.
- ASPECT/ORIENTATION: The slope types, and landscape profiles (ridges, valleys).
- WATER: Water sources (creeks, dams, ponds) and flow directions.
- ACCESS: Driveways, footpaths, animal corridors, and farm areas.
- FLORA AND FAUNA: What’s thriving?
- INFRASTRUCTURE: Existing buildings, fences, and other man-made structures, such as water and sewage provisions.
- ENERGY COMPONENTS: technologies and sources (sun, hydro, wind, and/or bio-gas).
- SOCIAL COMPONENTS: People, culture, trade, economics, and legal.
RESEARCH AND ANALYZE OUTSIDE INFLUENCES
Research is key to closing the gap between that which was observable and that which is more efficiently collected using off-site resources, such as books, local experts, and the internet. This is the information age and there is a lot of valuable information out there that can feed into the design process. A helpful guide for this sort of research is provided by William Horvath’s How to Set Up a Permaculture Farm in 9 Steps and his Permaculture Farm Checklist.
The major task during the research phase is to take inventory of outside forces that impact your goals and living situation. This is done through sector analysis and includes understanding the impact of the sun, wind, flooding, fire, pollution and wildlife. The sectors of a property are those elements that are set and difficult to change and/or have control over. Although there is little control over these elements, we can enhance or redirect them. Nature has both beneficial and detrimental forces. Depending on how a given force is interpreted and integrated, it can be the difference between success and failure.
The step to actually consider nature is foundational to permaculture thinking, which promotes working with and within the bounds of nature to create boundless, long-term yield. In working with nature, we protect our investments from detrimental natural forces and enhance our yield by tapping into the infinite energy source offered by nature, which secures the fate of our system and ultimately brings ease and harmony to our landscape and existence.
Collect as much data on the forces that exert the strongest unalterable influences to any action taken on the site. It is easiest to make multiple copies of the base map or, if working digitally, create digital layers. Start with about 12 layers and then label each page/layer as a “sector” to represent the possible factors influencing your site.
The most common sectors included are:
- CLIMATIC FACTORS: Sun, wind (this site is also helpful: wind), precipitation, and temperature variations, including first and last frosts, if applicable.
- GEOGRAPHY: landscape profiles and views worth preserving.
- WATER: Flooding/Draining, flows and directions, and watershed.
- FLORA AND FAUNA: Plant hardiness and Wildlife
- Soil Types: Web Soil Survey
- UNWANTED INFLUENCES: Fire, Noise, Dust, Smells, Crime, Air/Water/Light Pollution
In addition to the resources provided above, a number of online resources are cataloged here that can help you understand your land and the surrounding area better. Here are a couple examples of what a sector map can look like – ours are included in the Case Study Section:

The sector analysis consolidates the effects imparted on the site that the dweller has little to no control over, without substantial input of resources, such as the sun, wind, water, fire, weather, and wildlife. We can either fight against these forces or work with them.
SUN SECTOR EXAMPLE
The most dominant outside force is the sun, so we have provided a more detailed discussion here. Whether to channel or shield the sunlight depends on the component of interest, so it is important to understand sun exposure. Understanding sun sectors becomes more relevant as you move away from the equator and have more dramatic sides of the property. One will be sun facing and hotter and dryer, and one will be pole facing, which will be shaded during winter months. The east side of the property is showered with morning light, thus warming earliest in the day, helping to burn away the frost. The west side receives the strongest sun at the hottest part of the day. Proper orientation in relation to the sun can provide maximum energy or protection, depending on the need of the particular component you are designing.
The sun’s exposure has 2 periods of extreme impact – during the summer and winter. Let’s explore how this works. The earth rotates around an axis and each rotation around that axis is considered a day. The earth’s axis is not perpendicular to the path the earth follows around the sun. Each rotation around the sun is considered a year. Here is a visual of the earth’s daily spin and yearly rotation and another explanation of the earth’s spin and rotation around the sun path can be found here:

During the earth’s rotation around the sun, the tilt of the earth does not change relative to the sun – for a period of a year, the north pole for all practical reasons points in the same direction. Right now, the north pole is pointing at Polaris (or the North Star).

From the perspective of the northern hemisphere, the two extremes occur when: (1) the north pole is facing away from the sun, which marks winter, and (2) when the north pole is facing the sun, which marks summer.

In the northern hemisphere, during the winter when the northern hemisphere has an apparent tilt away from the sun, two physical conditions contribute to the cooler weather – day length and intensity of the sun beam. The sun is hitting the northern hemisphere for fewer hours, as shown below:

And, the total amount of sunlight reaching the northern hemisphere is more dispersed because the sunlight is not hitting the surface of the earth head-on, but at an angle. So the light (or energy from the sun, including heat energy) is spread out over a greater surface area, as shown in the image below:


The sun path (or solar graph) diagrams show arcs and that is how much daylight a given area is getting. This video and this website explains the parallel between the sun chart and what is actually going on physically, along with the image below:

Two common terms used for a sun chart are azimuth, which is where the sun is relative to North and altitude, which is the vertical angle to the sun relative to horizontal, as depicted below:

The sun chart defines important parameters, such as the solar window, which lies between 9 AM and 3 PM and is also bracketed by the summer and winter trajectories – all from the perspective of looking towards the equator – the Earth’s rotational center. The following free sites are available to plot the sun’s path at any given location:
http://suncalc.net/#/45.997,-66.8751,11/2019.09.15/20:23
http://solardat.uoregon.edu/SunChartProgram.html
The University of Oregon site is simple and easy to use. The site outputs a chart like this:

Created for zip code 48317, near Detroit, MI.
A solar heat gain study was completed for One Community’s Tropical Atrium and the design was based on maximizing sun in the winter and minimizing sun in the summer. For this component, the angle of the sun and the apparent path of the sun during different times of the year were applied to capture the sun’s energy during cooler weather and deflect it during warmer weather, keeping the temperature inside the atrium optimal for humans and plants. Additional information is available here.
The following image shows how the windows were placed to harness this natural source of nearly infinite free energy during cooler months and the roof was placed to shield this powerful force during warmer months:

Solar Heat Gain in relation to Azimuth: Click to open the open source Tropical Atrium Temperature and Humidity Control in a new tab
SUMMARY OF CURRENT REALITY
The permaculture design process is a fun, yet long journey that requires a great ability to adapt within dynamic climatic and economic bounds. Organize the information gathered through observation and research and identify the strongest influences. This summarizes your current reality. Develop drawings and bulleted lists of what you have learned about the land to aid in the conceptual and more detailed permaculture design process, as well as answer the question: Are my goals achievable?
STEP 3 – DEVELOP A CONCEPTUAL DESIGN
The next step is to develop your conceptual design. Using all the information and analysis you’ve done to this point, now you can start to actually visualize and outline the specifics of what you want to create. This is just the concept design, the detailed design is step 4.
The observation and research phase resulted in a basemap, sector map, and other relevant information for the design of a system that optimally works with nature to minimize exploitation and human intervention. With this thorough assessment, the components of the property and zones can now be placed appropriately. With permaculture design, we make a deliberate effort to work with nature and its forces. The design journey can vary depending on which methods you choose to use. Several options are discussed in Bill Mollison’s Permaculture: A Designers’ Manual. A few are highlighted below, some of which have already been described and used:
- OBSERVATION: The site’s observable characteristics often reveal the design itself
- OPTION AND DECISIONS ANALYSIS: The design process is a series of decisions based on the options available and the characteristics of each component, and each choice informs the next decision that needs to be made.
- RANDOM ASSEMBLY: A method by which innovative combinations are formed by piecing together seemingly unmatched components. This often results in unexpected positive connections that do not naturally present themselves. This is discussed further below under STEP C.
- FLOW DIAGRAMS OR MIND MAPS: Flow diagrams and mind maps are great ways to organize the design and/or see the connections and the flow of movement around the property. This is especially helpful when thinking about workflow and making daily tasks as easy as possible.
- ZONES: Placement of components based on zones is also a way to make life easier and increase flow. Zones are further described below under STEP B.
- SECTOR ANALYSIS: Placement of components based on the sector analysis makes life easier in the long run because we are following natural order and using it to our advantage rather than struggling for a lifetime to combat the inevitable. The map that resulted from the sector analysis is a layer that can now be used for the conceptual zone map.
- INCREMENTAL DESIGN: This is at the heart of the permaculture lifestyle. The design made on paper is merely the start of the journey. The journey itself is a gradual design process whereby continual adaptations contribute to a system that progresses towards improved efficiency and performance.
- DATA OVERLAY: This type of design uses map layers to best place components within a system, the layers can include topography, sun sectors, wind sector and the such.
Ultimately, no matter which process you go with, allow yourself to be guided by the permaculture principles. A permaculture system is ever-evolving and thriving on observations and trials and an openness to change (both expected and unexpected).
Here is a general 3-step process that combines a number of the above mentioned strategies and can be followed for the development of your conceptual design:
STEP A: MAINFRAME MAPPING
Begin with what Geoff Lawton calls the ‘mainframe.’ The mainframe components are the essential infrastructure, such as: water systems (water storage, harvesting, irrigation), access (farm roads, tracks, paths), and structures (house, outbuildings, portable structures).
During concept design the base map is marked up with the relative placement and rough size and shape of major features and functions. Rough bubble diagrams with notes can also accompany the map. Use your basemap and, in this order, place the following mainframe components:
- WATER: Darren Doherty calls climate “the rules of the game” and William Horvath calls the landform the “board on which you play.” Water is often considered on par with climate and landform, as this element is a prerequisite for life, growth, and surplus. There is substantial effort that goes towards harvesting and retaining water within the system. Water is optimally stored high in the landscape so the water is gravity fed when needed during dry periods. Topographic maps can be used to identify these logical locations. Tap into water sources for storage in this order, when possible: surface stream flows, ponds, rainwater, and underground aquifers. Swales on-contour, like those used with keyline cultivation, are particularly effective at slowly infiltrating the water to hydrate the landscape. The storage can be covered tanks or earthen dams. The first step to designing the water supply system is determining your water needs, which includes water for crops, livestock, and personal needs. One way to determine if your needs are met is to use the rule of thumb that 1 mm of rain on a 1m2 surface is equivalent to 1 L of water.
- ACCESS: The placement of roads and other access components is essential as this is what determines how you move through the property. When the property is easy to move around on, overall maintenance of the property becomes easier and adds to the overall enjoyment of the property. The best location for main roads are on ridges, because they stay dry and are easy to maintain. Other beneficial road locations include along boundaries and near channels. Roads can serve as much more than just access routes, if placed properly – roads are great water harvesting surfaces and fire breaks. Wherever they end up being, assure that the roads are on contour to prevent erosion and pooling of runoff.
- STRUCTURES: All structures should be designed and placed with water, sun, wind, and access in mind. When planning the layout of buildings and structures, it is important to first put effort towards looking after what you already have in place. The next priority is to restore what you can, and then lastly to introduce new components into the system. Buildings should be sheltered from the wind, not overly exposed to the sun, have good solar access, and should ideally be on a slope. Ancillary buildings, such as sheds, are ideally placed higher than residential buildings so they can house water tanks that are gravity-fed to the home.
The idea of working with natural forces is key to permaculture design. Our physical world affords a variety of free, unlimited natural resources, such as the wind and the sun. Working with the sun sector as it pertains to structures is given as an example here. In the northern hemisphere, the sun rises in the east and sets in the west while moving across the southern sky. How high and where the sun appears depends on the time of year and your geographical location. The closer you are to the equator, the higher the sun appears in the sky. Important angles to know for designing a building are the azimuth angle (horizontal angle along the horizon from due south) and altitude angle (vertical angle above the horizon). For example, during the summer in Detroit, MI, the sun does not set due west, but rather 58 degrees from due south. This information is advantageous when building or renovating structures. Because with this knowledge, we can maximize a site’s potential for passive heating and cooling. Good orientation reduces the need for heating and cooling. In the northern hemisphere, this typically means good southern exposure. Designing to let the sunshine in when needed (in winter) and keeping sunshine out in the summer, regulates the inside temperature naturally. Passive solar temperature control allows a house to heat and cool on its own. Passive solar is low tech and does not rely on mechanical devices, like HVAC systems that use fans, pumps, and electrical components. Controlling solar energy, both light and heat, reduces our reliance on fossil fuels.
There are a number of ways to utilize solar energy:
- DIRECT GAIN: Heating or cooling directly through solar gain or shadows, like what happens through a window with a sun shine or when an awning shades a window from the sun. The space is heated and lit when solar energy (radiation) passes through the window.
- INDIRECT GAIN: Heating or cooling indirectly through conduction of a thermal mass, like an outside wall that is heated and that heat is transferred into the home. The wall acts as a thermal mass that absorbs, stores, and distributes energy at a slow rate, which can help to regulate and control the temperature within a given space.
- ISOLATED INDIRECT GAIN: Heating or cooling an adjacent space then relying on convection to transfer the temperature, like a sunroom.
All passive solar designs use controls, such as insulation, overhangs, or vegetation, to control the way heat and light enters a space. This is happening by way of bouncing, filtering, and regulating solar energies.
Once water, access, and structures are positioned, the placement of other components becomes more apparent.
STEP B: ZONES
Zones are an interesting concept that implements a common phenomenon, namely that humans maintain what is closest in proximity. Zones are a guide for the placement of components based on how much human input is necessary. Here is a simplified zone map, although shown as concentric circles here, in actuality the zones end up being different shapes (greatly based on the sector maps) and sometimes with disconnected areas:
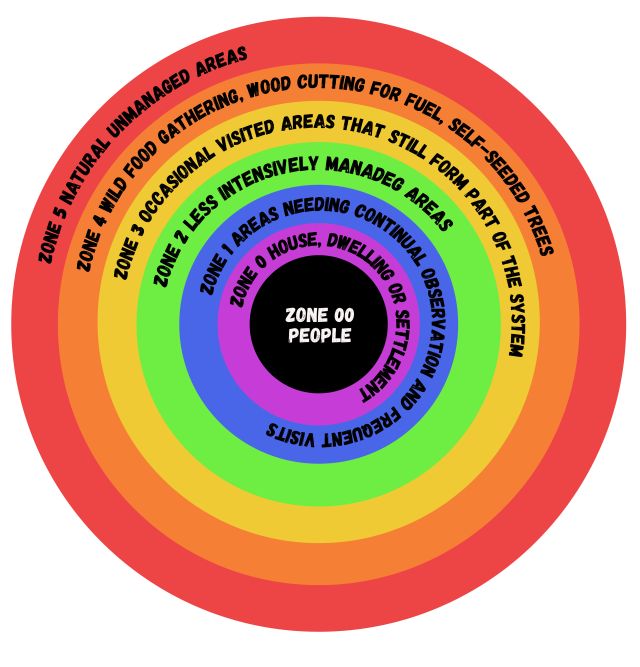 The final product of the concept design needs to include a map that delineates your zones and sectors. The delineation of zones organizes the space based on how often it needs to be accessed or needs attention. Sectors delineate and define how outside forces impact our site. Zones and sectors allow us to create a design that meets our needs, as well as works with the sways of nature. In order to do this you have to have a central point, and this point is your dwelling. If your dwelling does not exist yet, you may try multiple locations and create multiple maps with zones and sectors for the different dwelling location options. So this point is a great time to identify and work with all your zones.
Your zone map should be a layer on the map that provides some guidance as to the placement of components, reminding you to keep the work-intensive components near your dwelling. The easier it is to access the things that need the most attention, the greater chance that they will be properly maintained. So the most energy intensive components are placed near the dwelling, which is the central point and diminishing energy needs radiate out, with the most unmanaged areas on the outskirts of the property and furthest from the dwelling.
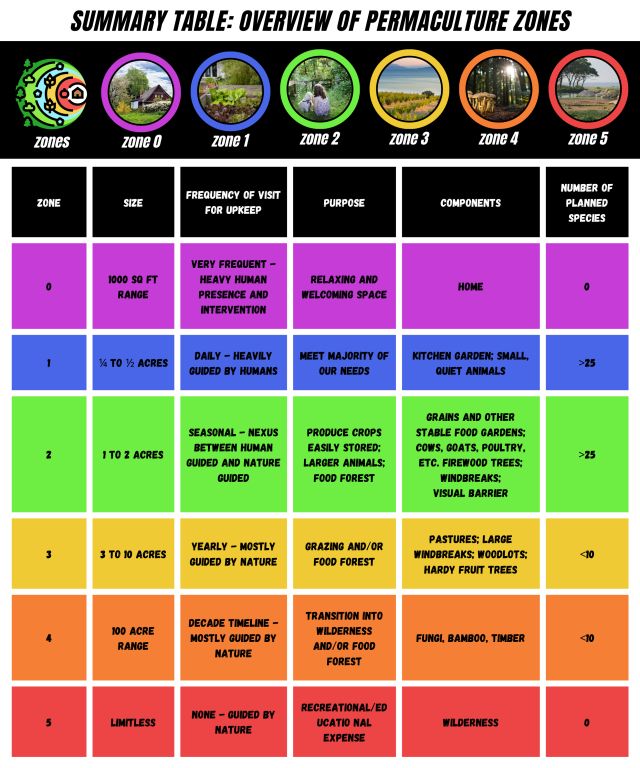
Here are some details on each zone in bulleted form, as well as a summary table:
- ZONE 0: Zone 0 is where the design starts. This is our home, where we spend the majority of our time. The home is ideally built with local resources and designed in a way that the sun and wind serve as natural climate controls, so outside energy input is unnecessary to maintain comfortable indoor temperatures. Also, the home is designed to catch and store water to meet household needs. The waste cycle is a closed loop, generating only the waste that the property can handle. Zone 0 is the smallest sector, typically made up of a relaxing and welcoming home.
- ZONE 1: Zone 1 is the high-traffic zone surrounding the home. After the home, this area is the most accessed with the most human input imparted – requiring daily attention. This area supplies the majority of our needs – this is where kitchen crops are grown and quiet animals are reared, such as fish, rabbits and compost worms. The success of this zone is guided by humans. This zone is designed for diversity (25+ planned species) and dense productivity (high produce growth per square foot). For a small family, Zone 1 is typically ¼ to ½ acre in size.
- ZONE 2: Zone 2 surrounds Zone 1 and is the nexus between human intervention and allowing natural processes to flourish without exploitation – requiring seasonal attention. This zone is for components like your crops that can be stored easily and eaten throughout the year, noisier animals such as poultry, milking cows, and goats, as well as trees for firewood harvesting, windbreaks, and visual barriers. This would be your first place to plant a food forest also, which could also be extended into other zones. Like Zone 1, this zone is also designed for diverse species (25+ planned species). The size is typically 1 to 2 acres.
- ZONE 3: Zone 3 is the grazing zone and increasingly guided by nature, with little human intervention – often requiring only yearly attention/intervention. The components are much larger, comprised of pastures, large windbreaks, woodlots, hardy fruit trees and additional food forests. This zone is designed for a limited number of market species (10 or less) and is substantially larger, 3 to 10 acres.
- ZONE 4: Zone 4 is a wild forest that supports fungi, bamboo, and timber. This zone is also designed for a limited number of market species (10 or less) and requires little attention – occasional pruning and harvesting on a decade timeline. This zone is on the order of 100 acres.
- ZONE 5: Zone 5 is wilderness that is maintenance-free and serves as a recreational and educational area to learn from nature and the ways in which nature is utilizing the climate and the setting in which we are living.
STEP C: COMPONENTS
List the components that already exist and the components that you wish to have within your property. Include everything on the property – all buildings, all animals, roads, energy, water, skills, and other land uses. A small farm will have these components: a house, barn, greenhouse and chicken coop. Other components could include cows, sheep, goats, rabbits, gardens, pastures, food forests, wood for fuel, roads, water systems, as well as conceptual components such as labor, finance, skills and market.
Here is an extensive list of common components developed by Geoff Lawton (your site may have additional components based your unique needs and your property’s unique potential):
- Water
- Irrigation water
- Drinking water
- Access
- Roads, footpaths, etc
- Crossing pipes over water systems (swales and spillways)
- Structures
- Houses
- Plant houses
- Ponds
- Fences
- Boundary
- Animals
- Crop Gardens
- Kitchen gardens
- Main crops
- Plants / Trees
- Planting guilds
- Species: Perennial, Annual
- Waste Systems
- Waste water
- Recycling
- Utilities
- Grease traps
- Composting
- Worm farms
- Reed beds
- Aquatic Systems
- Plants
- Animals
- Fungi Systems
- Tools and Machinery
- Energy Components
- Animal Systems
- Small animals
- Large animals
ANY OTHER DESIGN COMPONENTS:
Another approach for developing the list of components is using the Scale of Permanence, originally coined by P.A. Yeomans, an agricultural designer. In the original list by Yeomans, there are 8 factors needing consideration, which are listed in the order of their permanence – a combination of how much effort it takes to change it and how long it functions without changing.
Since its introduction, the list has been adapted and altered, but Yeomans list remains relevant and includes the following, in order of greatest permanence to least permanent.
- Climate
- Landshape
- Water
- Roads/Access
- Trees
- Structures
- Subdivision/Fences
- Soil
This graphic is a helpful learning tool:
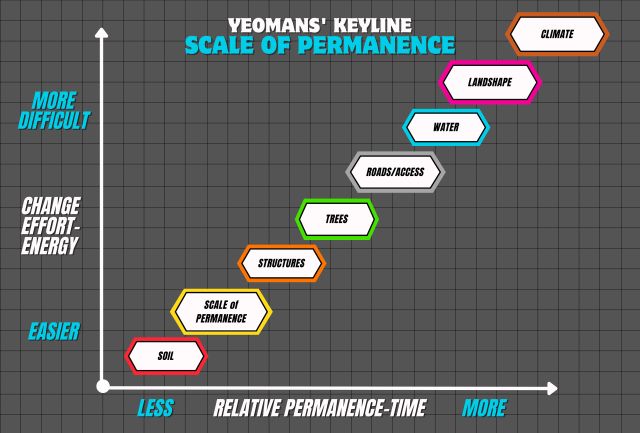
We think the Scale of Permanence is helpful because it guides you to work with the most permanent (fixed, unchangeable, or requires significant energy input to change) components of your land first, so the more flexible components are best fit within that context and within the constraints and latitudes. This is on par with the principle of Design From Patterns to Details. In its simplest terms the Scale of Permanence and the principle Design From Patterns to Details are proclaiming the importance of working with and learning from nature, because nature has the final say for the long-term survival of any endeavor.
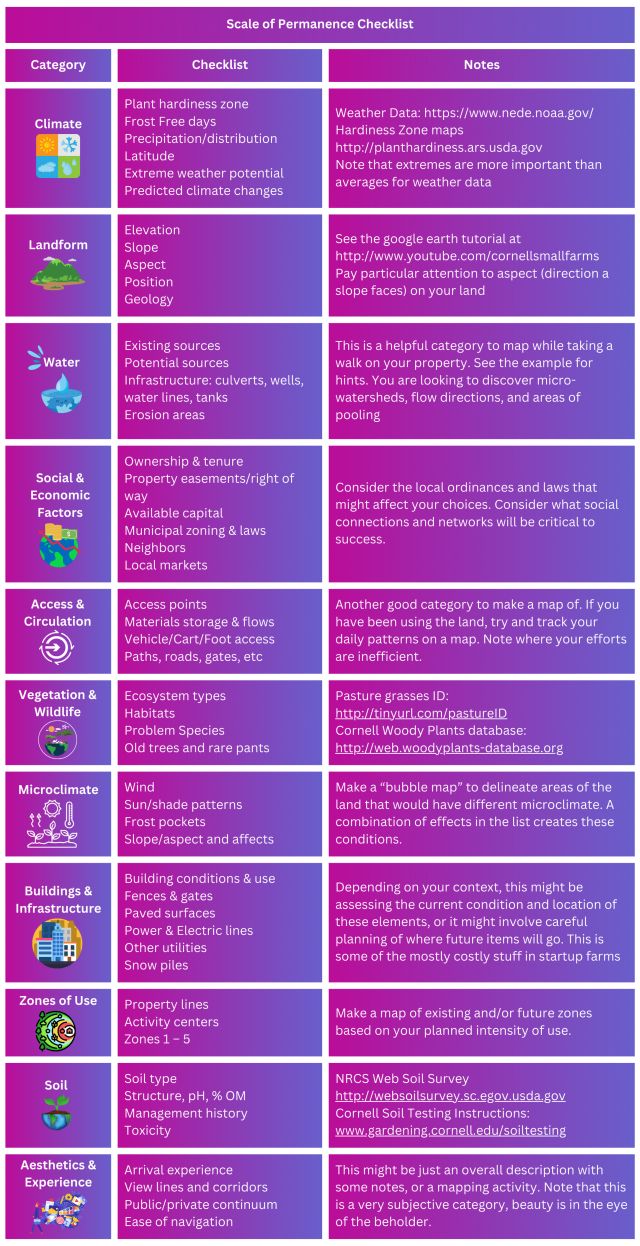
A revamped list was developed by permaculturists Dave Jacke and Eric Toensmeier that incorporates both the ideas of the Yeoman’s keyline design, as well as permaculture design:
- Climate
- Landform
- Water
- Social and Economic factors
- Access and Circulation
- Vegetation and Wildlife
- Microclimate
- Buildings and Infrastructure
- Zone of Use
- Soil
- Aesthetics and Experience
The following table by Tara Hammonds summarized each of these components:
Once you have all your components listed, start thinking about how they are all connected and/or could be connected. Think about the energy inputs and outputs of each one and how the energy transfers between them.
Energy is transformed or transferred from one system to another and this transfer/transformation process is not 100% efficient. This causes an increase in entropy or messiness. At the top of a mountain there is highly dense energy, but little life, whereas in the lowlands, especially around estuaries, there is high life energy and low potential energy. The goal of permaculture is to extend and spread the life of a system, which means slowing down and spreading out entropic loss to gain a life advantage – transferring trapped energy from one component to the next as many times as possible before the energy is transformed into a form that no longer serves the system as a whole.
Overall, we are aiming for growth and yield from a system that starts out needing substantial maintenance and then gradually transforms to a system that just needs to be managed. To achieve this objective, it is important to use nature as your directive and the core resources offered by nature – sun, wind, rain, air, beauty, and the landscape itself. An annual garden takes a lot of energy input, but the remainder of the permaculture design is nearly self-managed based on implementing lessons from nature and maximizing the energy stored in the system.
When designing, think about how you can link the different components within your complex living system. Integrate chickens for pest management and organic fertilizer, more than just meat and egg production. Collaborating with cows for regenerative soil building through rotational grazing, generating milk and beef production as a byproduct. Mimicking the natural processes within nature in conjunction with animals will create a cooperation to reconstruct our ecosystems, rebuild the soil, and regenerate our land. Aim for diverse productivity that is self-regulating and not exploitative. Interconnectedness brings stability by making it so the breakdown of one component doesn’t mean a complete failure because there is backup and support. Connected systems built on diversity generate abundance, collective benefits, creative co-creation that develops nurturing and regenerative cultures. Separated systems create outputs of depletion, competition, scarcity, culture-nature spilt, and homogenization. This encourages exploitative and degenerative cultures. Interconnected permaculture systems reside on the nexus of order and chaos – we promote wild forests that do not require our input to thrive while also maintaining organized vegetable gardens that require our input to even exist. The true goal is to strike a balance on the land that results in a self-replicating and self-regulating system with minimal human intervention and labor.
During this process, consider the needs and inputs of each component and consider assembling components so they serve each other. The more you do this the more you will see components supplying the needs and utilizing the outputs of each other. Establishing strong connections between components minimizes our work and leads to a more stable and supported system. Take the time to describe the attributes you seek for each component and how they can support each other. Make sure each component in the design is getting its needs provided by other components that are also part of the overall design, so each component serves and nurtures other components within the overall design.
RANDOM ASSEMBLY
Once you’ve considered zones, permanence, and made your lists and drawn as many connections as you think you can, Random Assembly can be a fun way to guide you to think outside the box and consider links and interactions between unseemingly paired design components. Begin by rewriting all the components that need to be placed on your land on individual cards. Examples would be vegetable garden, ducks, ponds, access path, shed, drain pipe, dam, and greenhouse. Write each one of these on a note card and place them face down.
Now write six linking words on a different colored note card. Use prepositions like these:
- Above
- Under
- On
- In
- Between
- Beside
- Far from
- Attached to
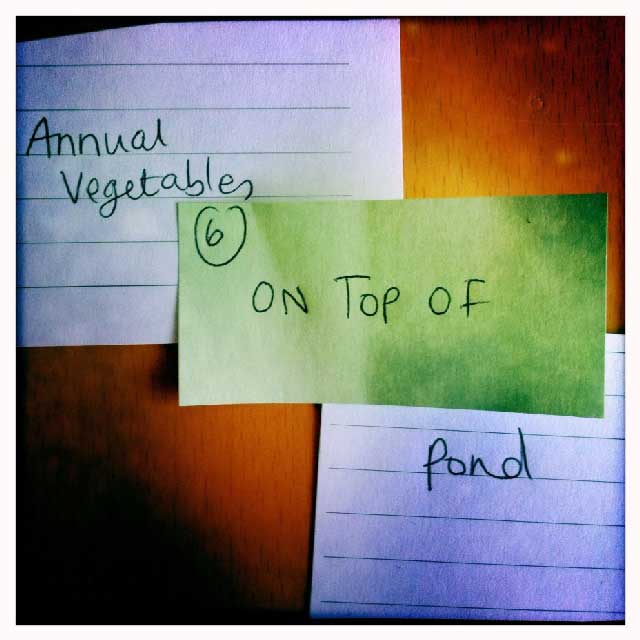
Next, pick two components at random and one linking word to place between them and see what comes up. At right is a photo of how it can look.
Have fun with the process. Give each combination a chance and take note of each combination and whether it is positive, negative or interesting. Explore what you have learned through this process by asking yourself these questions:
- Would any of these new ideas work?
- Should these ideas be incorporated during the Detailed Design step?
- Did any of these connections teach me something I might want to avoid?
- Did I come up with any new components that I may have forgotten?
- Save what you learned here for the next step, Developing A Detailed Design.
SUMMARY
As the conceptual design comes to fruition, we want to assure that we have accumulated all the relevant information that is available at this stage of the process. These can include things like having a general understanding of the property and how our choices may impact the other aspects of how the property functions, as well as the property’s potential. At this point, it is also important to be aware of any limitations and challenges present, this should include things such as fire, frost, pests, etc. Along with these challenges, come resources and unique beneficial aspects of the property in the form of plants, skills, and landscape. This thorough scouring, scrutiny, and assessment of the information available, leads to a design that is a robust starting place for small trials and performance-based feedback that ultimately leads to a sustainable overall system.
STEP 4 – DEVELOP A DETAILED DESIGN
Developing a detailed design is the final step. This is where you design the details of what you’ll actually do. This last step is done on paper and is the culmination of the entire process described up to here. This step can be a real rabbit hole because each component could have a whole website about it. As you put this section together, use all the resources you have available to you (people, books, online, etc.) to understand the intricacies of each component you are planning to include.
The primary book used by most during the actual details of the design of each component is Bill Mollison’s Permaculture: A Designer’s Manual. Other books recommended online include: Regrarians Handbook by Darren J. Doherty, The Bio-Integrated Farm by Shawn Jadrnicek, and A Pattern Language by Christopher Alexander. There are also many excellent online resources. Take the time you need to find the resources that are best suited for your situation and your learning style. Be quick to post on forums and reach out to the community that has practical applied experience. These are the resources that we found especially helpful during the development of this tutorial:
- Permaculture Apprentice Resource Page
- Setting up a Permaculture Farm Checklist PDF
- A Resource Book for Permaculture – Solutions for Sustainable Lifestyles PDF
- How to Set Up a Permaculture Farm in 9 Steps
- The Ultimate Guide to Starting a Profitable Permaculture Farm
Along with the above mentioned resources, here is a list of potentially valuable or interesting links (from a quick internet search) for designing the details of each component:
- Water
- Access
- Structures
- Living Fences
- Crop Gardens
- Perennial
- Fruit Tree Guild
- Planting Guilds
- Food Forest
- Nursery
- Soil
- Monetary Profits
- Animals/Animals
- Chickens
- Aquatic systems
- Fungi Systems
- Tools and Machinery
- Waste systems
- Waste water
- Energy
For each component, complete the following chart to summarize the thinking behind it (Swales and Chicken have been completed as examples):
Now that you’ve got all the information you need, create your detailed design. The detailed design is a collection of drawings and images that provide sufficient details for the actual implementation of your ideas. Start by placing tracing paper over the base map and experiment with the placement of the things you want. Draw at least 4 different potential designs that detail actual size, shape, and placement of each component, all the while maximizing the positive connections between components. Allow your mind to wander, be creative, and work without bounds. Keep the permaculture ethics and principles in the forefront and allow them to guide you and check back frequently with the results from the random assembly exercise and your research.
Out of the potential designs you develop, pick out the one that is most practical, efficient, and low-maintenance and you are ready for Step 5 – Implementation and Evaluation.
STEP 5 – IMPLEMENTATION & EVALUATION
The implementation phase is when the design is installed. The pace at which this happens depends on your unique situation and personal, environmental, technical, seasonal, and financial factors. This stage has a smoother rollout if you make a plan of action you can follow. The plan details the logical order of execution – basically a ‘to do’ list with a basic timeline that covers the first three years. The logical order for implementation is to (1) look after what you have; (2) restore what you can; and lastly (3) introduce new elements.
An overall approach can look like this:
- Fencing: An effective way to subdivide the property is to follow the transitions made by the more permanent infrastructure. The main fenceline often ends up closely following roads, enclosing animals, and planting areas. The zones can also guide the placement of fences. Flexible and mobile fences can be especially beneficial for areas enclosing animals as part of the regenerative process.
- Soil is low on the permanence list, because depleted or unhealthy soil can recover quickly – 2 healthy inches of soil can be converted every year. Soil is however the backbone of the system and warrants immediate attention to building the soil. This will contribute to securing a successful first round of planting. Soil is an excellent indicator of success. Several simple methods can be selected to improve soil fertility, such as keyline ploughing, cover cropping, mulching, erosion control, biofertilizer and compost tea amendments. Giving the soil life is the best thing you can do to propagate life. Be creative and allow yourself to learn from nature. Continue to amend the soil and allow the richness to penetrate deep into the soil. A great guide to building deep rich soil is available here.
- Planting begins after securing water and building the soil, as well as having easy access to the areas that will become savannahs, orchards, woodlots, farm forests, pastures, or gardens. An important component to planting is having the areas well protected from the wind. It may also be wise to focus first on income related activities, such as establishing pastures and annual crops, to have a speedy return on your investment. Guidelines for planting trees in a typical keyline fashion are available here or here. A step-by-step guide to establishing a food forest is available here.
- Vegetable plants generally need full sun (6-8 hours per day) throughout the growing season, with a few vegetables needing partial sun (4-6 hours per day). Track shadows for the beginning of each season, generally the 3rd week of March, June, September, and December. These times are when the sun is at its most extreme position for each season. Observe the shadows every three hours, at 9 am, 12 pm, and 3 pm. Using a different colored pencil for each time, shade in the shadows. The white space remaining are the areas that receive at least 6 hours of sun per day.
- Animals are essential to the permaculture system and integrate well with crops. Animals are best introduced after tree seedlings have been established. Pigs and chickens are good starter animals, because they are easy to care for and have quick turnaround when it comes to cash flow. Temporary fencing can be used to protect young plants and can also be helpful to concentrate the animals in an area that needs a fertilization boost.
- Larger animals can be introduced later to further increase fertility using planned grazing. The symbiotic relationship of properly maintained livestock and living soil contributes to the continuous transformation of subsoil into topsoil.
After implementation, there are no exact rules or laws. Think of it instead as a process of learning from errors and operating at the edge of the unknown. Make choices that extend the life of components, this naturally balances any pollution/waste that went into creating them. Continue to apply permaculture ethics and principles to every choice you make and listen to the directives of the natural system. Ultimately, be content with the search itself. This and your ongoing observations will reveal what is most beneficial for your system.
OPEN SOURCE FINAL DETAILED PERMACULTURE DESIGN (CASE STUDY)
This section is a working example of the process described above. The team is actively designing for a potential site and the work completed up to this point is presented below. We will continue to add to this section as this work evolves, we begin to build, and more content, imagery, and video becomes available.
CASE STUDY STEP 0 – FAMILIARIZE YOURSELF WITH THE ROOTS OF THE PERMACULTURE PROCESS
We started the process by writing the 3 foundational ethics and 12 guiding principles on index cards to have this information readily available – as pictured below:

CASE STUDY STEP 1 – IDENTIFY NEEDS AND ASSESS RESOURCES
The team’s objective is to provide a pristine working example of sustainable living to promote proof of concept replicable by others in any environment across the globe. The team’s primary criteria when it came to selecting the property to implement this endeavor are:
- World-class beauty with an abundance of trees and wildlife
- Sufficient sunlight for 100% solar power off-grid energy system
- Sufficient water supply for our agricultural and long-term expansion goals
- Zoned and sized to allow us to eventually incorporate as our own municipality
- Convenient major airport access for national and international travelers visiting us
- Remote enough to provide all the beauty and benefits of a “getaway” vacation experience
- Weather conducive to our aquaponics plans, establishing a food forest, as well as tourism
- Relatively easy access to supplies, materials, and medical services if needed for emergencies
- Sufficient tourism traffic to support our eco-tourism model through local overflow alone if needed
- Existing infrastructure to house the Pioneer Team while we build prototype Village 1 and Village 2
- Existing beauty which is marketable to people immediately versus requiring years of development
- County excited to support and help develop One Community as a model for counties everywhere
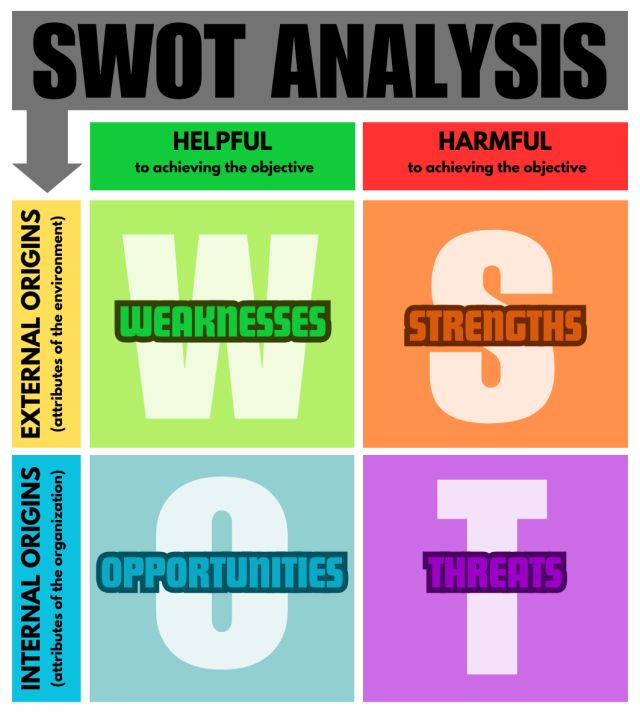
Here is One Community’s SWOT (Strengths, Weaknesses, Opportunities, and Threats) analysis to determine if there is a strategic fit. A strategic fit is when the internal environment of the team and its efforts matches the external environmental factors. The SWOT analysis results are presented in the table below, along with the team’s objective and strategies.
OPPORTUNITY – STRENGTH STRATEGIES (use strengths to take advantage of opportunities)
- With rising awareness and forecasted demands, One Community is ready for this shift and positioned to be the go-to source for customers in search of sustainability services when demand reaches its critical point.
- Provide a unique immersion experience that is attractive, convenient, fulfilling, sustainable and replicable, while retaining and enlisting high-quality volunteers and maintaining low operational costs.
OPPORTUNITY – WEAKNESS STRATEGIES (overcome weaknesses by taking advantage of opportunities)
- Obtain funding for a startup using a well-thought-out, high-quality plan that plays to increased awareness.
- With the model of sustainability being unfamiliar, all efforts will be shared openly and simply, giving care to making it accessible and replicable to all skill levels using multiple formats.
- Volunteers will be leveraged to close the gap for missing critical skill sets by building relationships and publicizing their work. Additionally, contingency funds will be set aside to hire experts.
THREAT – STRENGTH STRATEGIES (use strengths to avoid threats)
- Gain and maintain momentum of the new concept by identifying, marketing, and reaching an audience ready to embrace and promote this endeavor.
- Develop in-depth risk management plans to avoid political, economic, and religious conflicts, along with robust response strategies to mitigate conflicts.
- The impact of natural disasters is being addressed in four ways: location, construction method, permaculture design, and emergency planning. The location we’ve chosen is not prone to hurricanes, tornadoes, earthquakes, or drought. Our sustainable housing is more disaster resistant than traditional housing and our flooding plan is designed for a storm that should only occur once every 1000 years. We also have a fire plan designed by an experienced forest fire fighter. Permaculture design will further increase groundwater supply and drought and fire resistance. An emergency evacuation plan will also be in place.
THREAT – WEAKNESS STRATEGIES (minimize weaknesses and avoid threats)
- Both threats and weaknesses are being mitigated using sound judgement and thorough research and the use of experts, when applicable.
Based on the SWOT analysis, the team’s efforts is a strategic fit. The efforts of the team fill a necessary niche that ultimately will receive support because it is this very effort that will keep the human race thriving. There are challenges, and with awareness and thorough planning, these challenges will be overcome.
CASE STUDY STEP 2 – ASSESS SITE THROUGH OBSERVATION AND RESEARCH
The following basemap was developed after the property was visited a few times. This basemap includes topography and all existing elements, such as an orchard, roads, buildings, and areas where water appears to be accumulating.
A common recommendation by permaculture experts is to live on the property for an entire year solely for the purposes of observation. We have a unique situation, where many people will be residing on the property within months of purchasing the property. This volume of people requires us to get essential infrastructure/elements in place. With essentials in place, the team can concurrently observe and use these observations to make major decisions outside of the essential ones needed to get started and support residents. A substantial amount of thought and research has gone into and continues to go into the envisioned design – 1000s of volunteer labor hours over the last 10+ years. A rollout plan is being developed for the following infrastructure needed for a living model of sustainable and globally-regenerative communities:
Each infrastructure category will be implemented in a 7-phase rollout:
- Phase 0 – Due Diligence
- Phase 1 – Initial Survey
- Phase 2 – Landing Party
- Phase 3 – Long-Term Infrastructure
- Phase 4 – Continued Construction
- Phase 5 – World Invited
- Phase 6 – Expansion Beyond the First 5 Years
The rollout plans for each infrastructure area mentioned above will begin with an initial survey team of 3 people and progress to 400+ people. In consideration of Permaculture Principle 1 (Observe and Interact) and this step (observe and research), the team has dedicated the first three phases (Phases 0, 1, and 2) to site survey, as well as establishing minimum requirements for self-sufficiency on the property as efforts are ramped up and culminated to apply the design developed. Throughout this process, the team will consciously observe, interact, and research – learning from our environment and experiences. We will be aware of how effective the different options and new strategies and technologies are fulfilling the team’s goals. We will also gain a better understanding of our specific needs and continue to support and live in a manner that is supportive, replaceable, attractive, and fulfilling – draw connections and continue to improve our existence by evaluating, applying necessary changes, reassessing, and adapting.
Phase 0 is transpiring right now – the property has not been purchased yet and will be purchased after an initial soil test, water test, and overall property analysis is complete as a part of the Pioneer team’s due diligence. Also happening during Phase 0 is the development of blueprints, tools, tutorials, and as many resources as possible to streamline, simplify, and specifically forward the duplication of all components of One Community.
Phase 1 puts much of the research and design completed during the Phase 0 into action. This phase is about 1 month long and will be completed by a 3-person team. This Initial Survey Team will move to the property to survey the land and begin food infrastructure preparation, finalize development plans, and create the “pre-infrastructure” that needs to exist to support the implementation of Phase 2.
The Phase 2 will last 2 to 3 months and will include up to 20 people. The ‘landing party’ will be composed of primarily pioneers and a few volunteers possessing specialized skills who will collectively review and confirm the assessments of the initial three and then begin building. The goal of this team will be to complete their site survey, identify the locations of all planned construction, begin work on the infrastructure, and complete and gain approval for all the initial building plans.
Phase 3 will last 3 to 6 months and will include a team now of up to 50 people. The remainder of the pioneer team will move onto the property. The goal will be to begin establishing the long-term infrastructure and to get the initial components in full swing.
Phase 4 is expected to last 6+ months and will include up to 100 people. The residents will be actively contributing to the construction and vision developed during the Due Diligence (Phase 0). At this point construction will be in full swing and the additional people during this phase will allow the progress to transpire at an accelerated pace. This phase will also include experimental work that is necessary to bridge the gap between the team’s vision and information that was not readily accessible or unknown during Due Diligence (Phase 0).
Phase 5 covers years 1 to 5 after purchasing the property and will comprise up to 400 people. During this phase the team will continue with construction of the key structures and to become the largest provider of open source and free-shared sustainability information in the world.
The team has engaged in Geoff Lawton’s online Permaculture Design Course (PDC), through which the following work was completed to inventory the property’s initial conditions and influencing outside forces:
- SIZE/ORIENTATION: 1 square mile and oriented north to south.
- SLOPES: Combination of mostly gently sloped areas (about 50% of the property), flat areas (about 30%), moderately steep areas (10%), and several very steep areas – the steepest being about 100 ft higher than the surrounding area and with slopes as steep as about 70 degrees. The resultant landscape profile is flat lands, hills, and rocks.
- ELEVATION: Highest point is at elevation 6673 ft in the southwest corner and 6400 ft in the northwest interior.
Water: Springs, ponds, and seasonal streams. - FLORA AND FAUNA: Old growth forest, weeds, shrubs, and grassland, as well as native (rabbits, squirrels, deer, coyotes, and possibly voles, rats, mice, raccoons, marmots, gophers, and rattlesnakes) and domestic animals.
- ACCESS: Dirt roads and footpaths provide access to the majority of the property, but need improvement to meet our commercial goals.
- EXTREME WEATHER: Potential events include drought, flood, fire, and frost
- NEGATIVE INPUTS: None
- AESTHETICS: Positive views
- SOIL: Sandy loam, sand, and silt; Generally drains from South to North across the site; Erosion is more of a concern than compaction
- INFRASTRUCTURE: House, shed, 1,400 SF hogan that functions as a meeting and dining space, pipes, fences, ponds, and dams. Current structures are not sufficient for the planned population and not located appropriately for intelligent permaculture design. Old structures will function as temporary housing while new structures are built and rental housing and recreation space once new structures are completed.
- ENERGY: Propane for heat and generator for electricity.
- SUN: Midwinter sun angle at midday is 30 degrees and midsummer sun angle at midday is 70 degrees.
- WIND: From 7.8 months of the year, from February 13 to October 7, most often from the west and the remainder of the year, for 4.2 months from October 7 to February 13, most often from the east. The windier part of the year lasts for 4.8 months, from February 9 to July 3, with average wind speeds of more than 8.3 miles per hour. The windiest day of the year is April 11, with an average hourly wind speed of 9.8 miles per hour. The calmer time of year lasts for 7.2 months, from July 3 to February 9. The calmest day of the year is August 14, with an average hourly wind speed of 6.7 miles per hour.
- RAIN: Rainy period of the year lasts for 9.3 months, from July 4 to April 12, with an annual rainfall of 15-20 inches. Most of the rain falls during the 31 days centered around August 17, with an average total accumulation of 1.1 inches (vs. the usual monthly Summer to Spring average of 0.5 inches. Rain hits the property from the West for the first 3 months of the rainy season (July thro ugh September) and then from the East for the middle months of the rainy season (October through mid-February) and then again from the West again for the end of the rainy season (mid-February to mid-April).
- MICROCLIMATES: The spit of land that travels from South to North through the left third of the property creates microclimates for about 100 yards on both sides of it. Based on winds, this will mean a milder climate along the lower east side of this (where we’ll be building first) from February through October.
Based on the data available, the following sector map was developed:
Zone planning was also completed as a part of the certification process. Our zones are defined relative to the Duplicable City Center because this is the primary activity center as well as where all the food is stored, processed, and prepared. Placement of the City Center was based on property topography and water flow, existing access roads, and the orchard. Zones were then developed around this structure to 1) maximize efficiency by developing close to the commercial kitchen and food storage areas and 2) maintain the views desired from the living and social/recreation spaces. Window design and building orientation were created with maximization of passive heating and cooling as the goal.
The City Center is Zone 0. Zone 1 consists of the areas directly around the City Center structure, which includes the kitchen, herb garden, composting area, a natural swimming pool, and attractive views. Zone 2 consists of the vegetable garden, indoor and outdoor nursery area, goat barn and goat yard, chicken coop, and rabbitry. Zone 3 consists of the hoop houses, the existing orchard, and grazing zones. Zone 4 consists of an apiary, swales, possibly gabions, ponds, and food forests. Zone 5 is all wilderness, with the potential to develop into more food forests. Preliminary zones are delineated on the map below:
OBSERVATION AND RESEARCH BY COMPONENT
This section is under development and will not be fully completed until we are on the property. As previously mentioned, the potential One Community property has been located, but awaits being purchased and inhabited by our team. Needing to still procure the property has not stood in the way of developing solutions that align with Permaculture Ethics and Principles. One Community has deliberately completed infrastructure design work that is independent of location, so the One Community model may be replicated by others. The element of observation and research will carry through all phases of this application. Through conscious and continued observation and research, the process is more likely to develop into something lasting and contribute to lifestyle acumen. Although substantial thought has gone into the design of the systems needed to build, sustain, and flourish One Community, there is a lot to learn on the ground. These lessons that will be learned along the way will guide the adaptations necessary to continuously strive for something more sensical and attractive. This very process is what will make each community that is implemented, unique, even though they were developed using the same blueprint used by One Community. Provided herein is information collected during two site visits and years of quality research that has been completed by expert volunteers.
These influences, all the permaculture ethics and principles, and the specific goal of “Observation and Research” will be applied through each of the foundational components of One Community’s infrastructure. The specifics of the rollouts are being developed and detailed on the respective open source hubs:
For its educational value, and our own clarity, here is a big-picture summary of how the Observation and Research aspect of each of these will be applied during each phase for each of these components. Also, a phased rollout of each infrastructure component is provided here with general milestones in order of occurrence for this program. Exact milestones will become more clear once construction is underway and the subsequent projects flesh out the schedule.
FOOD
Food is the common thread that connects all living things, encompassing water, as well as nutrition. The very supply of food and water depends on how we treat the land. As the property is now, there are two kitchens, one in each of the two existing residential spaces. Additionally, there are three existing spring wells that can serve the property. There is infrastructure bringing water to the two existing residential spaces. The design area is located in the high country and water appears to flow away from the property. There appears to be ample water on the property via 2 ponds and 3 springs. The property is located in USDA growing Zone 7a, where the coldest winter temperatures dip to between 0 to 5 deg F. Zone 7 areas have moderately long growing seasons, typically lasting 8 months. The first frost is around November 15th and the last frost around April 15th.
The apparent ample water resources and a reasonable growing season supports One Community’s purpose of demonstrating the process of going from nothing to an entirely self-sufficient community. The following mind map shows ongoing research and design occurring during Phase 0 and what the Highest Good Food infrastructure provides its residents while concurrently respecting earth ecology.
The rest of the phased rollout process is summarized in the Phased Rollout Table below. As shown, phases 1 to 4 will take approximately 1 year and will build to 100 residents and volunteers living on the property. By the end of Phase 4, sufficient research and observation will be complete to intelligently, sustainably, and ethically complete the long-term food infrastructure and plans that will support Phase 5.
For the research aspect of the food infrastructure component, the team has consciously applied the permaculture ethics and principles to stay in check and connected to actions that reflect decisions for the Highest Good for All. The following table summarizes how each one was touched upon:
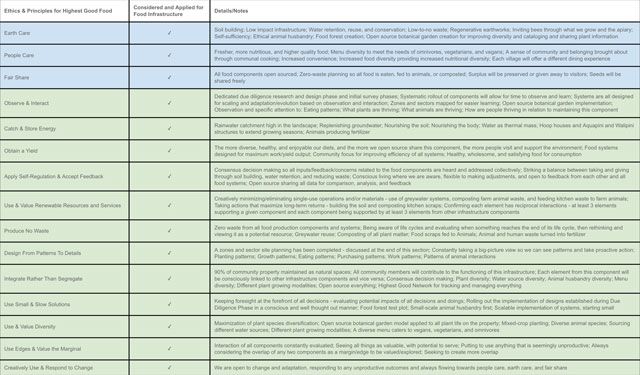
Ethics and Principles for Highest Good Food: Click for the Open Source and most current version of this table
Once on the property, we will conscientiously observe and learn from all that makes up the Highest Good Food infrastructure. Specifically, for the observation aspect of the food infrastructure component, we will be focusing on:
- Staying focused on the big picture to identify any patterns that emerge to improve the functions of this infrastructure component through evolution and mitigation measures that always realign us towards people care, earth care, and fair share / future care.
- Gathering feedback from residents regarding their experiences with this infrastructure component and how it is contributing to their fulfilled living experience.
- Assuring that each component and the elements within it have reciprocal interactions – at least 3 elements supporting it and 3 elements it is supporting.
- Providing comfort, more free time, and nourishment while preserving or expanding local ecology.
- Observing which plant species grow best in the various food environments (outdoors, hoop houses, aquapini/walipinis, etc.).
- Observing which animal species are happiest and healthiest in our environment.
- Observing which plant guilds work best together on our property.
- Observing which food items are most desired and enjoyed by residents.
- Surveying the land as a part of the soil amendment process.
- Confirming available flow rates, existing water resources, and identifying insufficiency.
- Maximizing water retention based on landscaping and other water flow and weather patterns.
- Informing purchasing patterns based on eating patterns, and food being wasted vs. insufficiencies.
- Confirming sufficient storage facilities.
- Evaluating when to buy versus make in-house.
- Identifying and addressing any areas that are unproductive.
- Minimizing single-use operations and reevaluating life cycles when necessary.
- Minimizing packaging waste.
- Minimizing waste generated from the kitchen, animal rearing, and gardening.
- Evaluating the efficacy of the operational management aspects.
During each Phase, One Community will revisit the Permaculture Ethics and Principles, as well as our own values, to assure we are aligned with the Highest Good for All. This check-in process will serve as a guide to our decision making and design process.
ENERGY
In addition to setting up the food infrastructure, as a part of pre-infrastructure needs to support the construction phase, the group will also need access to electrical power before much else can be done. As the property is now, it is not tied into the grid and the existing energy infrastructure includes solar and propane. Research completed to date (Phase 0) points towards the value of eliminating gas, because delivery is not sustainable. Also during Phase 0, experts have helped develop solar power potential with the added benefit of capturing water off the solar system. In addition, by elevating the solar panels 10 feet higher off the ground by design, a small-scale Agrivoltaics system will be created. Agrivoltaics is the combination of solar panel infrastructure and agriculture. Co-locating the two systems creates a mutually beneficial relationship. Advancements can be found in crop production, local climate regulation, water conservation, and renewable energy production. Solar panels begin to underperform in high heat temperatures of above 75 degrees when sunny. Crops located under solar panels produce water evaporation that creates localized cooling. The crop underneath emits water through transpiration, creating the cooler temperatures beneath the panels. The reduction of heat stress on the panels increases the solar panels boost in performance, creating even more energy efficiency. As for crop production; plants receive cooler daytime temperatures and warmer nightime temperatures. Additionally, the environment under the panels is cooler in the summer and warmer in the winter. Greater moisture in the air is also created from the agrivoltaic system. Plants will benefit from a reduction in transpirational water loss and demonstrate higher production due to not going through the stress of wilting during mid-day from excessive heat. This ease in stress provides the plant the ability to photosynthesize longer and grow more efficiently. Soil moisture is also increased in Agrivoltaic systems which in turn assist in the reduction of water usage. Building efficiency continues to improve with professional design help. The following mind map shows ongoing research and design occurring during Phase 0 and what the Highest Good Energy infrastructure provides its residents while concurrently respecting earth ecology.
The rest of the phased rollout process is summarized in the Phased Rollout Table below. As shown, phases 1 to 4 will take approximately 1 year and will build to 100 residents and volunteers living on the property. Energy needs will be met during each Phase using the best available options to satisfy the energy needs of that phase’s construction and residency plan. By the end of Phase 4, sufficient research and observation will be complete to intelligently, sustainably, and ethically complete the long-term energy infrastructure and plans that will support Phase 5.
Observation, along with other Permaculture principles will feed into decisions regarding more permanent sources of electricity (grid connection, solar, wind, hydroelectric) and storage, as summarized in the table below:

Highest Good Energy Permaculture Ethics and Principles: Click here for the open source and most current version of this table
Once on the property, we will conscientiously observe and learn from all that makes up the Highest Good Energy infrastructure. Specifically, for the observation aspect of the energy infrastructure component, we will be focusing on:
- Staying focused on the big picture to identify any patterns that emerge to improve the functions of this infrastructure component through evolution and mitigation measures that always realign us towards people care, earth care, and fair share/future care.
- Gathering feedback from residents regarding their experiences with this infrastructure component and how it is contributing to their fulfilled living experience.
- Assuring that each component and the elements within it have reciprocal interactions – at least 3 elements supporting it and 3 elements it is supporting.
- Providing convenience and comfort through net-zero power while preserving or expanding local ecology.
- Exploring site selection to maximize energy production from solar, wind, hydroelectric, and any new forms of energy that warrant exploration using observed natural patterns.
- Harnessing and capitalizing ‘free energy’ through passive solar, insulation, composting, and other heat sources like people and animals.
- Assessing costs and maximizing in-house services, especially for processes that are repeated and/or being open sourced.
- Observing and understanding how to best connect all the villages to our energy infrastructure.
- Measuring and accounting for how much we are actually using and the functionality of all uses.
- Evaluating and evolving our environmental and lifestyle conservation practices.
- Continuing to increase our energy efficiency over time due to increased conservation methods and “fine tuning” of our usage patterns and be open to the potential of having energy needs we haven’t accounted for.
- Experimenting to identify best practices for all installations and maintenance processes.
- Evolving the energy foundations and implementation and research of even broader diversity energy-saving strategies and alternative energy infrastructure methodologies.
- Identifying and addressing any areas that are unproductive.
- Minimizing single-use operations and reevaluating life cycles when necessary.
During each Phase, One Community will revisit the Permaculture Ethics and Principles, as well as our own values, to assure we are aligned with the Highest Good for All. This check-in process will serve as a guide to our decision making and design process.
HOUSING
As the property is now, there are two existing residential spaces. These existing shelters will be utilized, in conjunction with mobile/temporary structures (such as yurts), until the initial residential units are constructed. The thinking and planning completed during Phase 0 resulted in plans for multiple communal living mini-village models and a Duplicable City Center. All construction plans use readily available resources, demonstrate low-impact footprints, are cost effective, durable, and designed and built to demonstrate a fulfilling living environment. Each village will offer a diversity of budget and design options – each with unique appeal and potential to be built in almost any environment. The following mind map shows ongoing research and design occurring during Phase 0 and what the Highest Good Housing infrastructure provides its residents while concurrently respecting earth ecology.
The rest of the phased rollout process is summarized in the Phased Rollout Table below. As shown, phases 1 to 4 will take approximately 1 year and build to 100 residents and volunteers living on the property. By the end of Phase 4, sufficient research and observation will be complete to intelligently, sustainably, and ethically complete the long-term housing infrastructure and plans that will support Phase 5.
Observation, along with other Permaculture principles will feed into decisions regarding the multiple communal living mini-village models and a Duplicable City Center, as summarized in the table below:
Once on the property, we will conscientiously observe and learn from all that makes up the Highest Good Housing infrastructure. Specifically, for the observation aspect of the housing infrastructure component, we will be focusing on:
- Staying focused on the big picture to identify any patterns that emerge to improve the functions of this infrastructure component through evolution and mitigation measures that always realign us towards people care, earth care, and fair share.
- Gathering feedback from residents regarding their experiences with this infrastructure component and how it is contributing to their fulfilled living experience.
- Assuring that each component and the elements within it have reciprocal interactions – at least 3 elements supporting it and 3 elements it is supporting.
- Providing convenience and comfort through a fulfilled living environment while preserving or expanding local ecology.
- Assessing if the living environments are maximally enjoyable and holistically healthy.
- Understand from residents how common spaces are contributing to their well-being and general fulfillment and any ideas for improvements.
- Confirming radically sustainable elements are truly the most sustainable options available – use of readily available resources, low-impact footprints, cost effective, and durable.
- Assessing provisions of internet connection and network on the property.
- Evaluating homeshare options and contributions/qualifications for earning them.
- Evaluating the overall aesthetic of the development.
- Identifying and addressing any areas that are unproductive.
- Minimizing single-use operations and reevaluating life cycles when necessary.
- Minimizing waste generation.
- Informing future decisions based on observed insufficiencies, challenges, etc.
- Evaluating the efficacy of the operational management of each residence, village, the City Center, and the project as a whole.
During each Phase, One Community will revisit the Permaculture Ethics and Principles, as well as our own values, to assure we are aligned with the Highest Good for All. This check-in process will serve as a guide to our decision making and design process.
EDUCATION
Education quality and costs are arguably two of the most pressing problems of our day. We feel parents, students, and teachers deserve an education program that is usable in any environment, more fun, individualizes the learning experience through collaborative tools to assess and evolve all components, and allows students to advance according to their ability. During Phase 0, we have created a new system that allows for people to follow their innate talents, while having a functional foundation to integrate with traditional systems. The following mind map shows ongoing research and design occurring during Phase 0 and what the Highest Good Education infrastructure provides its residents while concurrently respecting earth ecology.
The rest of the phased rollout process is summarized in the Phased Rollout Table below. As shown, phases 1 to 4 will take approximately 1 year and will build to 100 residents and volunteers living on the property. By the end of Phase 4, sufficient research and observation will be complete to intelligently, sustainably, and ethically complete the long-term energy infrastructure and plans that will support Phase 5.

Highest Good Education Rollout: Click here for the open source and most current version of this table
Observation, along with other Permaculture principles will feed into decisions regarding the new educational system that is designed to discover and promote innate talents, while surpassing all traditional schooling benchmarks, as summarized in the table below:
Once on the property, we will conscientiously observe and learn from all that makes up the Highest Good Education infrastructure. Specifically, for the observation aspect of the education infrastructure component, we will be focusing on:
- Staying focused on the big picture to identify any patterns that emerge to improve the functions of this component through evolution and mitigation measures that always realign us towards people care, earth care, and fair share/future care..
- Gathering feedback from residents regarding their experiences with this component and how it is contributing to their fulfilled living experience.
- Assuring that each component and the elements within it have reciprocal interactions – at least 3 elements supporting it and 3 elements it is supporting.
- Providing growth through education while preserving or expanding local ecology.
- Confirming that “Lesson Plans for Life” are serving their purpose for everyone to enjoyably grow and evolve.
- Confirm that “Teach Strategies for Life” are serving their purpose for everyone to enjoyably grow and evolve.
- Confirm that “Teaching Tools and Toys” are sufficient and serve their purpose for everyone to enjoyably grow and evolve.
- Assessing if the educational program is comprehensive, effective, and diversely applicable.
- Confirm that the “Evaluating and Evolution” component is working as intended for all participants, ages and learning levels.
- Surveying if the educational program is surpassing all traditional schooling benchmarks.
- Identifying and addressing any areas that are unproductive.
- Minimizing single-use operations and reevaluating life cycles when necessary.
- Minimizing waste generation.
- Informing future decisions based on observed insufficiencies.
- Evaluating the function and design of the Ultimate
- Classroom and surrounding grounds are ideal for the enjoyable and effective learning process they are meant to support.
- Evaluating the integration of the educational program and students’ participation in it with the rest of the community functions and processes.
- Confirming if input is effectively being gathered and integrated from students and teachers to maximize the efficacy of the operational management aspects.
During each Phase, One Community will revisit the Permaculture Ethics and Principles, as well as our own values, to assure we are aligned with the Highest Good for All. This check-in process will serve as a guide to our decision making and design process.
ECONOMICS
The economic model that we plan to implement is specifically designed to pursue The Highest Good of All people and all life on this planet. Making sure the property provides the foundations for its success are part of Phase 0. Phase 0 has required no financial support because it has been completely volunteer-based and all expenses and consumables (space to work, hardware/software to complete the work, office supplies, communication hardware) have been provided by the volunteers. When the majority of the essential blueprints are completed for the building of One Community, the team will seek funding using a well-thought-out, high-quality plan that focuses on increased awareness. We are planning to the best of our ability so we arrive on day 1 with most of the major financial investment needed for the first 3 years of living and building on the property. A SWOT analysis was completed during Step 1 that confirmed the team’s efforts are a strategic fit because they fill a necessary niche that will grow with One Community. The following mind map shows ongoing research and design occurring during Phase 0 and what the Highest Good Economics infrastructure provides its residents while concurrently respecting earth ecology.
The rest of the phased rollout process is summarized in the Phased Rollout Table below. As shown, phases 1 to 4 will take approximately 1 year and will build to 100 residents and volunteers living on the property. By the end of Phase 4, sufficient research and observation will be complete to intelligently, sustainably, and ethically complete the long-term economics infrastructure and plans that will support Phase 5.
Observation, along with other Permaculture principles will feed into decisions regarding the self-sustainable, zero financial input, eco-tourism-based revenue stream, as summarized in the table below:
Once on the property, we will conscientiously observe and learn from all that makes up the Highest Good Economics infrastructure. Specifically, for the observation aspect of the economics infrastructure component, we will be focusing on:
- Staying focused on the big picture to identify any patterns that emerge to improve the functions of this component through evolution and mitigation measures that always realign us towards people care, earth care, and fair share.
- Gathering feedback from residents regarding their experiences with this component and how it is contributing to their fulfilled living experience.
- Assuring that each component and the elements within it have reciprocal interactions – at least 3 elements supporting it and 3 elements it is supporting.
- Providing financial freedom while preserving or expanding local ecology.
- Assessing Resource Based Economy implementation and applying lessons learned along the way.
- Assessing if residents are 100% happy with the economic model or are experiencing any deficiencies.
- Confirming that residents are experiencing financial freedom within this lifestyle – no-cost, easier life.
- Assessing if residents are satisfied with earning homeshare credits.
- Evaluating if eco-tourisms is a strategic fit and filling a necessary niche.
- Assessing and confirming attainment of all the economic success measures.
- Evaluating if the camping option for visitors is a strategic fit and filling a necessary niche.
- Evaluating for-profit versions of open source and implementation of the Entrepreneurial Model.
- Assessing the viability of revenue streams from hosted events.
- Assessing other sources of economic independence.
- Assessing if a crowdsourcing campaign (or regular crowdsourcing campaigns) would be beneficial.
- Identifying and addressing any areas that are unproductive.
- Evaluating if our financial specifics are sufficiently transparent.
- Minimizing single-use operations and reevaluating life cycles when necessary.
- Minimizing waste generation.
- Informing future decisions based on observed insufficiencies.
- Evaluating the efficacy of the operational management aspects.
During each Phase, One Community will revisit the Permaculture Ethics and Principles, as well as our own values, to assure we are aligned with the Highest Good for All. This check-in process will serve as a guide to our decision making and design process.
SOCIETY
The Highest Good approach for Society is the social architecture for cooperation, collaboration, and positive global change. During Phase 0, ample research and thought was given to how a society can function for the The Highest Good of All. During this current Phase, the Pioneer Team has signed the pledge, has undergone the extensive application process, and members participate in monthly review and feedback sessions. All new members are required to sign the pledge, undergo the application process, and complete multiple probationary periods to determine if they are a solid fit or not. During all phases, each person is evaluated on the basis of how well they align with One Community values and their ability to give and receive feedback, thus engaging in an ever growing personal evolution process towards our own highest potential.
Also, during Phase 0, the Pioneer team has a minimum Contribution commitment, weekly team calls, and an understanding their weekly commitment will be 40 weekly hours once on the property. The consensus process is also being loosely applied now on a small scale during Phase 0 by the Pioneer team. The necessary thought-process has also been completed for how the consensus process will be rolled out and applied at the larger scale, once we are on the property. The following mind map shows ongoing research and design occurring during Phase 0 and what the Highest Good Society infrastructure provides its residents while concurrently respecting earth ecology.
The rest of the phased rollout process is summarized in the Phased Rollout Table below. As shown, phases 1 to 4 will take approximately 1 year and will build to 100 residents and volunteers living on the property.
Foundational to One Community’s fulfilled-living approach is to create a daily living experience that includes the following and will be implemented as the infrastructure becomes available:
- More free time – Evident during Phase 1, in full swing by Phase 2.
- Schedule flexibility – Evident during Phase 1, in full swing by Phase 2.
- The highest quality food – Evident during Phase 2, and increasingly until in full swing at the onset of Phase 4.
- A diversity of exercise options – Inherent with the property choice, and part of Phase 2 rollout of options available through community contribution to Social Architecture.
- A diversity of recreation options – Part of Phase 2 rollout through community contribution to Social Architecture.
- A diversity of personal growth options – Part of Phase 2 rollout of options available through community contribution to Social Architecture.
- Home cooked breakfasts, lunches, and dinners – Evident during Phase 2; Increased experience after transition kitchen in place during Phase 2; in full swing by Phase 3, and expanded by Phase 4 when City Center Dining Dome and Kitchen are complete.
- A culture of world change and making a difference – Exists now and hereon, through all Phases.
- Everything needed within walking distance ” no commuting – Inherent with the property and lifestyle choice.
- An environment immersed in nature and surrounded by beauty – Inherent with the property choice.
- An advanced and parent-involved onsite daycare and all-ages education program – In full swing by Phase 3 when 1st teacher comes on board.
Keeping One Community and the fulfilled living model running successfully will be handled through the consensus process by prioritizing the fundamentals and a built-in inclusion of the social/recreational structure. By the end of Phase 4, sufficient research and observation will be complete to intelligently, sustainably, and ethically complete the long-term society infrastructure and plans that will support Phase 5.
Observation, along with other Permaculture principles will feed into decisions regarding the community contribution model, social architecture of enriching personal growth, recreation, and socialization, and the consensus process of self-governance, as summarized in the table below:

Highest Good Society Permaculture Ethics and Principles: Click for the open source and most current version of this table
Once on the property, we will conscientiously observe and learn from all that makes up the Highest Good Society infrastructure. Specifically, for the observation aspect of the society infrastructure component, we will be focusing on:
- Staying focused on the big picture to identify any patterns that emerge to improve the functions of this component through evolution and mitigation measures that always realign us towards people care, earth care, and fair share.
- Gathering feedback from residents regarding their experiences with this component and how it is contributing to their fulfilled living experience.
- Assuring that each component and the elements within it have reciprocal interactions – at least 3 elements supporting it and 3 elements it is supporting.
- Providing self-governance and an enriching social architecture while preserving or expanding local ecology.
- Confirming residents share purpose, values, and mission.
- Confirming that residents’ foundational needs are being met.
- Surveying residents regarding social architecture of enriching personal growth, recreation, and socialization and which fulfilled living options are most successful.
- Assessing public participation in the Fulfilled Living components.
- Assessing open source sharing of the Fulfilled Living components.
- Assessing if there are higher levels of productivity, increased availability of free time, success, efficiency, and richer living experience.
- Assessing the process and effectiveness of consensus training.
- Assessing and making adjustments to the rollout of the consensus process.
- Assessing the process and effectiveness of the Conflict Resolution process.
- Assessing the process of community member evaluating and removal when needed.
- Implementing lessons learned from any collaborative hang-ups and other challenges identified.
- Assessing and improving, when necessary, the application and tracking of community contribution hours.
- Confirming that no one is feeling burned out or overworked.
- Evaluating the screening and onboarding process for new members.
- Evaluating the Highest Good Network software effectiveness and function.
- Identifying and addressing any areas that are unproductive.
- Minimizing single-use operations and reevaluating life cycles when necessary.
- Minimizing waste generation.
- Informing future decisions based on observed insufficiencies.
- Evaluating the efficacy of the operational management aspects.
During each Phase, One Community will revisit the Permaculture Ethics and Principles, as well as our own values to assure we are aligned with the Highest Good for All. This check-in process will serve as a guide to our decision making and design process.
STEWARDSHIP
The Stewardship Infrastructure is the anchor for all other infrastructure components. It is the motivator that has gotten One Community to where it is today. The other infrastructure components interact and meld to form and stand for the Stewardship Infrastructure. One Community believes that the Highest Good approach includes each generation improving their own standard and experience of living while also leaving our planet better than they received it. We are here to open-source share how to do this by integrating solutions-based, sustainable, creative, and forward thinking approaches. The following mind map shows ongoing research and design occurring during Phase 0 and what the Highest Good Stewardship infrastructure provides its residents while concurrently respecting earth ecology.
The rest of the phased rollout process is summarized in the Phased Rollout Table below. As shown, phases 1 to 4 will take approximately 1 year and will build to 100 residents and volunteers living on the property. By the end of Phase 4, sufficient research and observation will be complete to intelligently, sustainably, and ethically complete the long-term stewardship infrastructure and plans that will support Phase 5.
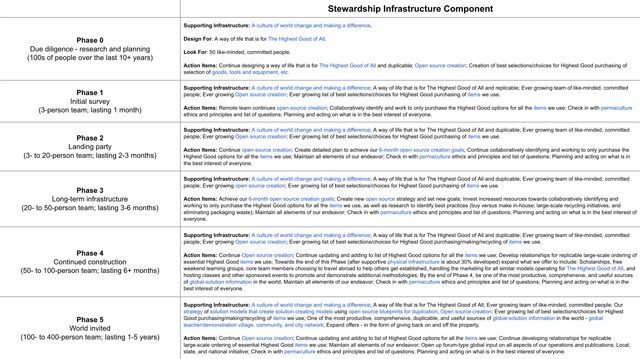
Stewardship Infrastructure Rollout: Click to for the open source and most current version of this table
Observation, along with other Permaculture principles will feed into decisions regarding pioneering a new paradigm of philanthropy and humanitarianism founded on giving people the necessary tools to better meet their own needs and desires, as summarized in the table below:

Highest Good Stewardship Permaculture Ethics and Principles: Click for the open source and most current version of this tab
Once on the property, we will conscientiously observe and learn from all that makes up the Highest Good Stewardship infrastructure. Specifically, for the observation aspect of the stewardship infrastructure component, we will be focusing on:
- Staying focused on the big picture to identify any patterns that emerge to improve the functions of this component through evolution and mitigation measures that always realign us towards people care, earth care, and fair share.
- Gathering feedback from residents regarding their experiences with this component and how it is contributing to their fulfilled living experience.
- Assuring that each component and the elements within it have reciprocal interactions – at least 3 elements supporting it and 3 elements it is supporting.
- Providing a community that is for the Highest Good of All while preserving life giving elements such as the soil, water, bees, and species diversity.
- Aligning all actions to preserve or expand local ecology.
- Assessing new ways to contribute to global ecology – assessing if we are succeeding in positively transforming the world.
- Identifying, researching, and working towards best practices (buy versus make in-house; large-scale recycling initiatives, and eliminating packaging waste).
- Identifying, researching and working towards relationships with the most ethical and sustainable providers.
- Identifying new open source strategies and setting new goals.
- Evaluating if there is a working balance between idealism and pragmatism.
- Evaluating if we are making duplication of a complete solution as easy as possible.
- Evaluating if our stewardship practices are good for people, the planet, and financial viability.
- Confirming that we are consciously and energetically facilitating more engagement of the sustainability industry, producing the absolute best possible consumer value, and delivering the most ecological goods and methodologies for building sustainable living communities and sustainable living components.
- Confirming that the residents are being held accountable to planning and acting on what is in the best interest of everyone.
- Identifying and addressing any areas that are unproductive.
- Minimize single-use operations and reevaluating life cycles when necessary.
- Minimizing waste generation.
- Informing future decisions based on observed inefficiencies.
- Evaluating the efficacy of the operational management aspects.
During each Phase, One Community will revisit the Permaculture Ethics and Principles, as well as our own values, to assure we are aligned with the Highest Good for All. This check-in process will serve as a guide to our decision making and design process. This is how we see ourselves providing the greatest gift to each other and the world. Through massive service and assistance, we get to “be the change we wish to see in the world” and become leaders by example of truly living for The Highest Good of All. We believe even a small group of people cooperating, collaborating, and committing to holding each other accountable to what is in the best interest of everyone has the potential to transform the world.
CASE STUDY STEP 3: DEVELOP A CONCEPTUAL DESIGN
Before beginning any permaculture (or other large design or construction), identify key information and objectively assess your resources and commitment to the process. We discuss this with the following sections:
OBJECTIVELY ASSESSING YOUR ABILITY
 Objectively assessing your own ability to succeed in designing and implementing your permaculture project is essential to your success. The design process requires research, time, and complex problem-solving skills. Implementation requires even more research, considerably more time, patience, observation skills, flexibility, and even more complex problem-solving and adaptation skills. The larger the project, the more people will be involved, and this means a need for quality management and people skills too. Larger sized projects means more financial investment also.
It is extremely important to consider your ability and dedication to the entire process before you start. What is your track record of success with similar-sized projects and commitments? What are your strengths and weaknesses and what are you able and willing to lose if it fails? What new skills will you need to learn and what skills will you need help with? Are you the person to lead the project implementation or would someone else be better suited for that?
If you haven’t already, conducting a SWOT analysis would be a good thing to do before starting too. If you need help with this, the image at right shows an overview of what the process is and clicking on the image will take you to the Wikipedia page that teaches the process.
IDENTIFYING DESIGN CRITERIA
Getting clear on the intent of your design is the next step. This is called the “Design Brief” and should include the intended use/priorities for using the property, the level of food self-sufficiency desired, who and how many people will live there, and an overview of anything else relevant to the design. Here is an example of One Community’s design brief:
The intended use of the One Community property is fourfold. First and foremost to demonstrate comprehensive sustainability covering food, energy, housing, and more. Second, to operate as an open source eco-tourism and teacher/demonstration hub that can be replicated as a sustainable living model. Third to provide and demonstrate food self-sufficiency and fourth to function as an educational example of comprehensive stewardship.
This graphic shows the scope and scale of One Community’s property plans and initial design layout to meet the above goals.
RESOURCE AND LIMITATIONS ANALYSIS
Details coming…
SITE DESIGN CONSIDERATIONS
We discuss important site design considerations with the following sections:
LOCATION AND PROPERTY DATA
Details coming…
OBSERVATION AND RESEARCH
Details coming…
SECTOR ANALYSIS
Here is the sector analysis for One Community’s proposed location.
APPLYING PERMACULTURE DESIGN
- Design Concept Development Using Energy Flow
- Zone Planning and Components List(s)
- Projections of Design Potential
DESIGN CONCEPT DEVELOPMENT USING ENERGY FLOW
This section will discuss the evaluation of energy flow and how understanding it can influence design. Water, wind, vehicle access, and foot traffic for daily activities should all be considered.
ZONE PLANNING AND COMPONENTS LIST(S)
This section will discuss initial zone planning and component placement.
That’s one thing about permaculture, there’s probably quite a lot of language we’ve got to invent. Because we’re doing some things that have never been done before in landscape, culture, and climate. ~ Geoff Lawton
PROJECTIONS OF DESIGN POTENTIAL
This section will discuss the long-term projections and potential for the design.
CASE STUDY STEP 4: DEVELOP A DETAILED DESIGN
Our project consists of seven open source sustainable villages and a centrally-located (also open source) Duplicable City Center®. Every village will have its own surrounding permaculture designs, operate on 100% renewable energy, feature rainwater harvesting and greywater recycling, heat recycling with climate batteries, and each will have its own permaculture plan. The initial design described in this section will serve as a learning process where, for the course of roughly a year (or more), we can apply the permaculture principle of observation. This learning process will precede planning for Phase II of our complete construction, development, and expansion rollout that will include the Straw Bale Village. Shown below is an overview of our Master Plan which depicts a potential layout for the previously mentioned villages.
The Duplicable City Center and Earthbag Village will be our first constructions, so we are focusing on these and their surrounding areas first. Zones 1-3, the main zones, have been developed around the Duplicable City Center because it will be the primary activity center in addition to where all the food is stored, processed, and prepared. Complete details for the design and function of the Duplicable City Center can be found here.
Placement of the City Center was based on property topography, water flow, existing access roads, and the existing orchard. Zones were then developed around this structure to maximize efficiency by developing close to the commercial kitchen and food storage areas and maintain the views desired from the living and social/recreation spaces. Window design and building orientation were created with the goal of maximizing passive heating and cooling.
Zone layouts around this structure were decided as follows:
ZONE 0: Zone 0 is the primary zone which consists of the Duplicable City Center and Earthbag Village with which Zones 1, 2, and 3 are focused around. The open source purpose of the City Center is to save resources and help model a redefinition of how people choose to live by demonstrating increased efficiency through centralization of key functions and activities. In support of this, the Duplicable City Center will provide food processing and preparation, dining, laundry, recreation space, and 12 VIP visitor rental rooms during the first phases of our construction. It will be LEED Platinum certified, and function as a revenue stream and communal-use and resource-saving replacement of individual kitchens, laundry rooms, and living rooms for all the residents of the adjacent Earthbag Village construction. The City Center will feature water collection off of the entire structure, greywater processing and recycling, low-water use fixtures, and the results of over 1000 hours of research into the most sustainable insulation, flooring, paints, adhesives, toilets, shower heads, and more.
The Earthbag Village will consist of seventy eight 200 square foot (19 sq meters) semi-subterranean earthbag “hotel room” style cabanas designed to fit on 3 acres. These low-impact development bungalow-style buildings will connect with spoke-like walkways into a central semi-subterranean 60-foot diameter Tropical Atrium/Meditation Center housing flowers, herbs, fruits, and vegetables. More information regarding the Tropical Atrium planting and harvesting details can be found here. The Tropical Atrium will be heated and cooled using a climate battery with a backup HVAC system.
The Earthbag Village will feature water collection off of all roads and structures, greywater processing and recycling, and 3 different types of water-saving bathroom structures:
- A net-zero bathroom that collects and stores all the water it needs to serve 40 people a day.
- A waterless vermiculture eco-toilet that uses urine separating toilets and worms to process solid wastes into usable compost.
- A set of 4 communal shower structures that integrate energy and water saving technologies.
ZONE 1: Zone 1 includes an herb garden north-west of the City Center that will grow fresh foods for easy access and use in the kitchen. There is an indoor/outdoor natural swimming pool near the entrance of the City Center, and landscaped views around the living and social spaces. Additionally, there is another greywater processing pond north of the City Center to hold and process runoff and greywater from the City Center.
The herb garden will feature various guilds including:
- Cucumber and Tomato Guilds with support species of onions, cabbages, carrots, corn, radishes, and beans.
- Carrot Guilds with support species of cabbages, leeks, radishes, peas, peppers, onions, and lettuce.
- Rutabaga Guilds with support species of peas, onions, and beetroot.
- Parsnips Guilds with support species of onions, radishes, and lettuce.
- Lettuce and Salad Greens Guilds with support species of radishes, carrots, parsnip, beetroot, and strawberries.
- Cabbage Guilds with support species of brussel sprouts, broccoli, spinach, swiss chard, and kale.
- Onion Guilds with support species parsnips, lettuce, beetroot, cabbages, strawberries, and carrots.
- Okra Guilds with support species of lettuce, tomato, radishes, and peas.
The herb garden also includes assorted herbs such as basil, bay leaf, chive, cilantro, clover, dill, fennel, garlic chives, lavender, leek, lemongrass, marjoram, mint, oregano, parsley, rosemary, sage, tarragon, and thyme. There will be potted lemon trees that can be brought in when temperatures get too cold during winter, as well as lone plantings of blueberries and asparagus in the northern parts of the garden.
We have also placed edible flowers on the west side of the garden so that during the summer winds from the west spread them throughout the rest of the garden. These flowers include Angelica, Anise, Arugula, Bachelor’s Button, Bee Balm, Borage, Calendula, Carnations, Chamomile, Chervil, Chicory, Chrysanthemum, Dandelion, Daisy, Hollyhock, Johnny Jump-ups, Lovage, Marigold, Nasturtium, Summer Savory, Snapdragon, Sweet Woodruff/Baby’s Breath, and Violet.
The herb garden will be surrounded by a double fence, with 4 feet between each of the fences, and interplantings of gooseberries, rosehips, bayberries, and other plants to keep out deer and other critters. While sourcing gooseberries, we will be sure to buy plants that do not contain the parasite for White Pine Blister Rust, which would wipe out our Black Locust trees.
The areas south and east of the City Center a sustainably landscaped food forest to provide small amounts of food and attractive views for the living and social areas. We will plant oak trees, chestnut trees, autumn blooming cherry trees, black locust trees, walnut trees, hickory trees, and hazelnut bushes. Chestnut trees grow faster than the oak trees and will be cut down once the oak trees are large enough to replace them. The autumn blooming cherry trees and black locust trees are for aesthetics, and the autumn blooming cherry trees will produce fruit that birds will eat. All of these trees are deciduous to provide shade in the summer and allow sun in the winter. These trees will be companion planted with deer and rabbit-resistant decorative plants such as Heuchera ‘Fire Alarm’, Lady Fern, and Astilbes, and herb/food plants such as Bee Balm, Rhubarb, Yarrow, Potatoes, Ajuya, Blueberries, Asparagus, Black Raspberry, and Grapes. These plants were also selected to survive the allelopathic nature of walnut trees. A visual representation of this is provided in the image below.
ZONE 2: Zone 2 is also by the kitchen and includes 18 hoop houses, the animal yard (sheep barn, chicken coop, and rabbitry), and the natural greywater processing pond. There will also be a nursery between the animal yard and hoop houses.
The greywater processing pond will have a greenhouse covering the entrypoint which will lightly heat it to keep it from freezing in the winter, allowing us to use it year round. The rabbitry and sheep barn are placed in contact with the north and west sides of the greenhouse so that the heat from the animals will help maintain it at night and the heat from the greenhouse will help heat the animals during the day. The plants we will be planting inside and outside of the greenhouse to clean the water are Water hyacinth (Eichhornia crassipes), Kudzu, Sorghum, Duckweed (Lemmna, Spirodela and Wolffia sp.), Alligator weeds (Alternanthera philoxeroides), Arrow arum (Peltandra virginica), Arrowhead (duck potato), Giant bulrush (Scirpus californicus), Soft-stem bulrush (Scirpus validus), Calla lily (Zantedeschia aethiopica), Canna lily (Canna sp.), Cattail (Tipha sp.), Elephant ear (Colocasia esculenta), Ginger lily (Hedychium coronarium), Maidencane (Panicum hemitomon), Pickleweed (Pontederia cordata), Common Reed (Phragmites communis), Soft rush (Juncus effusus), Torpedo grass (Panicum repens), Water canna (Thalia dealbata), Water iris (Iris pseudacorus), and Water Pennywort (Hydrocotyle umbellata). We will harvest these for non-food plant mulch.
The animal yard, chicken coop, and rabbitry are placed in this zone for three reasons. The placement will allow easy feeding and care from the kitchen staff, provide easy rotation through the multiple grazing areas in Zone 3 for soil reclamation, and easy transport and use of manure in all of the surrounding planting areas.
The hoop houses are placed far enough apart to avoid shading each other and will be fully planted with a 3 foot walkway allowing easy maintenance and harvesting. Each hoop house is 11×90′ and will be polyculture planted with a large variety of species. Hoop houses 16-18 will also be companion planted underneath the main plants. For our hoop house planting plan and alphabetical list of planned foods click here.
Similar to the planting plan from Zone 1, double fences and between-fence plantings are used in the hoop house planting area.. To save on fencing costs, the fence that surrounds this area will also surround the Zone 3 orchard.
ZONE 3: Zone 3 consists of 3 grazing zones and an existing orchard, which we plan to expand and improve. The grazing areas will be rotation grazed with sheep and chicken and rabbit tractors. Chicken and rabbit tractors are penned areas designed to be moved from place to place so the animals within them can feed on the fresh vegetation without risk of harm from predators. As they feed, they lightly till and fertilize these areas. The orchard and hoop house areas will have double fences and between-fence plantings to help keep deer and other animals out with the same planting plan described in the Zone 1 section above.
The orchard will have USDA Growing Zone 6 tolerant species of trees, these will include:
- Pear trees: Bosc, Bartlett, Conference, and Rescue (8 total)
- Cherry trees: Benton, Stella, Sweetheart, and Richmond- These will be placed near the entrance of the orchard so that we can experiment with covering and other strategies to protect them from bird predation (4 total).
- Apple trees: Honeycrisp, Gala, Red Halareds, and McIntosh (14 total).
- Plum trees: Damson and Stanley (15 total).
- Peach trees: Candor, Elberta, Halehaven, Madison, Redhaven, and Reliance (22 total).
- Apricot trees: Chinese Sweet Pit, Moongold, and Sungold (18 total).
- Asian pear trees: Kosui, Atago, Shinseiki, Yoinashi, and Seuri (17 total).
The orchard’s trees will be companion planted with comfrey Bocking 14, dill, beans, dandelions, bee balm, marigolds, nasturtiums, lavender, chives, daffodils, rosemary, carrots, alliums, tansy, mustards, marjorams, daisies, alyssum, and lupine. The trees were initially placed on a 35 foot grid to ensure that few canopies overlap, and then they were manually adjusted to further remove overlap.
Double fences and between-fence plantings are used around the garden planting areas. These will function as windbreaks and help keep deer and other animals out. Planned plantings in these areas that will also aid in keeping deer out are Austrian pine, Maple (silver and red and for lumber), and Northern Red oak (possibly). We will also plant the following in these areas as nitrogen fixers (nf) and as chop and drop (c&d) mulch sources: Black Locust (nf), Caragana <Siberian pea shrub> (nf and c&d), Elaeagnus commutata <American silverberry, wolf-willow, wild olive> (nf and c&d), Honeylocust (pollinator and nf (sort of)), Comfrey (c&d), Red clover (c&d), alfalfa (c&d), and Lupine (nf and c&d).
These zones and all the other Zone 3 grazing zones will also have barbed outside-the-fence plantings to further protect them from wildlife. Plantings in these areas will include Seabuckthorn (barbs & nf), Gooseberry (fruit and barbs), and Rosehips (fruit and barbs). The following will also be included for nitrogen fixing (nf) and chop and drop (c&d) mulch production: Bayberry (nf), Silver buffaloberry (nf and c&d), Russian olive (nf), Ninebark (nf & pollinator), Caragana <Siberian pea shrub> (nf and c&d), Elaeagnus commutata <American silverberry, wolf-willow, wild olive> (nf and c&d), Comfrey (c&d), Red clover (c&d), Alfalfa (c&d), and Lupine (nf and c&d).
The additional “Grazing Zones” will begin as grazing areas and eventually be used as food production zones once the soil quality is sufficient and we have the need (and more resident staff) for the additional food production.
ZONE 4: Zone 4 is a wilderness that we will improve with swales that feed smaller irrigation ponds and will slowly be transformed into a food forest. We will build the food forest by fencing a half-acre at a time. The swales close to the Earthbag Village will have spillways that overflow into the Earthbag Village‘s natural greywater processing ponds. These ponds will hold water for irrigation and produce some mulch. The sterilization and purification of these ponds should be sufficient for use as swimming and recreation spaces. The initial half-acre is located just west of the City Center so that it can easily be maintained as a Zone 2 or Zone 3. In the very northern area of Zone 4, there is a natural pond. We expect that the swales will help to recharge the aquifer and increase the size of this pond over time. We will use this pond for aquaculture production and as a recreation space. To support the aquaculture, we will develop this pond to maximize the Edge Effect.
Our swales will be planted with dwarf varieties of Black Locust, Pear, Plum, Peach, Apricot, and Apple Trees. Every third tree will be a nitrogen fixing Black Locust Tree. These will have an understory consisting of Elderberries, Goji Berries, Serviceberries, Blueberries, Seabuckthorn, Black Currant, Witch Hazel, Spicebush, Pussy Willow Bushes, Rosehips, Blackberries, Winter Berries, Baltic Rush, Black Chokeberries, Hackberries, and High Bush Cranberries.
An apiary is also included in the northern area of Zone 4. It is located at least 100 meters away from the herb garden and hoop houses. This location is far enough away from the City Center so that people will not have to worry about bee stings, but is still in the optimal location to keep our main planting areas (hoop houses, herb garden, orchard, and grazing areas) closest to the bees’ natural 100-3500m pollination range.
ZONE 5: This zone is currently all wilderness. We will be building 6 other villages in Zone 5, the planned locations for these can be found here. The villages that will be built here include the Straw Bale Village, Cob Village, Compressed Earth Block Village, Shipping Container Village, Recycled Materials Village, and Tree House Village. We will also slowly transform the rest of Zone 5 into a large food forest.
THE LOCATION AND PROPERTY
The intended use of the property is 4-fold. First and foremost is to demonstrate comprehensive sustainability practices covering food, energy, housing, and more. Second, to operate as an open source eco-tourism and teacher/demonstration hub that can be replicated as a sustainable living model. Third, to provide and demonstrate food self-sufficiency, and fourth to function as an educational example of comprehensive stewardship. All in all, the property will primarily serve as an eco-village that functions for long-term living and as an eco-tourism destination.
The leading goals for the property are as follows:
- Demonstrate comprehensive sustainability
- Operate as an open source eco-tourism and teacher/demonstration hub
- Demonstrate 80%+ food self-sufficiency
- Function as an educational example of comprehensive stewardship
In addition to the goals listed above, the site is also being designed as an open source botanical garden. We will catalog all of the species native to the area and have plans to build structures that will demonstrate and share additional biodiversity. Because the property will also serve the purpose of an ecotourism destination, it is beneficial to emphasize growing interesting and delicious foods to share. More specifically, the goal is to provide food that is more diverse and nutritious than what is available in a typical grocery store. For our 80% food self-sufficiency goals, the site needs to produce sufficient preservable foods to cover this in the winter.
Project funding is designed to cover all expenses up to $20 million. The initial construction team will consist of 50 volunteers with the ability, plan, and desire for bringing on an additional 50 after the first 6 months, and another 300 in the following couple years.
CLIMATE
The property was previously used as a summer home and retreat center for kids, but currently is not being used. The size of the property is 640 acres and has a Tropical and Subtropical Steppe Climate. Being 1,047 miles away from the Pacific Ocean, the property receives an average annual rainfall of 15.54 inches (based on recordings from the nearest city, Kanab, UT). The average summer temperatures are roughly 88-93 degrees F (high) and 52-60 degrees F (low) and the average winter temperatures are roughly 48-53 degrees F (high) and 24-28 degrees F (low). The most rain falls during the 31 days centered around August 17, with an average total accumulation of 1.1 inches (vs. the usual monthly Summer to Spring average of 0.5 inches). Weather systems that bring precipitation to the site often come from the west, with a seasonal variation from October 7 to February 13 (4.2 months) where the wind shifts directions and is most often from the east, with a peak percentage of 40% on January 1.
EXTREME WEATHER
As a result of the site’s physical characteristics, extreme weather possibilities include drought, flooding, and wildfires, but is not prone to slumps or landslides. The site has presence of rock, flatland, hills, and erosion, as well as a naturally occurring spring and pond. There are areas of gully erosion and seasonal water flow which will be challenging because we get most of our water in bursts. We will use gabions and swales to help slow and absorb water during the seasonal bursts.
The site also has consistent winds from the west during the summer and from the east during winter, some of which are hot/dry winds which can lead to wildfires. Generally, hot/dry winds could occur on the property at the same time or in specific portions of the property without affecting other parts. While substantial elevation changes can exacerbate the winds, this is not always true due to microclimates created by terrain such as large hillsides/mountains, tree density, rock slides, etc. To address this and prevent fire wind, initial construction will be in an area sheltered by a north-sloping depression of the property that is protected from both the east and west winds. We will also work to increase beneficial microclimates through trees and other plantings, these will help prevent forest fires. The site will also have a comprehensive fire and medical plan including preparation, maintenance, and, in extreme emergencies, evacuation. Wildfire preparation will include fire-team training, brush clearing and ladder fuel removal property’s whole perimeter, an annual property check, tool maintenance/sharpening, restocking of tools, etc. Additionally, earthbag/aircrete construction will help minimize fire damage. Metal roofing and keeping debris (branches, leaves, woodpiles, needles, etc) away from the structures will also be helpful.
WATER FLOW
As mentioned in the section above, the site has areas of gully erosion and most of the water flow is seasonal. Water hits the property from the west July through September, from the east October through mid-February, then again from the west mid-February to mid-April. We will address the gully erosion with gabions and use swales to help slow and absorb water during the seasonal bursts. We will address the gully erosion with gabions and use swales to help slow and absorb water during the seasonal bursts. A visual of the site’s water flow is included below.
TOPOGRAPHY
The initial area of our property that we will be developing has a gentle slope that faces north. The topography of the site consists of mid-slopes, hillcrests, valley floors, and flat areas that could be considered mesas, with the steepest slope being 70 degrees. The area’s highest point of altitude is recorded at 6,673 feet in the southwest corner, and the lowest point at 6,400 feet in the northwest interior. The size and topography of the site can be seen in the image below.
SUNLIGHT
Because we are at a relatively high elevation, we want to maximize solar gains, especially in the winter. We are also fairly north of the equator and the area of our property that we will be developing first gently slopes north. For these reasons, it is important to understand sun angles and their seasonal changes. We will design our windows to be facing south-to-slightly-southeast, and will be cautious to avoid shading our windows and structures in the winter when the sun only reaches 30 degrees above the horizon. There are not really any south-sloping areas, but a fair amount of the property is gently sloped north/north-facing. These areas increase shading, so we will spread buildings out more to minimize this effect.
INFRASTRUCTURE
There are three pre-existing structures already on the property that we will not be designing/placing as part of the design. They are a 1,400 square foot hogan, a 1,960 square foot bunkhouse, and a 30×35′ quonset hut storage building. The Bunk House can comfortably accommodate 16 people in double-bunks and about 24 more in a large loft. The hogan could sleep 15-20 and we have plans for temporary structures to house an additional 20-30 people until more permanent housing is constructed. There is a 2.26 mile access road into the property, access roads to each of the structures, and various service roads. We will be adding buildings such as a barn, poultry coop, outhouse, shed, water tank, and house(s). The site also has pre-existing fences, ponds and dams, and buried pipes. We will be adding and/or heavily modifying fences, terraces, earth banks, power lines, buried pipes, and ponds and dams.
ACCESS
Access roads and paths are important components that will be added to allow easy movement throughout the property. This includes driveways, farm tracks, and footpaths. These will consist primarily of decomposed granite around the City Center and permeable asphalt within the Earthbag Village. There is a preexisting 2.26 mile access road into the property, access roads to each of the structures, and various service roads. A visual of these access roads is included below.
FLORA AND FAUNA
There are preexisting flora and fauna on the site, these include native grassland/prairie, old growth forest, and plant species of special concern. Because of these species we will need to use more care while easing into the property, which will require an environmental impact study. Pests and varmints on the property worth noting include rabbits, squirrels, deer, and coyotes. There is also a possibility for voles, rats, mice, raccoons, marmots, gophers, and rattlesnakes. Pre-existing plant life on the site include pine, aspen, Gambel oak, sage, juniper, Utah serviceberry, and cacti.
Any of the following may also be found, but a site inventory will be taken and a corresponding listed created once we are on site:
- Native grasses: Basin wildrye, Blue Grama, Bluebunch wheatgrass, Desert Needlegrass, Indian ricegrass, Little bluestem, and Shining muttongrass.
- Potential shrubs: Manzanita, Creeping oregon grape, Mountain Lover, Squawbush, Bitterbrush, Fourwing saltbush, Cliffrose, Smooth sumac, Golden currant, Shadscale, Winterfat, Buffaloberry, and Gooseberry.
SOIL
 Soil plays a vital role in the plant life that resides in an environment. The most prominent soil types found on our site are sandy loam, sand, and silt. We anticipate existing soils to have a pH on the higher/basic side, but testing will be necessary to be sure. The target pH range is from 6.0 to 7.0. There are no known toxins present in the soil, and because of the soil’s composition it drains moderately. For our purposes the soil drains too quickly, we plan to address this with soil amendment through adding organic matter. We will also add swales and gabions to control runoff. The soil will need improvement wherever we decide to plant food. To improve it, we will be using swales, hugelkultur, cover crops, and rotation grazing of sheep, rabbits, and chickens. There have been no notable recent soil disturbances. An image of the different soil types is included below.
SITE LIMITATIONS
The largest limitation on this site is soil quality, as the soil is generally sandy loam. The first thing we will do is a soil test. Then, assuming the test comes back as expected, we will lift the soil using a garden spade and add 4-6″ of quality compost while keeping the topsoil in place. Over this we will slightly rake in several inches of well-aged manure, leaving the majority of the manure exposed as the surface layer of compost. We will then mulch with hay on planted areas and wood chips on pathways to retain moisture. Green manures or cover crops will be grown and cut, and we will add 2 to 4 inches of new compost/manure and straw each year. This method will improve the soil without tilling. There are also minor issues with preexisting wildlife such as rabbits, squirrels, deer, coyotes, and possibly voles, rats, mice, raccoons, marmots, gophers, and rattlesnakes. We will address these wildlife challenges with fencing and guardian animals.
ENERGY
A key characteristic of the site is that it is off-grid, as a result of this, the primary methods of power collection will initially be the existing propane infrastructure for heat and a generator for electricity. As the site progresses, we plan to install a grid-tied solar farm which will be vital for making the property’s power use net-zero. The site will also serve as a permaculture and sustainability teacher/demonstration site. Right now, we are open-sourcing all of our designs as we develop them. Once we complete our designs, we will begin developing and building on the property. As we do this, we will be double-checking and adding to all of our free-shared plans. We will then open the property as an ecotourism destination, while also open sourcing how to maintain and run an operation like this.
SUN SECTOR ANALYSIS
Because we are at a relatively high elevation we want to maximize solar gains, especially during the winter. We are also fairly north of the equator and the area of our property that we will be developing first gently slopes north. For these reasons, it is important to understand sun angles and their seasonal changes. We will design our windows to be facing south-to-slightly-southeast, and will need to be careful to avoid shading our windows and structures in the winter. The graphic below shows an overview of our sun sector analysis. This includes sun angles during winter and summer’s solstice and solar elevation.
AESTHETICS
Because the site will also serve as an ecotourism destination, aesthetic conditions that will be necessary as part of the sector map are positive views. To address this, window placement and outdoor recreation spaces will highlight the views and plantings will be placed so that they are not blocking said views. Additionally, there will be botanical gardens that will produce food, help preserve and regenerate our planet’s plant biodiversity, and provide beautiful places to visit, relax, and appreciate the plants.
SOCIAL COMPONENTS
The site will serve in a social context as a permaculture and sustainability teacher/demonstration site. As stated in the previous section, the property will also serve as an ecotourism destination which will help us share our designs. Right now, we are open-sourcing all of our designs as we develop them. Once we complete our designs, we will begin developing and building on the property. As we do this, we will be double-checking and adding to all of our free-shared plans.
USING GEOGRAPHIC INFORMATION SYSTEMS (GIS) TECHNOLOGY FOR PERMACULTURE DESIGN
Geographic Information Systems (GIS), also known as Geographic Information Science, is a method of observing and manipulating geographical data to better understand and map our earth and its systems. This technology integrates various data sources, including digital mapping, drones, satellite imagery, global navigation satellite systems (GNSS), light detection and ranging (LiDAR), and geospatial statistics. Many people carry this very technology in their pockets; mapping apps on smartphones have revolutionized the way we travel and navigate, giving people the power to use GIS at their fingertips.
Incorporating GIS into permaculture design significantly enhances the understanding of a landscape and is especially valuable during the creation of base maps, as outlined in Step 2 of the design process (Assess Site Through Observation). Accurate base maps that detail elevation changes are essential for identifying natural features such as water flow and sun exposure, which guide decisions on the optimal placement of structures, swales, and other infrastructure.
The following sections demonstrate how GIS-generated maps can be used to identify ideal locations for structures and infrastructure. A comparison between the original master plan—created using topographical maps and on-site observations—and updated slope maps generated with GIS will highlight the advantages of integrating GIS into the planning process.
The first section introduces the software tools used for the analysis. The second section delves into the creation and application of elevation data in GIS. The third section evaluates alternative placements for the Villages and City Center based on slope and solar analysis, presenting an updated master plan. Subsequent sections cover the property’s watershed analysis, the workflow employed for GIS-based planning, and additional resources for GIS data.
We explore all this in the following sections:
- ArcGIS Pro vs QGIS
- GIS Maps Created From Elevation Data
- Master Plan Changes Based on GIS
- Updated Master Plan
- Watershed
- Workflow
- Resources
ARCGIS PRO VS QGIS
Two GIS software programs were utilized for the analysis. The initial analysis was conducted using ArcGIS Pro, a proprietary software developed by ESRI that is widely adopted by professionals due to its streamlined, user-friendly interface and robust capabilities. However, the high licensing costs associated with ArcGIS Pro can be a limitation for some users.
To explore a more accessible alternative, a second round of GIS analysis was performed using QGIS, a free, open-source software. QGIS offers a wide range of tools and plugins developed by a global community, making it a highly versatile option for GIS tasks. While its setup and interface can be more complex compared to ArcGIS Pro, its cost-free availability makes it an attractive choice for individuals and organizations seeking a powerful yet budget-friendly GIS solution.
During the QGIS analysis, new data reflecting the true scales of villages and structures was incorporated, enabling the creation of accurate footprints on the maps. This improvement provided a clearer visualization of the actual sizes of structures and informed more precise placement decisions.
As detailed in the following sections, the analyses and map outputs from ArcGIS Pro and QGIS produced comparable results, even though the symbology varied. The most significant changes stemmed from incorporating updated information about the true sizes of structures, refining viewshed priorities, and confirming the need to position the parking lot at the property entrance, with camping grounds located nearby.
Both software programs are capable of achieving similar results. ArcGIS Pro excels at creating visually polished maps and offers a more intuitive user experience, while QGIS stands out as an excellent free alternative for those prioritizing affordability without sacrificing analytical power.
GIS MAPS CREATED FROM ELEVATION DATA
Using LiDAR data available online, such as the USGS LiDAR Explorer Map, elevation measurements can be obtained for each square meter or even finer resolutions across many landscapes in the United States. For the property, LiDAR scans from aircraft produce Digital Elevation Models (DEMs), which can be manipulated in GIS software to create incredibly useful maps for design.
LiDAR is a remote sensing technology that uses a scanner to emit hundreds of thousands of laser pulses onto a surface or landscape. These lasers reflect off surfaces and bounce back to the LiDAR scanner, which uses the reflected information to calculate distances. The lasers can penetrate through foliage to measure the elevation of the bare earth. In conjunction with global navigation satellite systems (GNSS), this information can create a highly accurate elevation model of the earth’s surface.
DIGITAL ELEVATION MODEL (DEM) OF THE PROPERTY
The Digital Elevation Model (DEM) is the foundational dataset necessary for creating detailed and informative maps. It enables visualization and analysis of terrain, identification of slopes, contours, and other land features. A DEM serves as the first step for further analysis, providing an accurate depiction of the landscape. High points are represented with lighter shades of gray, while low points are shown in darker shades, offering a clear representation of elevation variation.
BARE EARTH MAP
Using GIS software such as ArcGIS or QGIS, Digital Elevation Models (DEMs) can be processed to showcase terrain beneath vegetation, revealing the land’s surface shape. Contour lines can be generated at any desired interval, such as every 5 feet, to provide detailed topographical information. A bare earth map highlights elevation changes and uses sunlight simulation to create a 3D perspective, clearly depicting slopes and undulations without the visual obstruction of vegetation.
FADED MAP
Satellite images often feature vibrant colors that can be visually overwhelming and make design work challenging. A faded map, with subdued colors, minimizes background features and allows design elements to stand out. This map is especially useful for presenting everything from conceptual designs to final plans. Additionally, it conserves ink during printing. Source: Services — Pearl River Eco Design
ALTITUDE MAP
The DEM’s symbology can be transformed into a colored representation of surface altitude. A color gradient is an effective way to depict altitude, with blues representing low spots and reds indicating high spots. Altitude influences microclimates, affecting sun exposure, wind patterns, and the areas where frost and fog settle, making it crucial for determining the placement of certain plant species. For instance, early-budding fruit trees should be planted above low spots to avoid damage from spring frosts.
SLOPE MAP
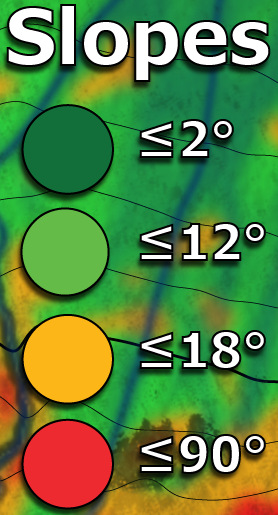
Adjusting the coloring of the slopes can divide the map into areas ranging from flat to steep. Relatively flat slopes (≤ 2°) are colored as dark green and are ideal for structures and main crops due to ease of movement and lower erosion risk. Moderately steep slopes (≤ 12°) are colored as light green and are suitable for terraced agriculture and earth structures to slow water movement and prevent erosion. Steep slopes (≤18°) are colored orange; while it is possible to develop these areas, the costs are higher than on green slopes. Very steep slopes (≤90°) are not suitable for development and are best left as Zone 5 wild areas. Source: Services — Pearl River Eco Design
WETNESS MAP
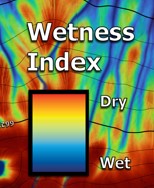
Geographical features such as ridges, depressions, and drainage basins influence water movement and accumulation. Wetness maps use color gradients to highlight moisture levels, with blue representing wetter areas and red indicating drier regions. These maps help identify optimal locations for ponds, rain gardens, and water-loving plants.
SOLAR ASPECT MAP
The orientation or aspect of slopes can be mapped to show where solar energy potential is greatest and lowest. In the northern hemisphere, north-facing slopes receive the most shade and are colored purple and blue, east-facing slopes receive early morning sun and are colored red and orange, south-facing slopes receive the most sun exposure and are colored yellow, and west-facing slopes receive afternoon sun and are colored green. This map helps designers place elements based on sun exposure, with south-facing areas ideal for gardens and solar panels, and north-facing areas suitable for shade-loving plants and infrastructure sensitive to sun exposure.
TERRAIN RUGGEDNESS
This map categorizes the landscape in more detail than a slope map. Dark green represents level areas, green as nearly level, light green as slightly rugged, yellow as intermediately rugged, orange as moderately rugged, dark orange as highly rugged, and red as extremely rugged. This detailed information helps identify the flattest areas for building and assess trail difficulty for hiking or access routes.
MASTER PLAN CHANGES BASED ON GIS
The initial master plan for the property was developed using topographic maps and satellite imagery, which lacked the detail needed to address site-specific issues. Some contour intervals exceeded 100 feet, making it challenging to accurately plan infrastructure. The incorporation of Digital Elevation Models (DEMs) revealed critical terrain details that were previously overlooked. Below is the original topographic map that guided the initial placement of villages, the community center, roads, and the parking lot.
ORIGINAL MASTER PLAN TOPOGRAPHICAL MAP
The original master plan was designed using topographical maps and is sourced from One Community’s Open Source DIY Permaculture Design webpage. To incorporate this map into GIS software, it was georeferenced to a base satellite map to establish a common reference framework.
Using GIS software, the original master plan map was georeferenced to a base satellite map to establish a common reference framework. Georeferencing is essential when a map lacks a coordinate system, which otherwise makes it difficult to incorporate or overlay it with other maps in GIS software.
Georeferencing is an important process for maps lacking a coordinate system, as this absence makes it challenging to integrate or overlay them with other maps. This process involves identifying distinct, shared features on both the base map and the map being referenced—such as road intersections, building corners, or trees—and marking them with control points. These points link the maps to each other and to a coordinate system. The GIS software then adjusts the referenced map by stretching or compressing its image to align the control points while minimizing distortion.
Once georeferenced, the original master plan was overlaid onto maps generated from the Digital Elevation Model (DEM). The combined maps revealed issues with the planned placement of villages and infrastructure, which could be improved. The following sections and images illustrate the results of the geospatial analysis and provide suggestions for relocating structures to better-suited areas.
COMBINATION OF MAPS FOR SLOPE ANALYSIS
Overlaying the original topographic map on top of the slope map via georeferencing tools in ArcGIS Pro created the following map which enabled analysis of the planned placement of villages and other structures. The combined maps revealed challenges in some of the proposed locations. The next section describes the results of the geospatial analysis and details suggestions on the relocation of structures.
PLACEMENT OF STRUCTURES BASED ON SLOPE
The finest resolution elevation data available online—1 meter—provides measurements for every square meter of the property. Using this high-resolution data, the slope for each square meter was calculated and categorized. In ArcGIS Pro, slope degrees (ranging from 0° to 90°) were divided into four categories to assist in construction and earthwork designs: ≤2°, ≤12°, ≤18°, and ≤90°.The categories are further distinguished by red, orange, light green, and dark green colors.
Similarly, QGIS was used to generate a slope map, but its symbology was adjusted to include nine distinct ranges based on slope percentages. The color palette was also modified to accommodate individuals with color vision deficiencies, particularly those with difficulty distinguishing between green and red.
Each village and infrastructure component from the original master plan was evaluated to determine new, more optimal locations primarily based on slope. Slope is one of the most significant factors for structure placement, as it is challenging to modify and significantly impacts construction costs. Once slope analysis was complete, the locations of structures were further refined by considering other factors such as sun exposure, water movement, viewsheds, and other site-specific features.
Initially, in ArcGIS Pro, the areas representing the villages were based on the circular footprints from the original master plan’s topographical map. However, when using QGIS, the actual sizes and shapes of the villages were incorporated, allowing for more accurate placement and analysis.
DUPLICABLE CENTER CITY RELOCATION
Both the ArcGIS Pro and QGIS maps reveal an area that is likely a dry creek bed, characterized by a narrow, elongated depression with steep slopes.
In both mapping platforms, the Duplicable City Center was relocated slightly to the northwest to avoid the dry creek bed and provide a larger area of relatively flat terrain. Additionally, the QGIS map enabled further adjustments to the road layout, aligning it with the planned farm design around the City Center.
EARTHBAG VILLAGE RELOCATION
The Earthbag Village (Pod 1) was initially planned to be located in a dry creek bed, a site unsuitable for construction. In the ArcGIS Pro map, the designated area for the village was larger than its actual dimensions. However, the accurately scaled QGIS map provided a more precise representation of the village’s true footprint, enabling better placement analysis. A new location was identified on terrain with slopes predominantly within the 0–10° range, making it more appropriate for construction and long-term stability.
STRAWBALE VILLAGE RELOCATION
An area slightly to the south, identified in both the ArcGIS Pro and QGIS maps, is better suited for constructing the Straw Bale Village (Pod 2) due to its flatter topography. This southern location offers improved accessibility as it is closer to the road and also benefits from favorable solar exposure.
In QGIS, the solar potential symbology was adjusted to a heat map, with blue representing low solar potential and yellow indicating high solar potential. Areas with high solar potential, characterized by south- and southwest-facing slopes with minimal shading, were prioritized for the new location of the Straw Bale Village.
COB VILLAGE
An optimal location for the Cob Village is across the road, northeast from the original location that has flatter terrain. This area features flatter terrain, which is more suitable for construction, and is situated further away from the property border, allowing more room for construction and future expansion.
Additionally, a QGIS solar potential heat map highlighted areas with high solar exposure, prioritizing south- and southwest-facing orientations. These characteristics make the new location ideal for supporting sustainable energy needs and long-term development plans.
EARTH BLOCK VILLAGE RELOCATION
The original location of the Compressed Earth Block Village (Pod 4) was selected for its beautiful views, afforded by the steep drop-off just to the south. However, as revealed by the QGIS slope analysis, the current footprint is too large to avoid encroaching on steep slopes, particularly on the eastern side.
If maintaining the original location is a priority, significant adjustments to the landscape design would be required. Alternatively, a more open and flatter area to the east offers greater flexibility for development, although it lacks the dramatic southern views. For a compromise between views and practicality, a slightly western relocation provides expansive views while maintaining flatter terrain. Adjustments to the road layout would be necessary for this option.
Solar potential analysis in QGIS indicates that the highest solar potential is found on flatter terrain to the east, though these areas lack the dramatic scenic views. The western relocation site offers better solar potential compared to the original location while preserving a similar view.
SHIPPING CONTAINER VILLAGE
In the ArcGIS Pro, the location of the Shipping Container Village was adjusted slightly east to a flatter area closer to a main road. If the primary focus for the village is the dramatic view from the southern cliffs, the original location of the Earth Block Village along the cliff edge could be suitable, given the smaller footprint of the Shipping Container Village. Alternatively, if privacy is a priority, a location northeast near the road, further away from other villages, would be a favorable option.
A solar map created in QGIS highlights areas with greater solar potential for the Shipping Container Village. Either relocation area for the village has great solar potential.
RECYCLED MATERIALS VILLAGE
In ArcGIS Pro, it was revealed that the originally planned location for the Recycled Materials Village (Pod 6) was situated in the middle of an existing road. Two alternative locations were identified as better suited for the village due to their abundance of flatter land. In QGIS, the true scale and elongated shape of the village were considered, requiring placement in a flatter area alongside the existing road.
A solar map created in QGIS highlighted areas with higher solar exposure, and the proposed relocation ensures access to abundant solar energy while accommodating the village’s unique layout.
PARKING LOT AND TREE HOUSE VILLAGE
The original design identifies an optimal location for the Tree House Village (Pod 7), as it is situated in a relatively flat area with existing trees. In ArcGIS Pro, the parking lot was initially relocated slightly west to an area with gentler slopes. However, further evaluation determined that the parking lot should remain near the property entrance for accessibility. In QGIS, the parking lot was adjusted to span both sides of the entrance road, utilizing flatter terrain as a practical alternative to its original location.
COMBINATION OF MAPS FOR WATER HARVESTING ANALYSIS
By overlaying the original road access and water harvesting maps with the altitude map using georeferencing tools in ArcGIS Pro, a comprehensive map was created to enable a detailed analysis of the water harvesting plan.
PLACEMENT SWALES AND PONDS
The original plan correctly identified the greatest water harvesting potential in the lowest areas of the property. Additionally, the altitude map generally matches the water flow map in terms of water flow direction and the optimal locations for swales to capture this water. However, a few issues become apparent when these two maps are overlaid. Also, when constructing the swales, they should precisely follow the landscape’s contours using leveling and measurement equipment.
ISSUES OF CURRENT PLAN
With the combined map, several issues are evident. The planned placement for ponds intersects with roads, and some swales pass through the area designated for the Earthbag Village (Pod 1).
ADJUSTED WATER HARVESTING MAP COMPARISON
Based on the analysis, the Duplicable City Center and Earthbag Village (Pod 1) in both GIS software have been relocated. The swales have been adjusted to match contour lines and include breaks to accommodate roads and the Earthbag Village area. The ponds have also been repositioned to avoid intersecting with roads.
In the QGIS version, the actual footprints of the City Center, farm, and villages were taken into account, resulting in their relocation to different sites than those identified in the ArcGIS Pro map. This adjustment ensured that the placements aligned more closely with the true scale of the structures and the surrounding landscape features.
SOLAR ENERGY POTENTIAL
Using GIS software for suitability analysis, optimal locations for solar panels were identified based on south- and southwest-facing slopes, relatively flat terrain, and minimal shading.
In ArcGIS Pro, cluster symbology was used to highlight areas of high solar potential with red circles, emphasizing smaller but concentrated areas.
In QGIS, a heat map was applied, with blue representing low solar potential and yellow indicating high solar potential. This method provided a more precise visualization of solar potential across the property.
SOLAR FARM PLACEMENT
The general area of the original location of the solar farm is one of the better spots closest to the City Center. However, analysis in both GIS platforms identified a better location slightly northwest of the original site. This area features flatter terrain with optimal south- and southwest-facing orientations for solar energy collection.
UPDATED MASTER PLAN
Using the combined GIS analysis, an updated master plan was developed to optimize the layout of the Duplicable Community Center, villages, Sustainable Parking Lot Construction Guide, solar farm and water catchment structures.
Benefits of updated master plan:
- Improved Structure Placement: Incorporating elevation data enabled the analysis of slope and the identification of flatter, more open areas suitable for village placement, ensuring stability and efficient land use.
- Optimized Solar Energy Utilization: A suitability analysis identified ideal locations for solar panels based on slope, orientation, and shading, maximizing energy collection efficiency.
- Integrated Land Use: The updated plan integrates multiple factors—such as slope, solar potential, water flow, and viewsheds—resulting in a cohesive design that balances functionality, aesthetics, and environmental sustainability.
- Informed Watershed Management: GIS analysis revealed water flow patterns across the property, helping to position infrastructure in areas less prone to flooding. Additionally, watershed basins were delineated, highlighting opportunities for water harvesting and identifying where additional earthworks may be necessary.
- Comprehensive Visualization: By combining data from various maps (elevation, slope, water flow, solar potential) into a unified GIS-based master plan, the design provides a clear and holistic understanding of the property to support informed decision-making.
- Flexibility for Future Design Decisions: The use of GIS ensures the master plan can be updated as new data or priorities emerge, allowing for adaptable and scalable design solutions.
ARCGIS PRO MASTER PLAN
The ArcGIS Pro master plan integrates multiple maps to refine the placement of infrastructure. It primarily incorporates slope and solar potential to determine optimal locations.
QGIS MASTER PLAN
The QGIS master plan further refines the layout by incorporating newly scaled village footprints and adjusted infrastructure placements. Unlike ArcGIS Pro’s circular representations of the villages, the QGIS map uses the true dimensions of the structures, allowing for a more realistic representation.
QGIS AND ARCGIS PRO MASTER PLAN COMPARISON
The layout is similar between the ArcGIS Pro and QGIS master plans, but there are a few key differences.
- The Earthbag, Recycled Materials, and Earth Block Villages were expanded to reflect their actual sizes.
- The Earth Block and Shipping Container Villages switched locations to better accommodate their footprints while maintaining views of the southern cliff.
- The parking lot was relocated to the property entrance and now spans both sides of the road due to flatter terrain.
- A campground was included in the new layout.
*Note: ArcGIS Pro can produce the same results as QGIS. The second analysis with QGIS changed the final layout of the master plan because of new data, not because of superior capabilities.
ORIGINAL AND UPDATED MASTER PLAN COMPARISON
Most updated locations remain near their original sites, with changes primarily driven by slope considerations. The placement of Compressed Earth Block Village (Pod 4) and Shipping Container Village (Pod 5) switched, while the Sustainable Parking Lot Construction Guide and Recycled Materials Village (Pod 6) were placed in flatter, more open spaces.
WATERSHED
Once a DEM (Digital Elevation Model) is converted into a slope map, both ArcGIS Pro and QGIS were used to perform detailed watershed analysis, determining how water moves across the landscape. While it’s possible to map water flow at a resolution of each square meter, this level of detail would create an overwhelming and unreadable map.
In ArcGIS PRo the map is simplified to display only where streams would form when 1,000 or more square meters of water flow into them. The arrows indicate the direction of water flow.
In QGIS, arrow symbols for flow direction proved to be less legible, prompting the refinement of symbology to reduce clutter. Water flow streams were categorized into four types, with smaller streams originating in higher elevations and larger streams forming in lower areas.
Additionally, the Water Outlet Tool in QGIS was used to delineate watershed basins. A shared ending point for the water flow streams on the property revealed distinct watershed basins with varying flow directions off the property. The largest basin, referred to as the “Central Basin,” directs water northward through the farm, underscoring its potential for water harvesting. Five smaller basins were also identified, where water exits the property, providing insights into potential locations for additional water harvesting infrastructure.
Each map has a level of detail that would be valuable for planning purposes, allowing designers to identify significant water harvesting opportunities and understand the flow paths across the landscape. However, such detail might clutter a conceptual map.
DETAILED WATER CATCHMENT AREA
These maps provide a more detailed view of the water catchment area, which is crucial since most food production will occur here. They offer finer detail on where water will collect and flow within the landscape. They also highlight the locations of swales, which are also depicted in the Adjusted Water Harvesting Map. Overall, the swales appear to be strategically positioned to slow down water flow and enhance water collection.
In the QGIS version, true-scaled footprints for the villages, the City Center, and the farm were included, and the roads and swales were slightly adjusted to accommodate these elements. Notably, a large amount of water is shown to pass through the City Center and farm area. It may be necessary to implement additional earthworks to prevent flooding in this area during significant rainfall events.
WORKFLOW
This workflow outlines the suitability analysis used to identify the optimal locations for villages and the Community Center based on terrain. The above GIS analysis used digital elevation models (DEMs) sourced online rather than custom aerial surveys. However, depending on the survey technology and available resources, a DEM with sub-meter resolution can be produced through a custom aerial survey, providing a more accurate representation of the landscape. This can be accomplished using personal drone equipment or by contracting professional aerial survey companies.
RESOURCES
Here are some resources for site analysis to further refine designs and incorporate into GIS software.
EVOLVING THE MASTER PLAN
The original master plan, based on on-site observations and topographical maps, has been significantly refined through GIS analysis. The updated plan improves structure placement by identifying flatter areas, optimizes solar energy utilization, and integrates key factors such as elevation, slope, and water flow for a more cohesive and sustainable design. GIS analysis also enhances watershed management by mapping water flow, reducing flood risks, and identifying opportunities for water harvesting. By combining multiple data layers into a unified master plan, GIS provides a clear visualization of the property and allows for flexible, future updates as new data emerges. For specifics on this process, click here.
FINAL DESIGN PLAN
Coming…
PERMACULTURE IMPLEMENTATION PROCESS
Coming…
BEFORE AND AFTER PHOTOS
Coming…
WHAT WORKED AND WHAT WE’D RECOMMEND
Coming…
WHAT WE’D DO DIFFERENTLY
Coming…
COSTS AND YIELDS
Coming…
RESOURCES
This page will continue to develop with any additional resources we find helpful, input from consultants that choose to join our team and contribute, and the actual permaculture design implementation as part of the One Community Highest Good food, Highest Good society, Highest Good energy, Highest Good housing, etc. components. This will include the addition of pictures and our ongoing (indefinitely) experience with what worked, changes we made, evolutions in thought process, etc.
In addition to this, here are some resources we consider especially helpful:
- Geoff Lawton Permaculture Research Institute | Geoff Lawton Permaculture Course
- Permies.com | Paul Wheaton PDC and ATC (177 hours) as HD download
- Book: “Permaculture: A Designers’ Manual” by Bill Mollison
- Book: “Sepp Holzer’s Permaculture” by Sepp Holzer
- Trello Board of Resources: Permaculture Design – Data Collection Portal
- Use this page (click here) if you have a resource you’d like to suggest be added here
SUMMARY
 Permaculture is a design system that utilizes a set of principles and ethics that guides us to create holistic systems aiming to replicate nature. Observing nature within permaculture can be a path towards a paradigm shift of interconnected, regenerative closed-loop systems. We are open sourcing One Community’s permaculture designs and processes to demonstrate comprehensive sustainability, operate as an open source eco-tourism and teacher/demonstration hub, to provide and demonstrate food and lifestyle abundance beyond self-sufficiency, and as an educational example of comprehensive stewardship.
FREQUENTLY ANSWERED QUESTIONS
Q: Should I take my own Permaculture Design Course?
Yes. While we’ve made every attempt here to share our design process as well as possible and with the intent to be replicable, Permaculture is a huge topic that deserves as much time and study as you are willing to invest in it. The more you know, the better you’ll be able to apply the principles.
Q: My specific situation/location/goals/etc. are different, what should I do?
Permaculture is a huge topic and this page is meant to share our complete design process but every design process will have differences. The more different your specific situation, location, goals, etc. are, the more your design will differ from ours. To find the information you’ll need to create an appropriate design, we’d suggest using what you can from this page, doing additional research, taking a permaculture course, and/or investing in one or more of the other resources listed in the resources section. The more knowledge and information you have, the better your design will be.
Q: I’ve created a complete design for a different set of circumstances and I’d like to share it to help others, how do I do that?
If you are willing to share all the details of your design using the format listed here, we’d be happy to create a page on our site sharing your work and promoting you and/or your organization as the creators. Contact us and we can begin the conversation about what is involved in that process.
 One Community